HOW TO: LS1--> LT1 Tailight wiring (with pics)
 07-01-2007, 09:29 PM
#1
So i know there have been lots of questions of how to wire it so your LT1's light up the way they should. So i took some pics to show you how i did it. I went to autozone and bought two turn and stop signal sockets they are like 14 bucks each.
i then cut off the socket that was on there that has the missing middle wire and wired this in with a jumper from the middle wire to the brown middle wire from the socket next to it.
here is a pic with the left light fixed and the right light not. shows the difference in the look and how much better it looks when you fix it
yup its that easy.
Last edited by IB Chandak; 05-29-2013 at 07:11 PM.

The following users liked this post:
Domrod1579 (07-18-2020)
The following users liked this post:
67lsbird (12-10-2021)
07-01-2007, 10:33 PM
#5
TECH Fanatic
iTrader: (7)

Join Date: Jan 2005
Location: World
Posts: 1,309
Likes: 0
Received 0 Likes
on
0 Posts

Originally Posted by xBROKEx
once its solderd and taped it looks factory.
Trending Topics

 07-02-2007, 12:47 AM
#14

Nice write up, and it does look factory!
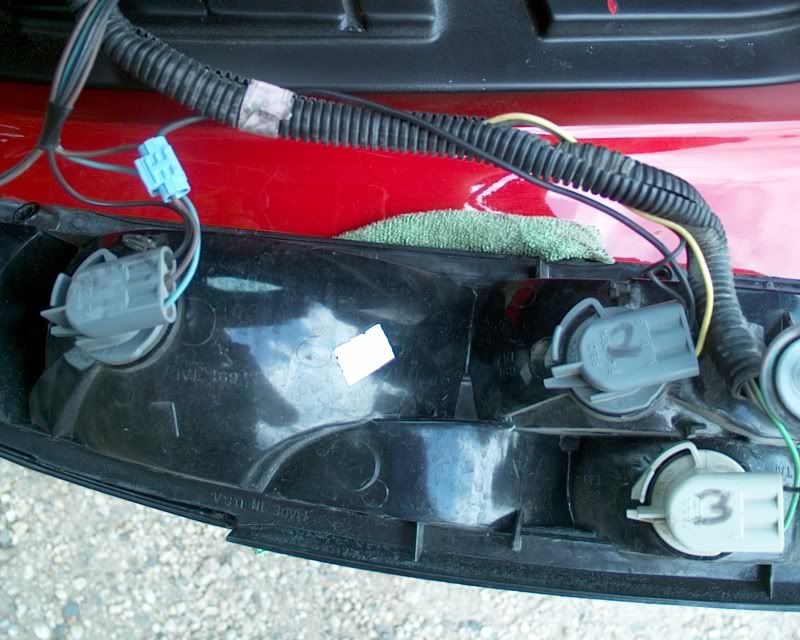
I did mine a little easier. I just bought 1 GM socket and took one wire out if it for each tail. To get the wire out all i did was take the inside brown part of the socket out. It comes out by simply pushing the two locks on the side in and pulling it out. When you take it out you see the 3 wires on the bottom. All i did was pull one of them wires out and installed it on the blinker socket thats on the car. So its like a factory connection still.
With the wire installed into the stock socket, i just took the other end of it and put it in a scotch lock which was tapped into the middle wire (low filament) on the main tail light socket.
Its an easy way of doing it, and still somewhat clean. Heres a pic of how its set up.
07-02-2007, 03:17 AM
#15
Originally Posted by Jakson
Nice write up, and it does look factory!
I did mine a little easier. I just bought 1 GM socket and took one wire out if it for each tail. To get the wire out all i did was take the inside brown part of the socket out. It comes out by simply pushing the two locks on the side in and pulling it out. When you take it out you see the 3 wires on the bottom. All i did was pull one of them wires out and installed it on the blinker socket thats on the car. So its like a factory connection still.
With the wire installed into the stock socket, i just took the other end of it and put it in a scotch lock which was tapped into the middle wire (low filament) on the main tail light socket.
Its an easy way of doing it, and still somewhat clean. Heres a pic of how its set up.


 too
too I second the vote to have this thread stickied!
