

1973 RS Camaro LSX Swap


 10-14-2012, 07:53 PM
#807
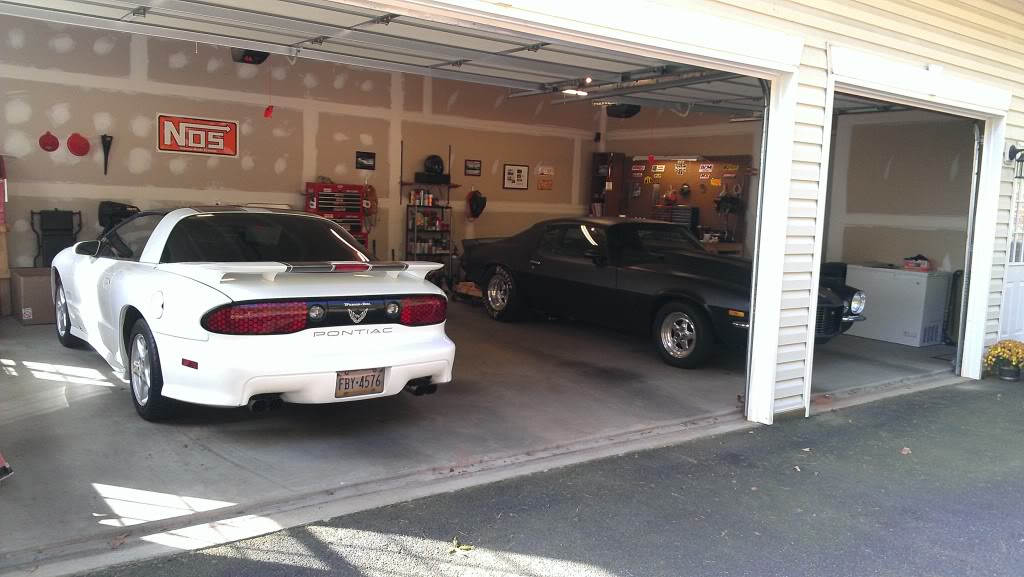
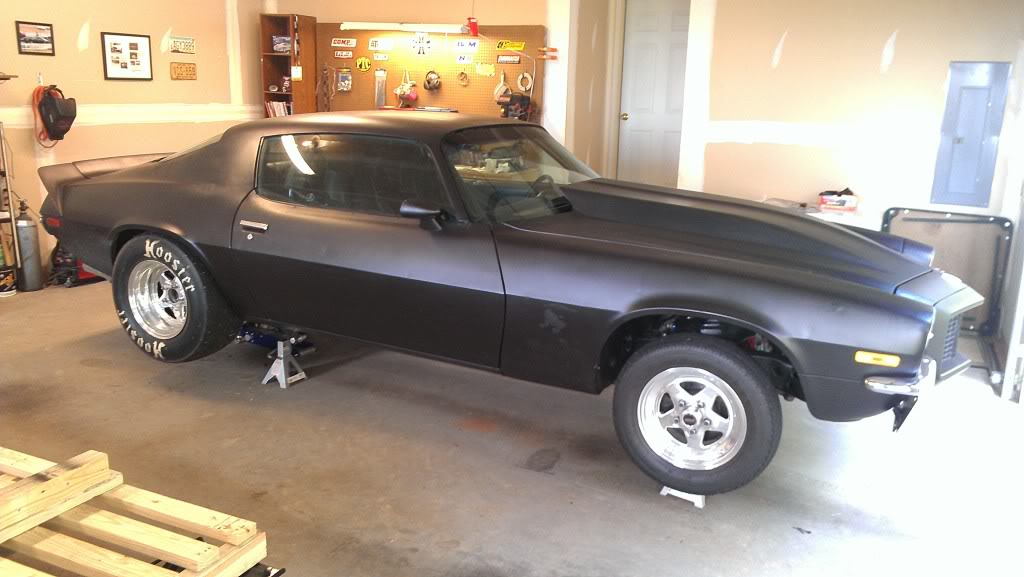
I got a few short sessions in the garage this weekend and surprisingly got quite a bit done. My goal was just to get the new rear tore down and painted but this morning I decided I would just go ahead and get the car up on jack stands and things got a little out of control. It ended up with the 10-bolt coming out of the car and the axles and brakes being torn off of it in preparation for modding the brakes and swapping them over to the 9 inch. But before I get into that I figured I’d post a pic of my new workspace since I moved to VA recently and have a lot more garage space to work with. I’m also glad to be rid of those horrible mustard-colored walls in the old garage in AZ. That was a rental but this one is mine. It will eventually be painted white to make it brighter to work in.
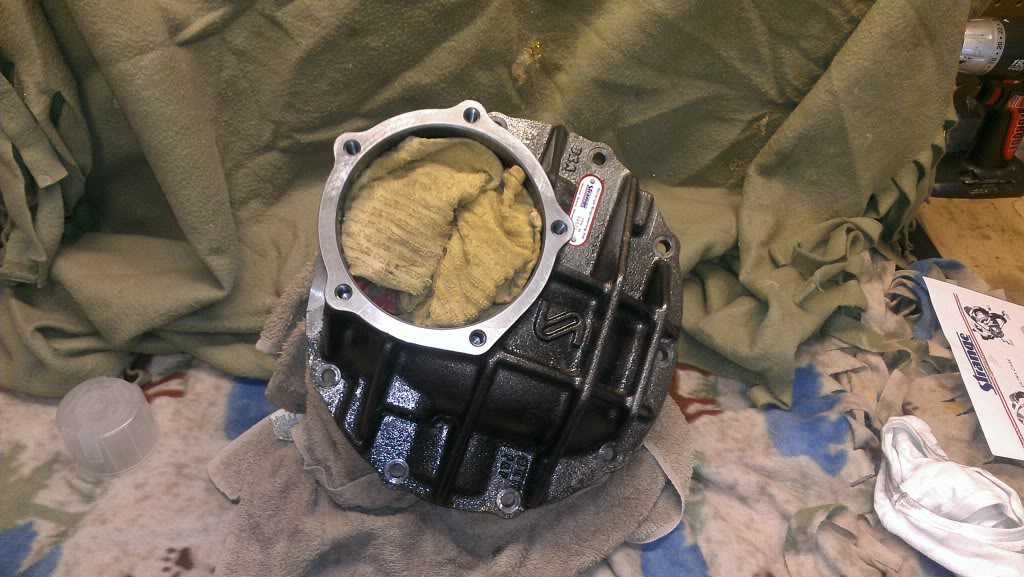
So Saturday afternoon, after I came in from hunting, I decided to get the 9 inch tore down to the bare housing so I could get some paint on it while the weather is still warm enough.
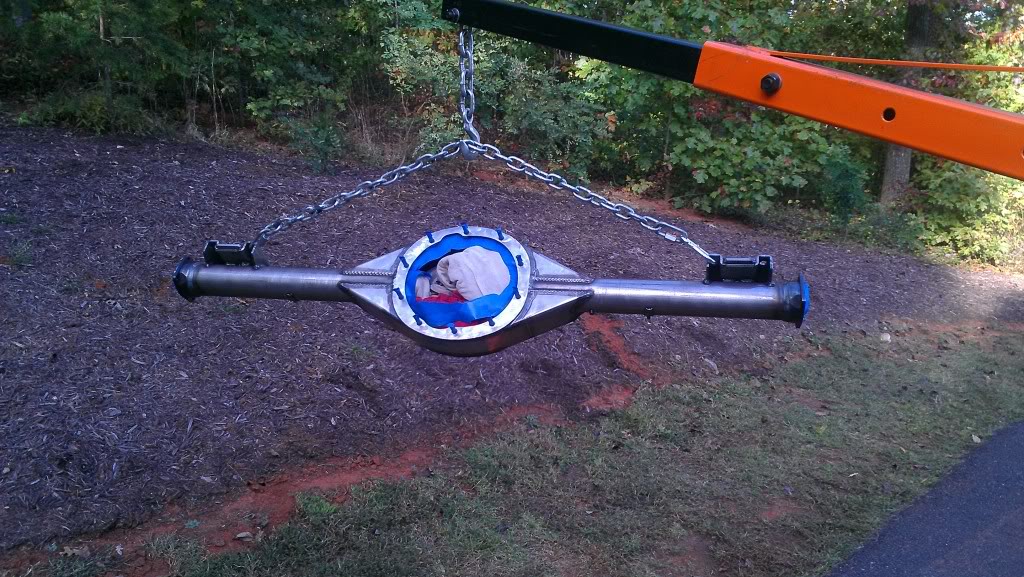
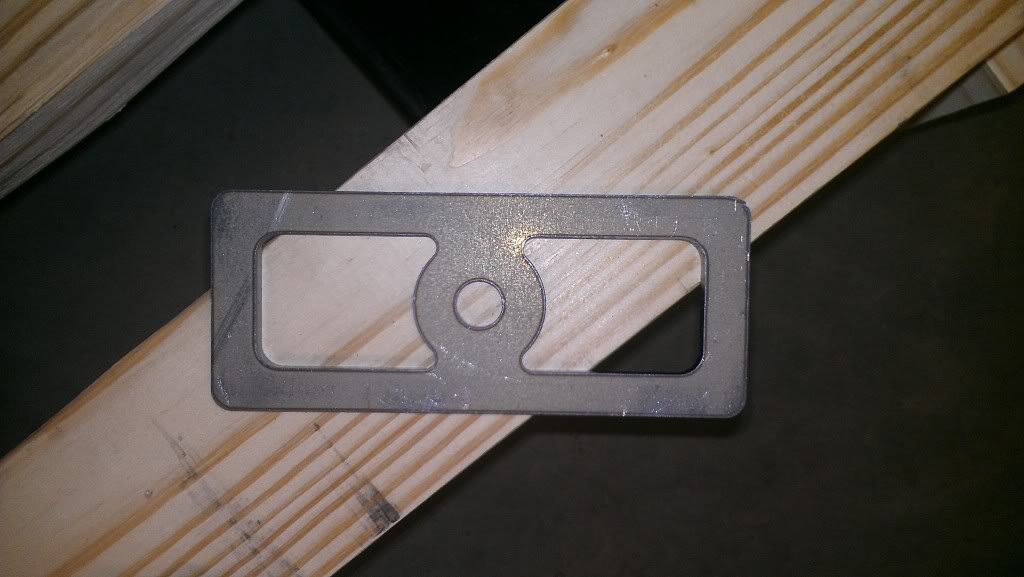
But before I could paint it I had to weld in (actually just tack) the locator pads from Calvert Racing. These are designed to work with my Calvert split mono leafs and serve as a locator for the springs. They take the place of the rubber or poly insulator pads you would normally install. I had a similar but thicker set on the 10-bolt. These ones are thinner because I had the 9 inch built with mono-leaf perches.
Here’s the housing all painted up.
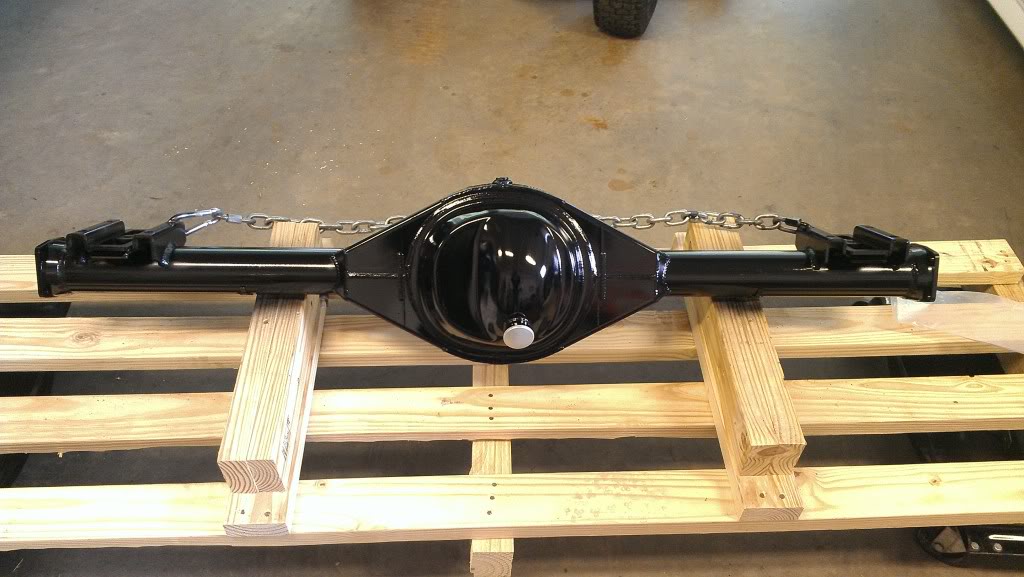
The center pig was already a nice cast iron color so I decided to leave it alone and just put a couple coats of clear engine enamel on it.
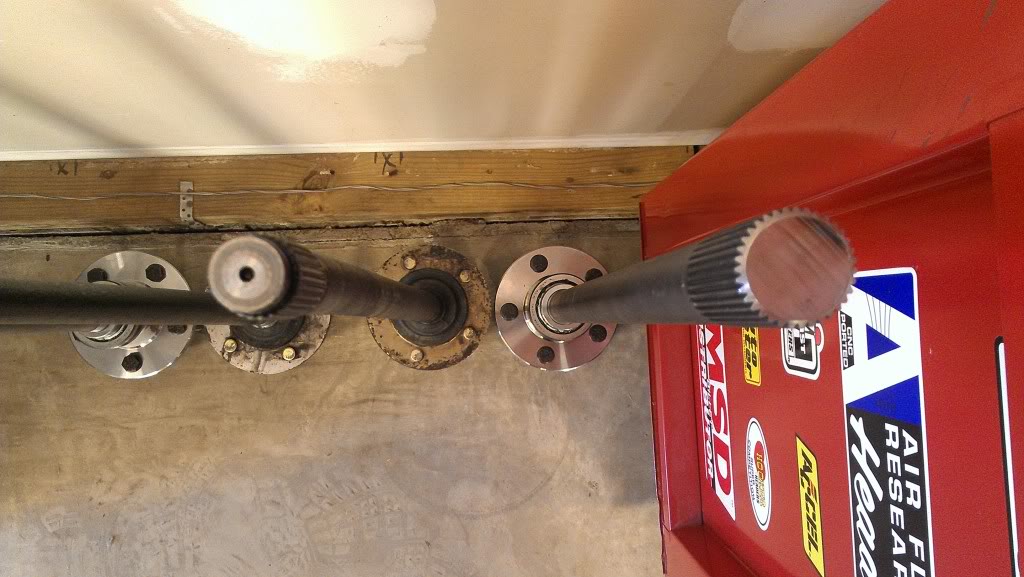
This morning I had a few hours before some family commitments so I went out to the garage to put the rear back together (minus the axles).
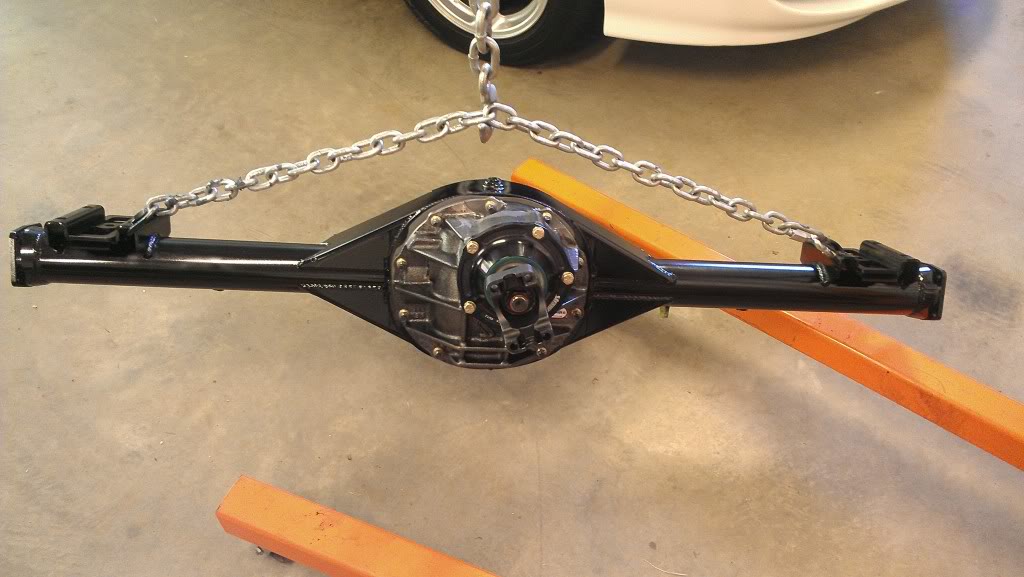
Then I decided to “just get the car up on stands” and that’s when parts started falling off the car….LOL.
And this is how things ended up…….with a 10-bolt on the floor.
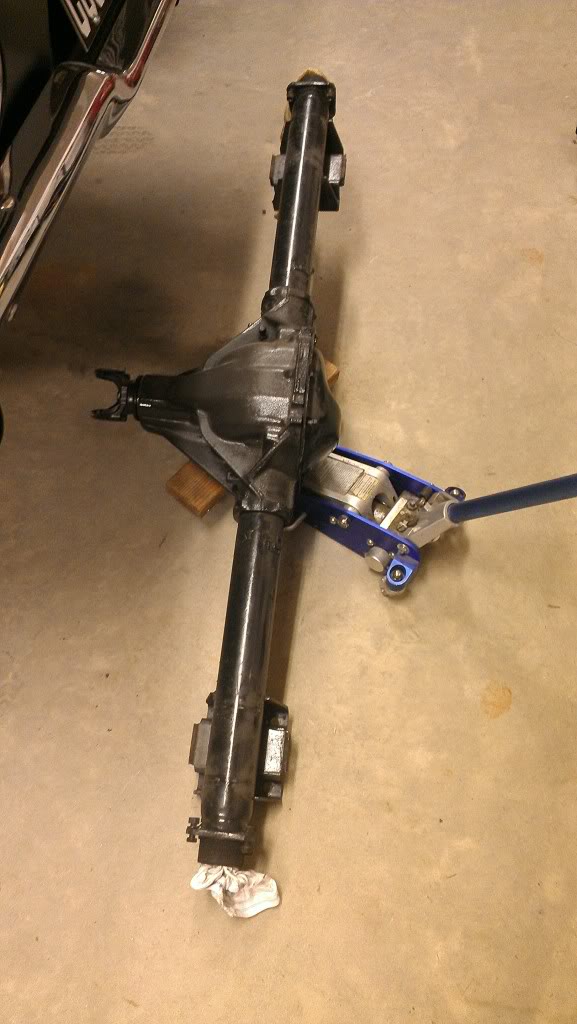
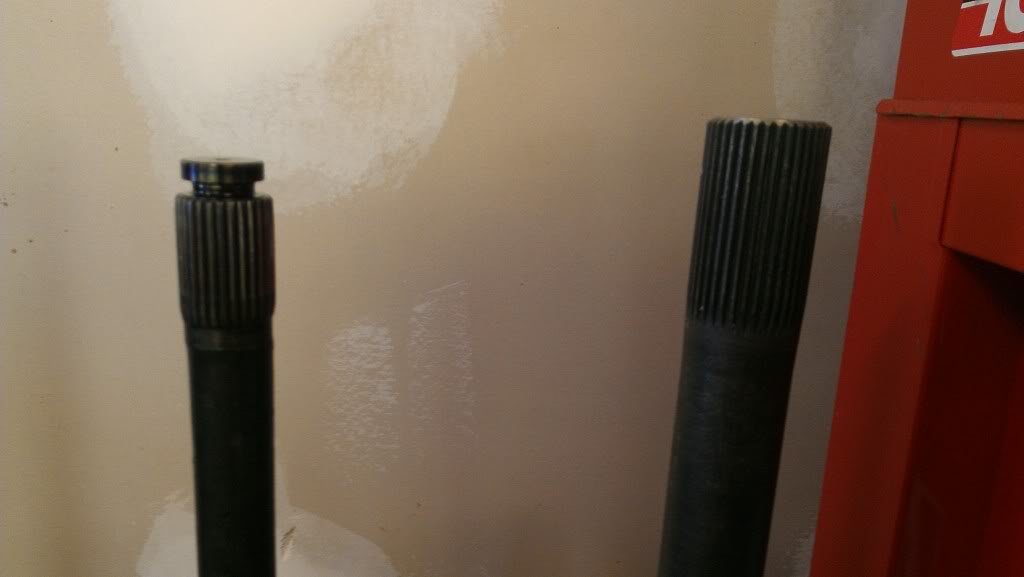
I thought this was a pretty interesting comparison to show some of the strength upgrades I’m getting in just the size of the axles alone. This is how 28 spline axles look next to 35’s.
I feel pretty good about the amount of work I got done in such a short period of time. There’s still plenty of “slow” work to do on the brakes to modify, prep, and paint them but it occurred to me that I can leave those sit for a while and concentrate on getting the 9 inch housing and center section assembly under the car. This will be enough for me to take measurements for a new driveshaft and get it ordered. Maybe that will happen later in the week or next weekend after the paint on the rear has more time to cure. Then in the time it takes to get a driveshaft built and shipped I can hopefully get the brakes prepped and assembled and get the axles back in.
So Saturday afternoon, after I came in from hunting, I decided to get the 9 inch tore down to the bare housing so I could get some paint on it while the weather is still warm enough.
But before I could paint it I had to weld in (actually just tack) the locator pads from Calvert Racing. These are designed to work with my Calvert split mono leafs and serve as a locator for the springs. They take the place of the rubber or poly insulator pads you would normally install. I had a similar but thicker set on the 10-bolt. These ones are thinner because I had the 9 inch built with mono-leaf perches.
Here’s the housing all painted up.
The center pig was already a nice cast iron color so I decided to leave it alone and just put a couple coats of clear engine enamel on it.
This morning I had a few hours before some family commitments so I went out to the garage to put the rear back together (minus the axles).
Then I decided to “just get the car up on stands” and that’s when parts started falling off the car….LOL.
And this is how things ended up…….with a 10-bolt on the floor.
I thought this was a pretty interesting comparison to show some of the strength upgrades I’m getting in just the size of the axles alone. This is how 28 spline axles look next to 35’s.
I feel pretty good about the amount of work I got done in such a short period of time. There’s still plenty of “slow” work to do on the brakes to modify, prep, and paint them but it occurred to me that I can leave those sit for a while and concentrate on getting the 9 inch housing and center section assembly under the car. This will be enough for me to take measurements for a new driveshaft and get it ordered. Maybe that will happen later in the week or next weekend after the paint on the rear has more time to cure. Then in the time it takes to get a driveshaft built and shipped I can hopefully get the brakes prepped and assembled and get the axles back in.
10-15-2012, 11:19 AM
#808
I like the new shop! Looks like you have plenty of room side to side. I wonder if the T/A and the Camaro ever talk about how you abuse the **** out of them?
The axle diameters are night and day difference. The stockers look tiny in comparison, especially down the length. You will never snap one of the 35's! What ends did you have put on the new rear end? e.g. big bearing Fords, GM etc? One would assume you had the GM ends since you are reusing your brakes. What about over all length, did you stick with the stock dimensions?
The axle diameters are night and day difference. The stockers look tiny in comparison, especially down the length. You will never snap one of the 35's! What ends did you have put on the new rear end? e.g. big bearing Fords, GM etc? One would assume you had the GM ends since you are reusing your brakes. What about over all length, did you stick with the stock dimensions?
10-15-2012, 07:23 PM
#809
Yep, plenty of room side to side. I really dig having the extra space between the two cars to work on stuff like these rears without being too close to either car. Believe it or not, I even got a little more front to back room with this garage too. The last one was only 19.5ft deep and this one is nearly 23ft deep. It's not much more but it makes a difference.
I literally laughed out loud when I read that ^^^ . The sad part is I'm not sure which one would win the "I get beat worse than you" argument.....LOL. The TA probably wins just due to the stick shift and the fact that it's been around me for 13 years........buuuut.....the Camaro has a 7500 RPM rev limiter where the TA's is only set at 6900. And while I don't shift the Camaro at 7500, I'm ashamed (and a little proud) to say it has found that 7500 RPM limit once or twice during a few uncontrolled burn outs where my eyes were glued to the road and not the shift light.......
Yeah these 35's should be pretty tough to kill. I'm sure I'll never hurt them with any combo I have in this car. The housing ends have the 4-bolt flange to accomodate GM brakes. I always hear talk of the "big" Ford bearings but I'm not sure how big those actually are. The bearings these ends accomodate are 3 inch OD. The ID of the ends is 3.150. Here's a link to them: http://www.jegs.com/i/Strange-Engine...H1143/10002/-1
The rear was built to stock dimensions but some rough measurements I've taken on it show it to be about a 1/4 inch wider overall. This may just be an error in rough measuring, but if it's a bit wider it may actually work to my advantage. With the 10-bolt I was running about 1/8 inch of spacer behind the wheels to keep the tires from rubbing on the leaf springs. So it would be pretty slick if I can do away with the spacers, purely by accident. I thought about requesting it be built about a 1/4 inch wider but I didn't want them to go to far. You can always add spacers but if its to wide.......you're kinda screwed.
. The sad part is I'm not sure which one would win the "I get beat worse than you" argument.....LOL. The TA probably wins just due to the stick shift and the fact that it's been around me for 13 years........buuuut.....the Camaro has a 7500 RPM rev limiter where the TA's is only set at 6900. And while I don't shift the Camaro at 7500, I'm ashamed (and a little proud) to say it has found that 7500 RPM limit once or twice during a few uncontrolled burn outs where my eyes were glued to the road and not the shift light.......The axle diameters are night and day difference. The stockers look tiny in comparison, especially down the length. You will never snap one of the 35's! What ends did you have put on the new rear end? e.g. big bearing Fords, GM etc? One would assume you had the GM ends since you are reusing your brakes. What about over all length, did you stick with the stock dimensions?
The rear was built to stock dimensions but some rough measurements I've taken on it show it to be about a 1/4 inch wider overall. This may just be an error in rough measuring, but if it's a bit wider it may actually work to my advantage. With the 10-bolt I was running about 1/8 inch of spacer behind the wheels to keep the tires from rubbing on the leaf springs. So it would be pretty slick if I can do away with the spacers, purely by accident. I thought about requesting it be built about a 1/4 inch wider but I didn't want them to go to far. You can always add spacers but if its to wide.......you're kinda screwed.
 10-18-2012, 06:31 PM
#811
Thanks man.....really more of a "welcome back" though.....LOL. I've lived 18 years in PA, 2 years in NC, 3 years in FL, and 6 years in VA prior to now so I'm well aquainted with the east.....LOL. AZ was enjoyable for the past 3 years but It's really great to be back "home" again. In fact, this is my favorite time of the year on the east coast!
10-19-2012, 07:26 PM
#812
I've been working a little bit here and there over a few evenings this week and I finally have the new rear bolted under the car. I still have all the brake backing plate work and some other odds and ends left to do, but I at least got it to the point that I was able to measure for the new driveshaft tonight. I'll get that ordered up on Monday.
During the process of all of this I also took the time to weigh both rear ends (without brakes or gear lube). It turns out the 9 inch is only 19lbs heavier than the 10-bolt which I don't think is too bad at all considering the heavier axles, half inch larger ring gear, and overall sturdier construction. I'm not sure what I was expecting, but I guess I would have expected something closer to 40-50lbs heavier, so I was pleasantly surprised with only 19lbs. Extra weight is rarely a good thing with a car that's already as heavy as mine but at least this newly found 19lbs is in the right spot.....right over the rear tires!
During the process of all of this I also took the time to weigh both rear ends (without brakes or gear lube). It turns out the 9 inch is only 19lbs heavier than the 10-bolt which I don't think is too bad at all considering the heavier axles, half inch larger ring gear, and overall sturdier construction. I'm not sure what I was expecting, but I guess I would have expected something closer to 40-50lbs heavier, so I was pleasantly surprised with only 19lbs. Extra weight is rarely a good thing with a car that's already as heavy as mine but at least this newly found 19lbs is in the right spot.....right over the rear tires!
10-19-2012, 09:23 PM
#813
Thats interesting on the weight. I can see how it should be heavier, I just thought the 9" was supposed to be lighter for some unknown reason. The added weight will surely be overcome by the added power with the aid of NOS! May even help plant the tires better. Now for some quick wiring and hose routing and here comes the 10's!!!
10-20-2012, 12:01 AM
#814
 11-02-2012, 04:27 PM
#815
I’ve been out of town more than I’ve been home over the last couple weeks so I haven’t gotten much done on the car. But I did get my new driveshaft from Strange earlier this week. Here’s a pic of it next to my stock driveshaft.
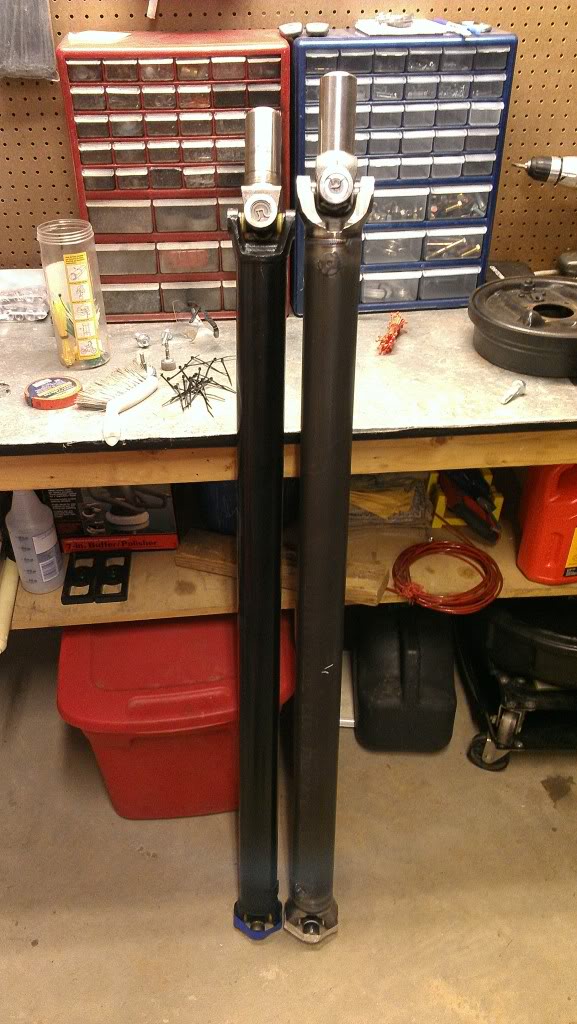
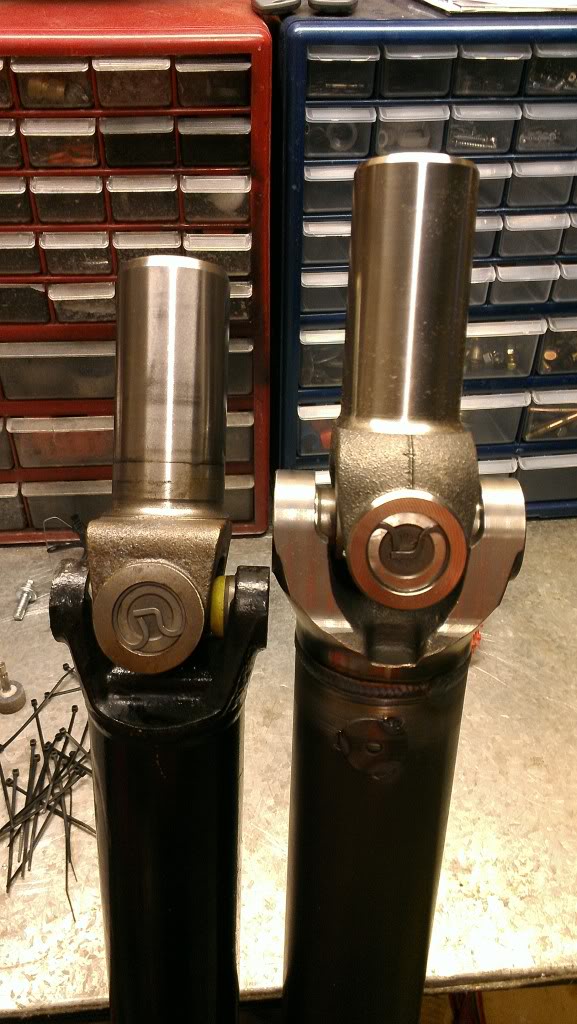
The new driveshaft is made with 3 inch diameter .083 wall chromoly tubing and chromoly weld yokes. It is only 1 7/8 longer than the stock shaft, but it weighs 6lbs more. This kinda surprised me at first since the stock one is presumably made of mild steel, but apparently it’s pretty thin walled stuff from the factory and it is Ľ smaller diameter (2.75) and almost two inches shorter. Plus the weld ends on the new shaft are much beefier than the stock ones and I’m sure the solid body 1350 u-joints on the new shaft add some weight as well. Here’s a better comparison shot of the two weld yokes.
Tonight I test fit the new driveshaft and everything looks great. So now I just need to find enough time to get a couple coats of paint on it and it’ll be ready to install.
11-03-2012, 09:42 AM
#818
 .
.