
project high school: 5.3 in 72 nova
 06-15-2011, 10:22 AM
#1
Launching!
Thread Starter

Join Date: Jan 2011
Location: Arizona
Posts: 200
Likes: 0
Received 0 Likes
on
0 Posts

Thank you to everyone who has answered my questions so far and been patient while i was learning what i could before starting. futureuser, tsnow, frojoe, kansasnova, hookemdevils, bmf5150, and a few others have been huge inspirations.
when it came time to buy my daughter's first car, i handed her an auto trader to see what she wanted. she picked out all the old muscle cars and said the new cars all look alike and she wanted something different that's not in the parking lot now. so off i went. she wanted my 68 firebird and i agreed, but when we pulled the front clip off to clean it all up, the subframe was bent. so off i went again, looking for a subframe. that's how i found the nova. sold my truck and some 4 wheel drive parts and brought the nova home. had 3 different rims and tire sizes. rats living in the trunk, and smelled like dirty socks. but one look and my daughter was in love. She drove the car for about 6 months and we fixed most of the leaks, however when the car came up to temp, the oil pressure went to zero. Kinda like a leash, after 15 min. she came home cause there was no oil pressure. so off i go again, and fount ls1tech.com. bought a rebuilt 5.3 with ported heads, ls1 manifold and injectors, ported throttle body, used 4l60e and started reading and collecting parts. I have ordered psi harness and computer and bought dynatech headers. not being afraid of a welder, i was determined to make my own mounts and crossmember. here is the saga. Please feel free to offer any advice or help. Lord knows i'll need it.
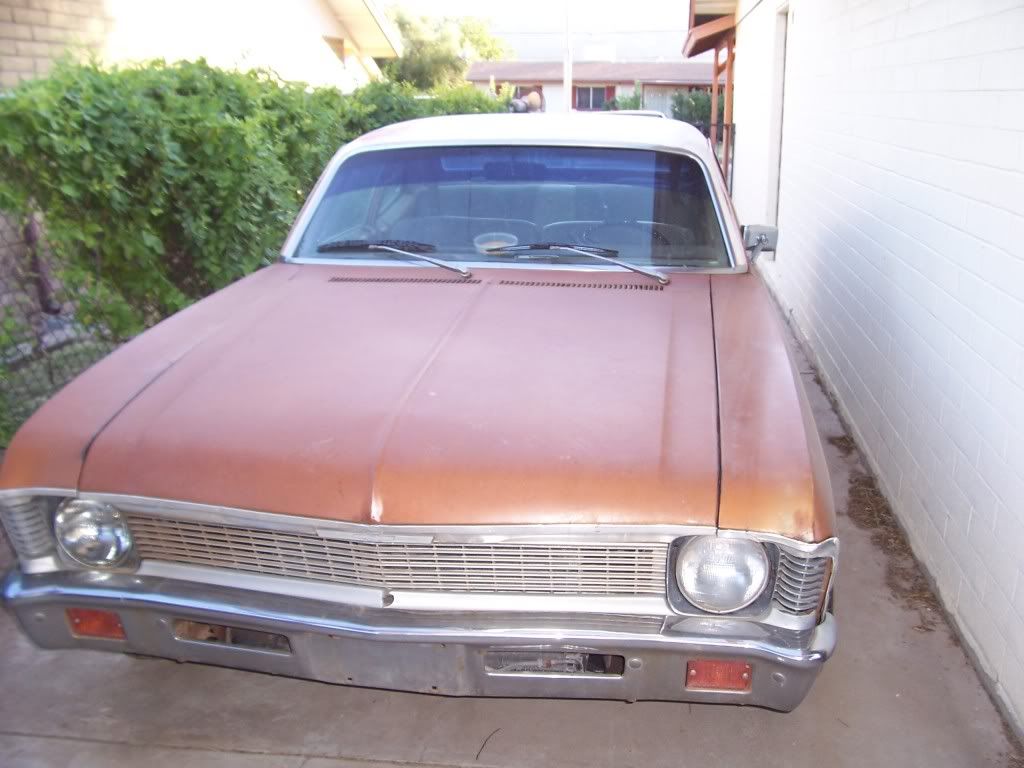
the car in my tiny driveway beside house.
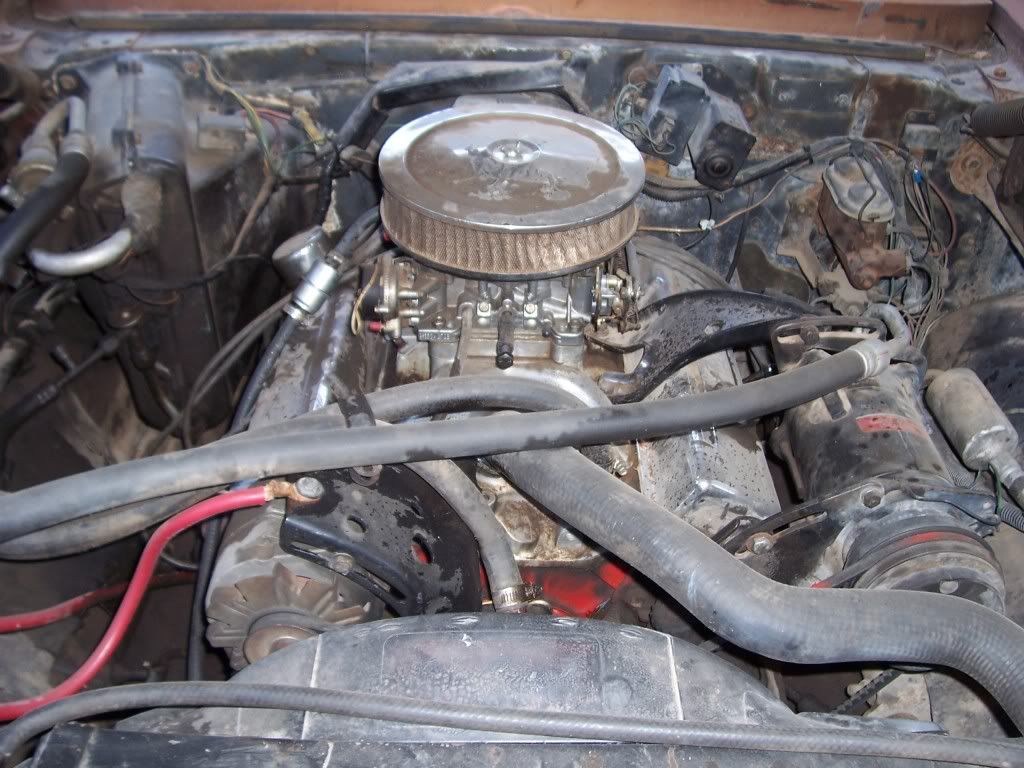
engine and trans
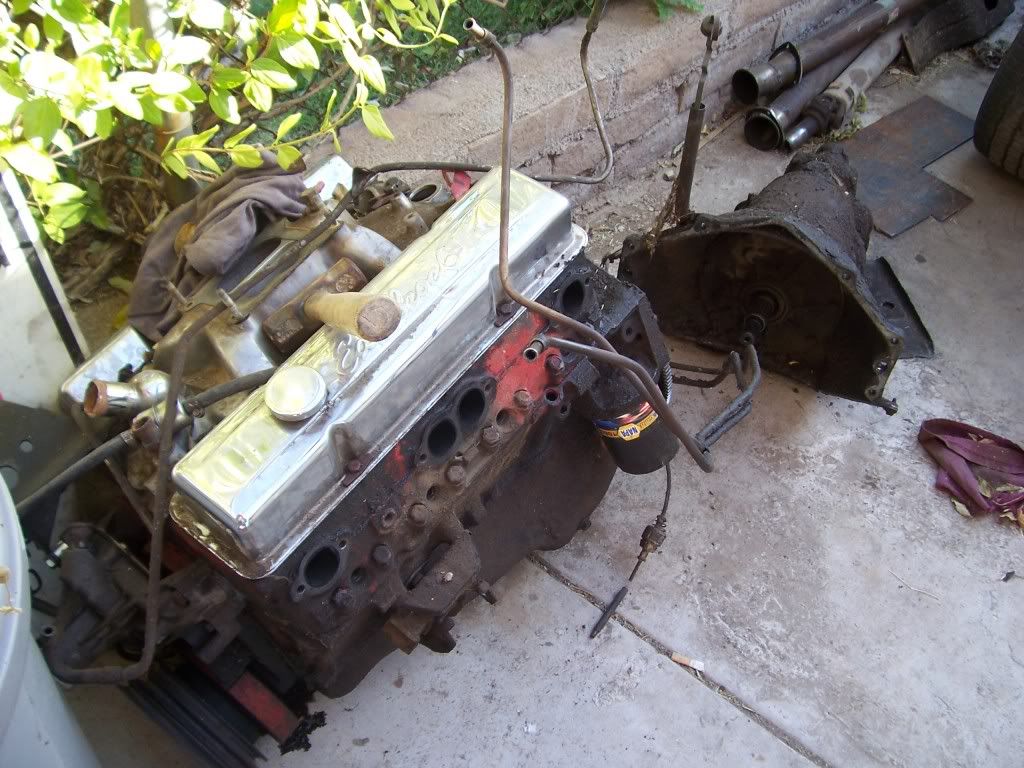
and now it's out
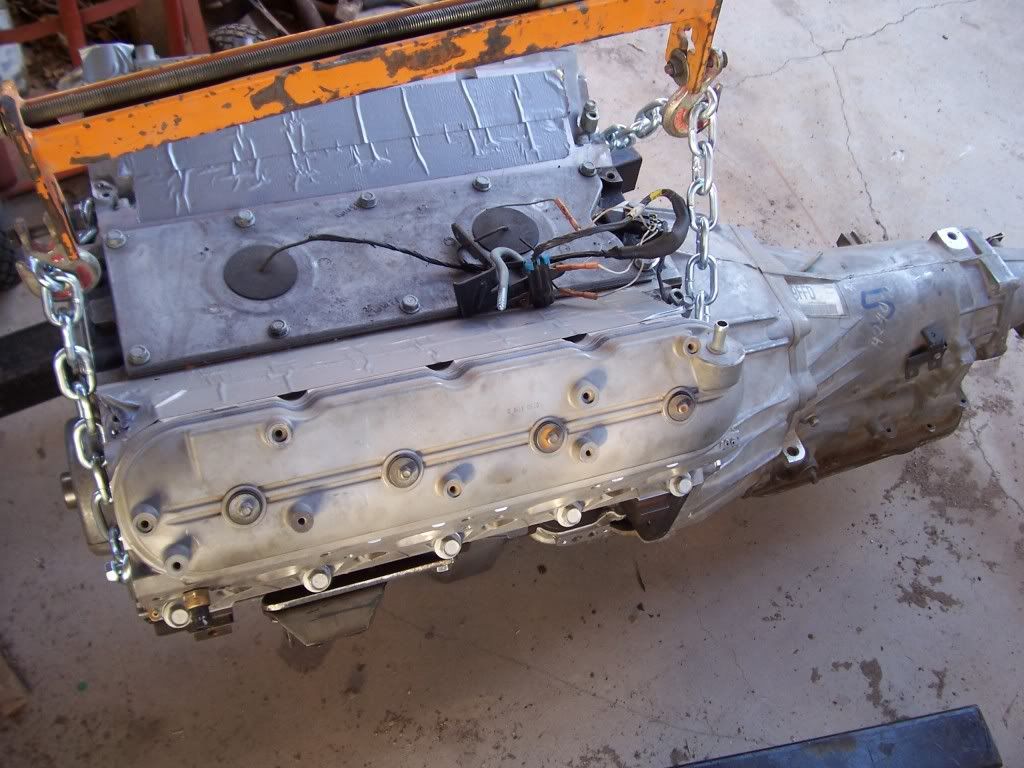
new engine and trans
when it came time to buy my daughter's first car, i handed her an auto trader to see what she wanted. she picked out all the old muscle cars and said the new cars all look alike and she wanted something different that's not in the parking lot now. so off i went. she wanted my 68 firebird and i agreed, but when we pulled the front clip off to clean it all up, the subframe was bent. so off i went again, looking for a subframe. that's how i found the nova. sold my truck and some 4 wheel drive parts and brought the nova home. had 3 different rims and tire sizes. rats living in the trunk, and smelled like dirty socks. but one look and my daughter was in love. She drove the car for about 6 months and we fixed most of the leaks, however when the car came up to temp, the oil pressure went to zero. Kinda like a leash, after 15 min. she came home cause there was no oil pressure. so off i go again, and fount ls1tech.com. bought a rebuilt 5.3 with ported heads, ls1 manifold and injectors, ported throttle body, used 4l60e and started reading and collecting parts. I have ordered psi harness and computer and bought dynatech headers. not being afraid of a welder, i was determined to make my own mounts and crossmember. here is the saga. Please feel free to offer any advice or help. Lord knows i'll need it.
the car in my tiny driveway beside house.
engine and trans
and now it's out
new engine and trans
Last edited by ls68firebird; 06-15-2011 at 07:56 PM. Reason: addition

 06-15-2011, 10:38 AM
#3
Launching!
Thread Starter
Join Date: Jan 2011
Location: Arizona
Posts: 200
Likes: 0
Received 0 Likes
on
0 Posts
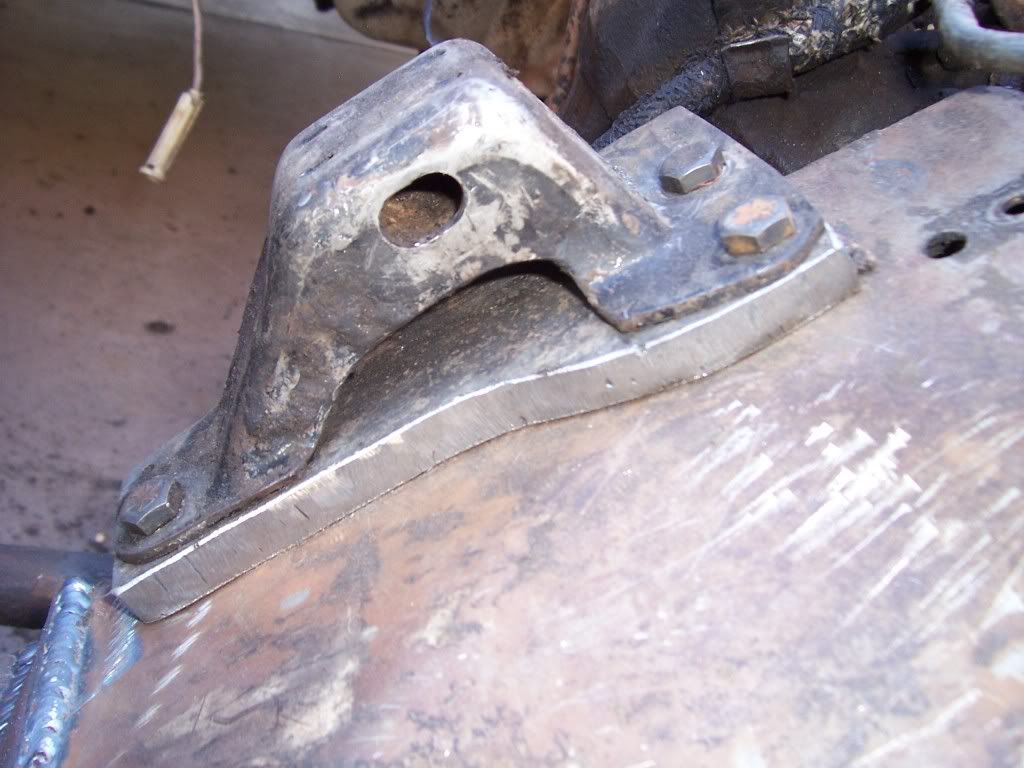
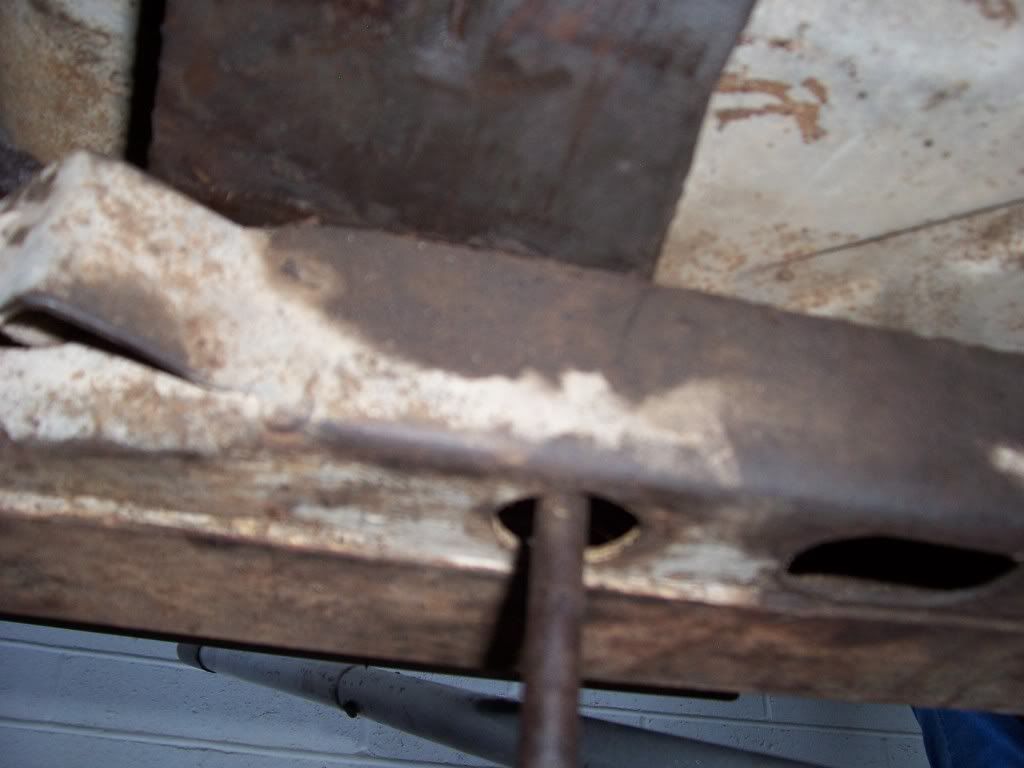
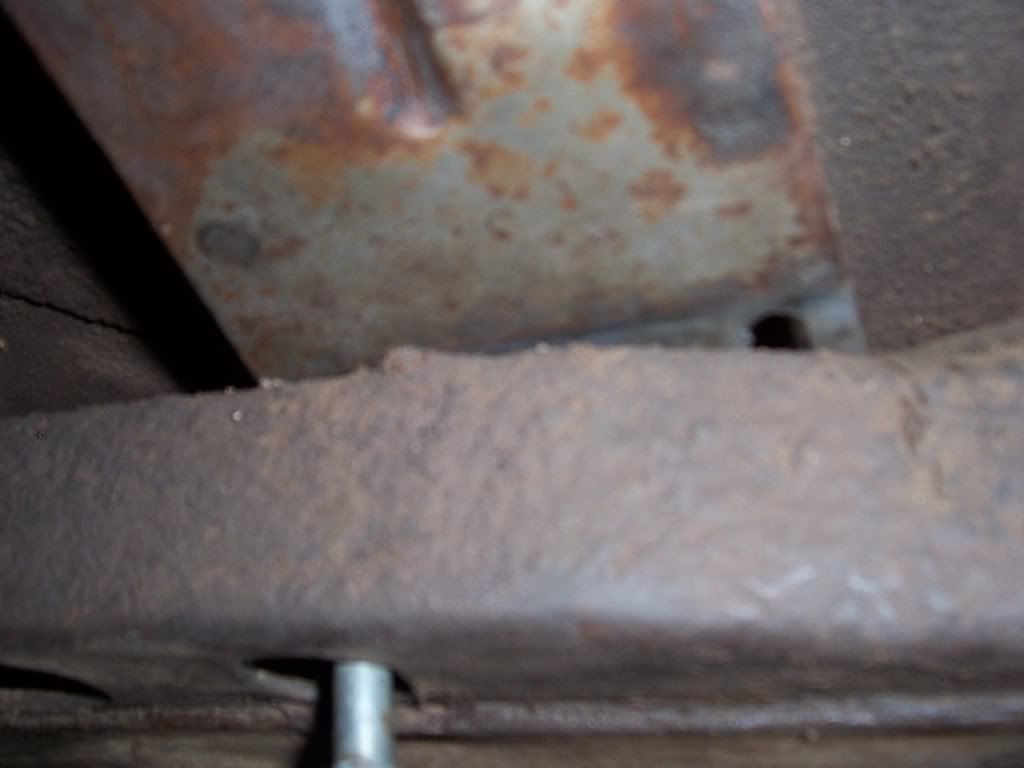
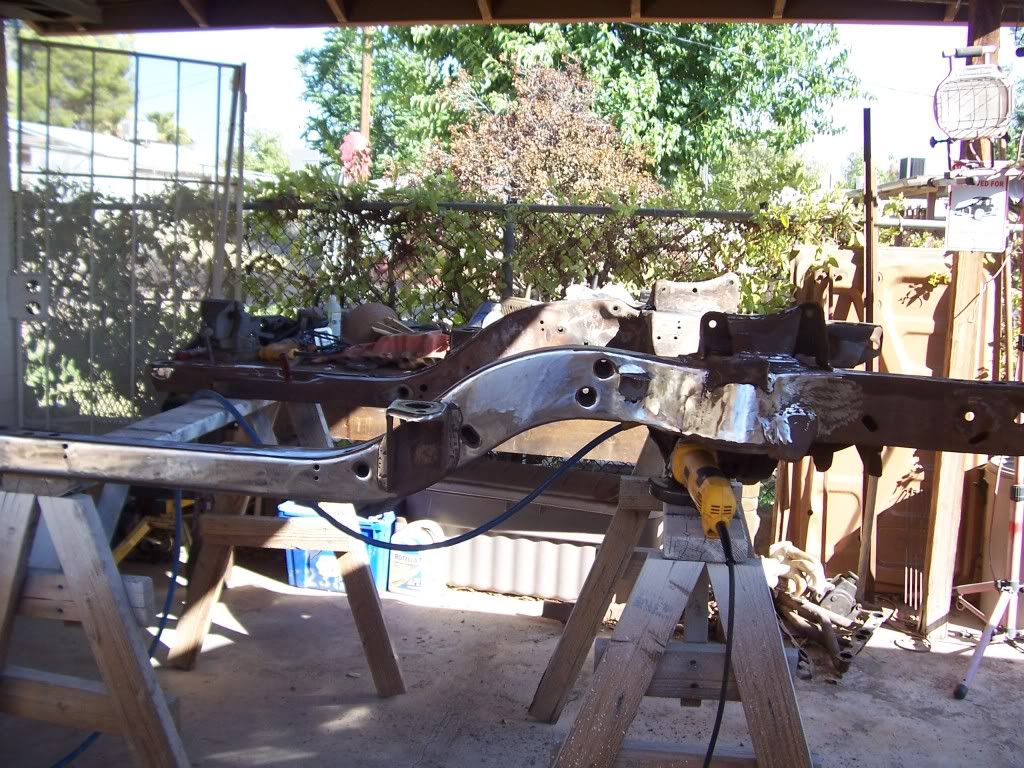
As i read, i got a lot of different stories as to what motor mounts work, whether to use energy suspension mounts, offset mounts, forward, back, up, down, upside down, or what so i decided to make my own. used the factory small block mounts from the car, and bought new motor mounts from napa. built my own adapter plates from 3/8" plate, and drilled them so the bottom forward plate mount and the bottom motor mount shared the same hole. then i lowered the engine and trans in place to see what it. And of course, it wouldn't fit. I took the big block chevy mounts off of my firebird and tried those. Funny thing was, the driver's side was taller but the passenger side was the same height. The motor tried to sit unlevel and the mounts didn't fit. I then mounted the stands to the mounts and lowered the engine in the car, and the oil pan hit with about 1/2" between the stands and the crossmember. I traced the stands onto a piece of 1/2" and cut them out and drilled them to space the stands up. Bolted all of this in place and slid the motor and trans in one more time. The oil pan hit, but the passenger side bolt only needed about 1/8". worried about the mounts settling and the rock of the engine, i cut and boxed the crossmember for clearance. wasn't hard, but there was 50lbs. of grease and sand in the crossmember. two fires, and a bunch of coughing later, the crossmember was clean and boxed in. now the motor fits with lots of room and the truck oil pan can be cut 1 to 1 1/2" for ground clearance.
boxed in, welds are actually a lot better than the pics show
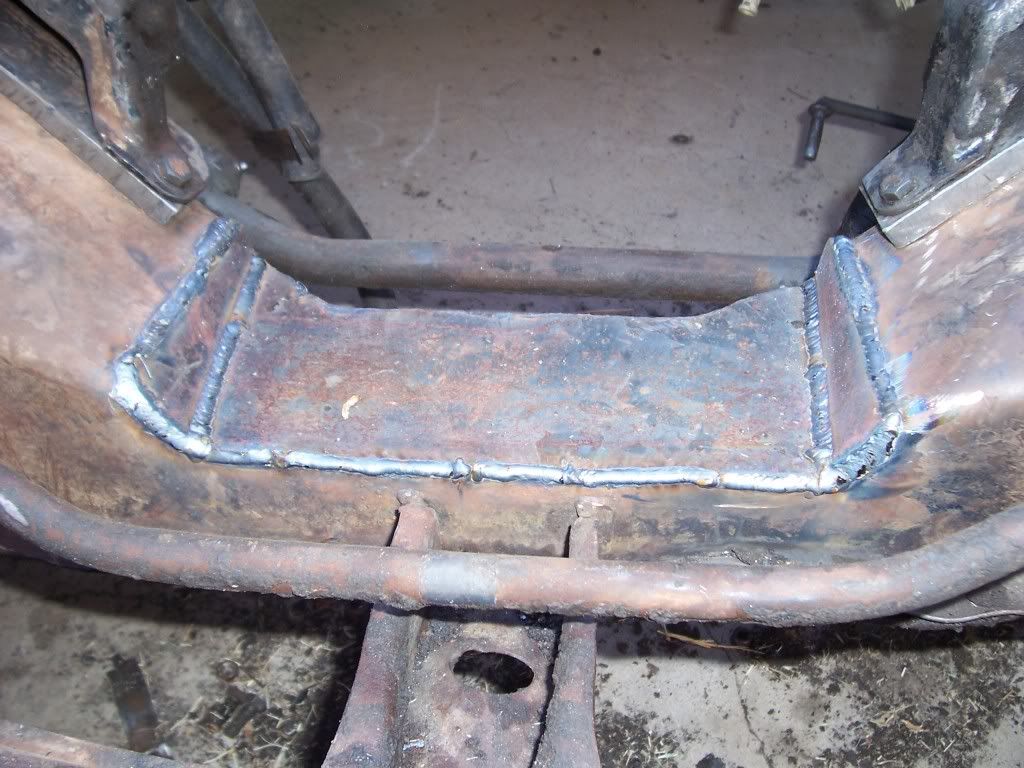
welds
spacers- will be cleaned up better when i dissasemble the front end for paint.
the passenger head hit the a/c suitcase during mock up - ooops
boxed in, welds are actually a lot better than the pics show
welds
spacers- will be cleaned up better when i dissasemble the front end for paint.
the passenger head hit the a/c suitcase during mock up - ooops
06-15-2011, 03:58 PM
#5
bczee used a (slightly modified) TH400 trans x-member in his LS1/4L60e build. you could likely do the same to save some $$$. i'm not sure how the TH350 x-member would work out.
06-15-2011, 04:44 PM
#6

I used my stock th350 trans x-member. I will upload some pics later. Basically i cut the sides off the stock xmember and welded the outside seams so that is was only as wide as the distance between the frame rails. i drilled 2 3/8 holes on each side, then used thick angle iron about 5inches long on each side with matching holes as the x-member. I then put the trans where i wanted it and then welded the angle iron to the frame rails. It bolts and unbolts easily.
I hope this helps without pics. This weekend i will put them up.
I hope this helps without pics. This weekend i will put them up.


Trending Topics
06-15-2011, 07:39 PM
#9
Launching!
Thread Starter
Join Date: Jan 2011
Location: Arizona
Posts: 200
Likes: 0
Received 0 Likes
on
0 Posts
To answer the crossmember questions and suggestions. Last night i put the original th350 crossmember in to see how it worked. i used a trans mount from a m22 4speed i have and the mount to trans holes lined up perfectly. when i slid the crossmember in, i was able to get the two bolts to the mount lined up and when i twisted it slightly i lined up the last bolt hole in the subframe to the first hole in the crossmember on one side. the other side was only off about 1/4". I will oblong the holes for the trans mount and should be able to line up at least one hole on each side. When i pull the subframe out to clean and paint, i will drill two new holes in the subframe to bolt the crossmember to. I will have to cut new holes on the bottom large enough to get a socket on the new bolts. Don't know if the angle will be right, but it's a cheap fix for now, that may work well. If the angle is off too far, i will break out the cut off wheel and the welder.
i'm ahead of you. got two loaded. one by the door and one by the bed. I have three daughters and have gotten to be good at the "intimidating dad" part.
deuce4935- You may want to invest into a shotgun.....Once she drives the Nova to school, all of the knucklehead boys will be hot on her heels if they arent already, get it done!
06-15-2011, 10:44 PM
#10
Launching!
Thread Starter
Join Date: Jan 2011
Location: Arizona
Posts: 200
Likes: 0
Received 0 Likes
on
0 Posts
Made the mods to the crossmember and it seems to work. will be able to tell more with the subframe out of the car. here are a couple of pics to put into perspective.
driver's side
pass side
pics of the oblong holes. cleaned them up later with metal bur on die grinder.
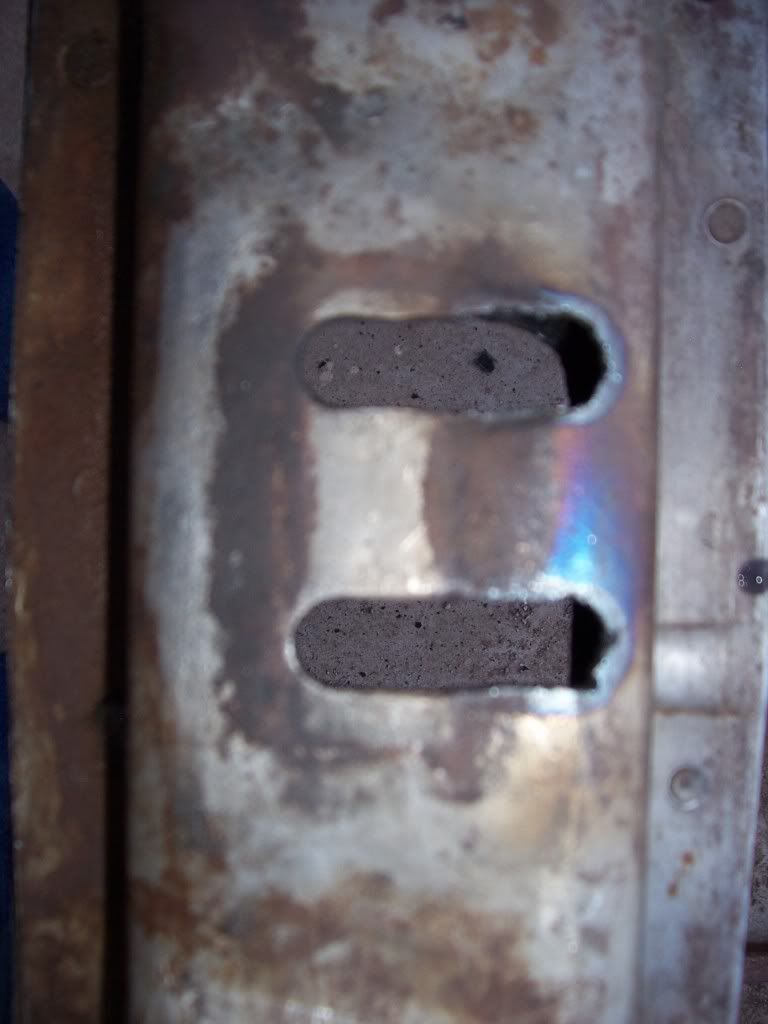
next the subframe comes out. hopefully tomorrow night.
driver's side
pass side
pics of the oblong holes. cleaned them up later with metal bur on die grinder.
next the subframe comes out. hopefully tomorrow night.
06-15-2011, 11:41 PM
#11
Cool I'm glad I could help... and I don't even remember having to answer any PM's/questions! Haha.
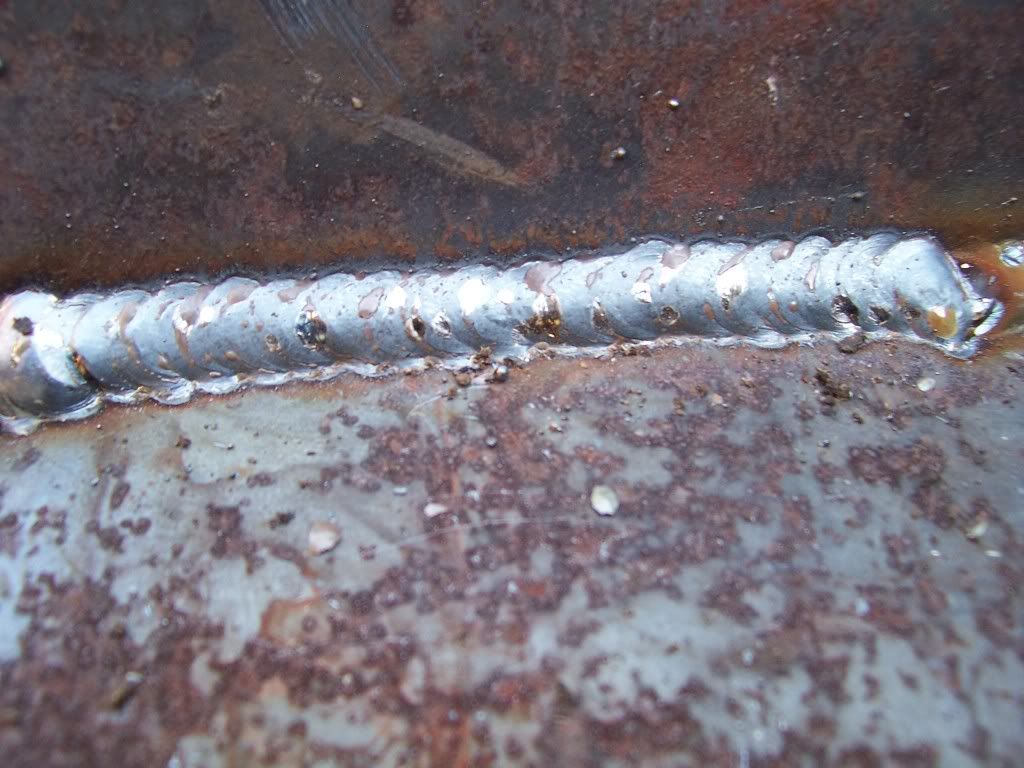
One tip for the welding, clean that sucker up before you're thinking of welding it, then clean it just a bit more. I'm a fan of going nuts on steel with a wirewheel and then even some rubbing alcohol if there is metal dust still hanging around. The rust spots in the surrounding area of that modded cross-member will snap, crackle, and pop and make the weld porous, as well as make the bead more inconsistent due to "throwing you off your a-game". That being said, the weld in that closeup turned out real nice considering how dirty the steel surface was! Nice!!
One tip for the welding, clean that sucker up before you're thinking of welding it, then clean it just a bit more. I'm a fan of going nuts on steel with a wirewheel and then even some rubbing alcohol if there is metal dust still hanging around. The rust spots in the surrounding area of that modded cross-member will snap, crackle, and pop and make the weld porous, as well as make the bead more inconsistent due to "throwing you off your a-game". That being said, the weld in that closeup turned out real nice considering how dirty the steel surface was! Nice!!
06-16-2011, 09:04 AM
#12
Launching!
Thread Starter
Join Date: Jan 2011
Location: Arizona
Posts: 200
Likes: 0
Received 0 Likes
on
0 Posts
I hear you on the clean part. I hate to admit it but i was not intending to weld it. It was getting late and i was just tacking them in place when my boy came out to help. I usually clean a lot better but i got carried away showing him. By the time i lifted the hood, it was done. Bought a tig a while back and need to learn to use it. perhaps this is the perfect project.
06-18-2011, 07:05 PM
#14
Launching!
Thread Starter
Join Date: Jan 2011
Location: Arizona
Posts: 200
Likes: 0
Received 0 Likes
on
0 Posts
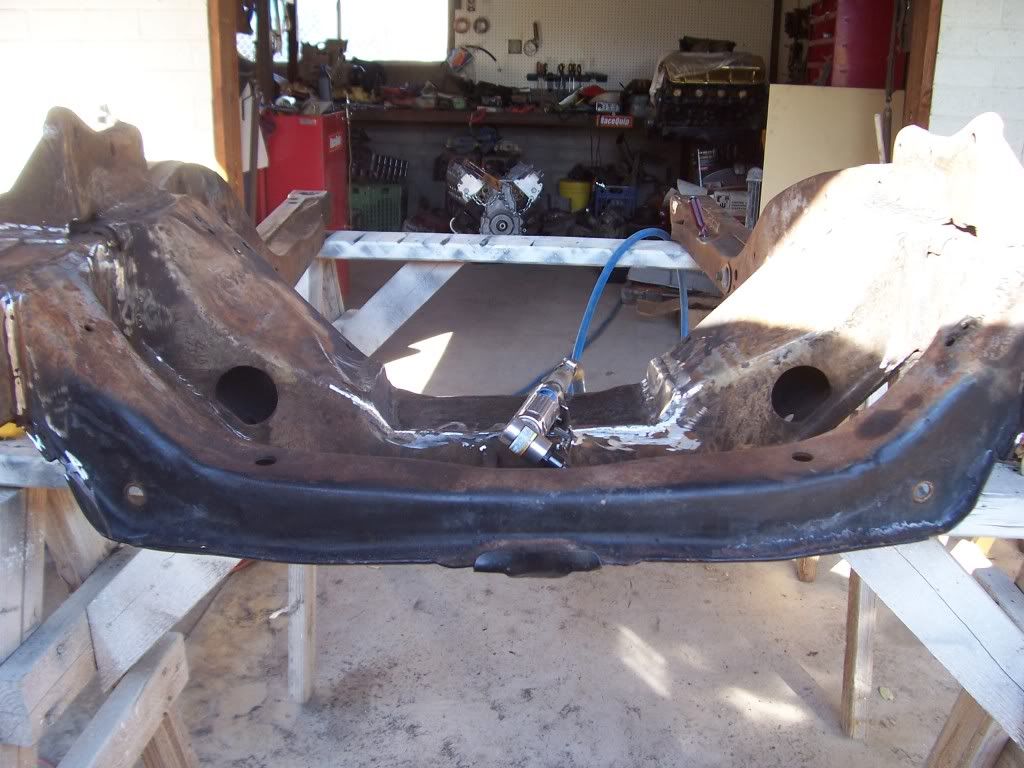
Last couple of days have been hectic with work, but i did manage to get a little done.
pulled the subframe, my daughter is gonna s@#t when she sees this
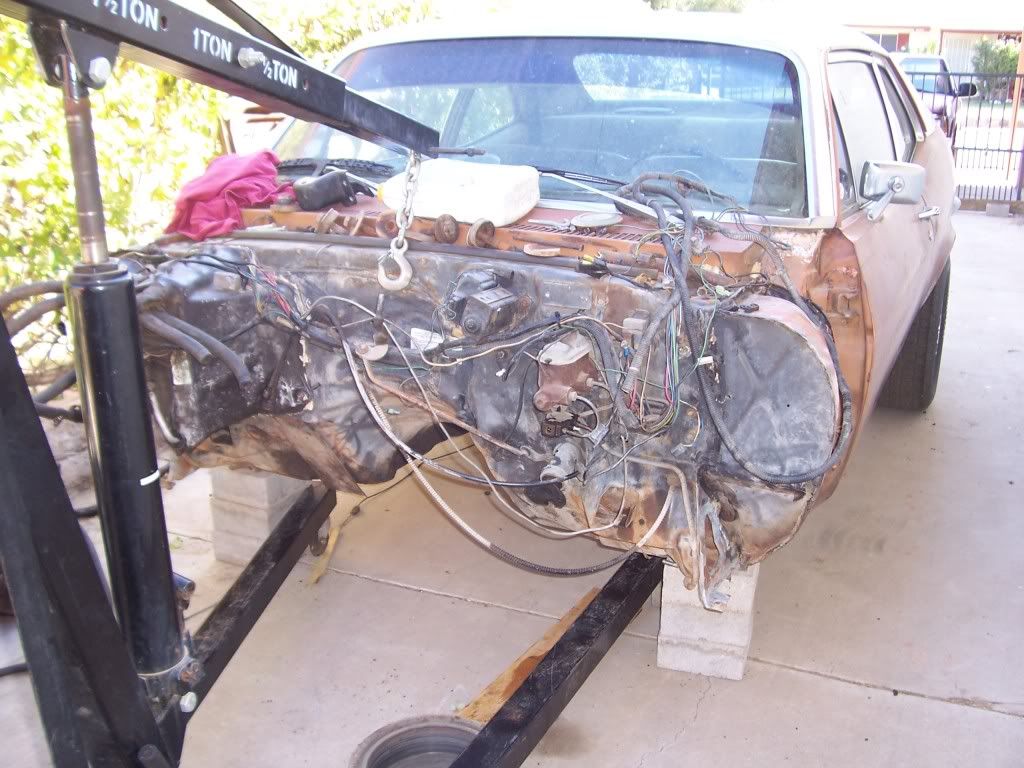
spent 4hrs at work with the acid and soap just to find the brake lines, then brought it home and started cleaning it
Is there a lot of splatter on all of the subframes? took a long time with a grinder to clean up. I have read about guys rewelding the crossmember, do they grind out all the old welds or clean them up and weld over them? And do they weld all of the seams or just spot them like factory? I'm at that point and want to do it now if it is worth it.
You helped more than you can imagine!
pulled the subframe, my daughter is gonna s@#t when she sees this
spent 4hrs at work with the acid and soap just to find the brake lines, then brought it home and started cleaning it
Is there a lot of splatter on all of the subframes? took a long time with a grinder to clean up. I have read about guys rewelding the crossmember, do they grind out all the old welds or clean them up and weld over them? And do they weld all of the seams or just spot them like factory? I'm at that point and want to do it now if it is worth it.
frojoe- Cool I'm glad I could help... and I don't even remember having to answer any PM's/questions! Haha.
06-18-2011, 08:54 PM
#16
Launching!
Thread Starter
Join Date: Jan 2011
Location: Arizona
Posts: 200
Likes: 0
Received 0 Likes
on
0 Posts
thank you. i will finish cleaning it then weld it up. thinking about doing the gulstrand mod. Does anybody know if that will wear the tires abnormally when just driving around town?
06-20-2011, 07:48 PM
#17
Launching!
Thread Starter
Join Date: Jan 2011
Location: Arizona
Posts: 200
Likes: 0
Received 0 Likes
on
0 Posts
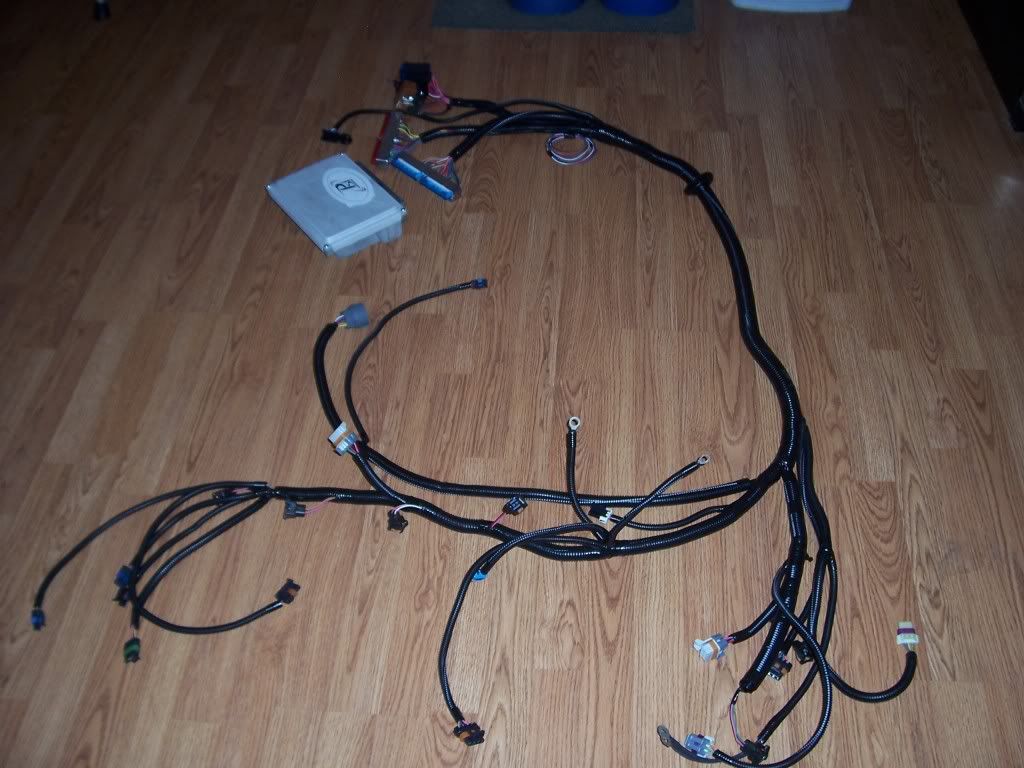
Giving much thanks to PSI conversions today. Last week i talked to them and ordered a wiring harness and computer. They stated it would ship on Saturday and i would receive it this week. Well today it showed up as promised for the price promised. the harness looks good and the connectors and wire are new (no spliced on used connectors). the wiring loom is just split poly loom but fits well and is the correct lengths for the wire. After some of the wiring nightmares i have read, i was pleasantly surprised. it will be a while before i am going to use it, but i had the money now and i will need it before i have the money again.
06-21-2011, 01:58 PM
#18
guldstrand mod merely gives you a better camber curve by moving the upper a-arm attach points lower (and more caster by moving them back). I was going to do it, but decided against it since it puts your cross-shafts awfully close to the angle change in the stand. it's not really necessary unless you want to take some twisties, but not hard to do either.
ps - i'm finished w/ the front suspension on the nova. let me know when you're in the valley next, and i can try to meet you to check it out.
ps - i'm finished w/ the front suspension on the nova. let me know when you're in the valley next, and i can try to meet you to check it out.
06-21-2011, 03:27 PM
#19
TECH Fanatic
iTrader: (5)
Join Date: Sep 2008
Location: Salem/Keizer
Posts: 1,120
Likes: 0
Received 0 Likes
on
0 Posts
I've gotta say....this is the coolest thread that I've seen in a LONG time! Big props to your daughter for being cool beyond her years...in a world of Honda "race car" loving ignoramuses. Even more props to YOU...for being the kind of dad that is willing to do all this for her! 
I hope that she's right there with ya, learning how to build a KILLER first car
I hope that she's right there with ya, learning how to build a KILLER first car
06-21-2011, 06:54 PM
#20
Giving much thanks to PSI conversions today. Last week i talked to them and ordered a wiring harness and computer. They stated it would ship on Saturday and i would receive it this week. Well today it showed up as promised for the price promised. the harness looks good and the connectors and wire are new (no spliced on used connectors). the wiring loom is just split poly loom but fits well and is the correct lengths for the wire. After some of the wiring nightmares i have read, i was pleasantly surprised. it will be a while before i am going to use it, but i had the money now and i will need it before i have the money again.
And if you need any help at al just let me know i just got finished with my Nova build so i can help some if you have a question.