When you click on links to various merchants on this site and make a purchase, this can result in this site earning a commission. Affiliate programs and affiliations include, but are not limited to, the eBay Partner Network.
After getting the transmission tunnel hump sealed and riveted to the hump, I covered it with the roofing, sound deadening material. The roofing material really did a good job hiding the ugliness of it all. Obviously, it's going to get carpeting and a center console covering it as well.
It looks like I'm going to have to do a little more clearance grinding on two of the three notches. I don't know how far that shifter assembly may torque over under load but I don't want it banging into anything.
Hey I have been following your build as it is something that I have been wanting to do myself. I had a 1990 coupe 30 years ago. Wow, I can�t believe that these cars are 30 years old. Anyway, I am finally chiming in because I completely understand what it�s like getting a TREMEC into an automobile that was originally an automatic. I put a T56 Magnum in my 1976 Laguna S3 last year with a 496 BBC. I also used the same sealer that you used along with my questionable welding. You are going through many of the same things that I did. Keep up the great work. I would really like to see this car in person one day. If you let me drive it I will let you drive my 2001 SS with an LS7/TREMEC F swap that I just finished. Good luck.
Food for thought - I added a third mount - a “torque mount” if you will. Attaches to driver’s side head and to the frame rail through a poly mount. Minimizes torque stress on the primary mounts and almost completely eliminates engine rocking under accel/decel load.
Last edited by Michael Yount; 02-27-2021 at 12:57 PM.
That roofing stuff really does a nice job, and I bet gives Dynamat a run for the money for sound deadening!
When I did my online research on the roofing materials, the reviews from the guys that had used it were extremely positive. According to the experiences that I read, it just plain works and doesn't have any tar smell even in hot, southern summers. It's so economical compared to the name brand, car sound deadening materials.
Hey I have been following your build as it is something that I have been wanting to do myself. I had a 1990 coupe 30 years ago. Wow, I can�t believe that these cars are 30 years old. Anyway, I am finally chiming in because I completely understand what it�s like getting a TREMEC into an automobile that was originally an automatic. I put a T56 Magnum in my 1976 Laguna S3 last year with a 496 BBC. I also used the same sealer that you used along with my questionable welding. You are going through many of the same things that I did. Keep up the great work. I would really like to see this car in person one day. If you let me drive it I will let you drive my 2001 SS with an LS7/TREMEC F swap that I just finished. Good luck.
Thank you, REVIN! I'd love to drive the '01SS with the LS7/Tremec F. I bet that car is a blast to drive. Do you have a build thread on that car?
Michael, I've seen where guys have crudely used a piece of chain (slack) connected to a bolt in the driver's side head and then a bolt on the frame. I'm sure your torque mount is much nicer than that.
I saw chains mostly in drag cars back in the day. They work reasonably well under acceleration...but do nothing for movement the other way when decelerating. And they create NVH issues....which are inconsistent with you sound damping materials.
You're right about that NVH, Michael! I'll probably just grind a little bit more on the transmission tunnel hump to get round, clearance cutouts where they need to be. If something else ends up hitting when the engine torques over, then I'm going to be looking at something like what you've got.
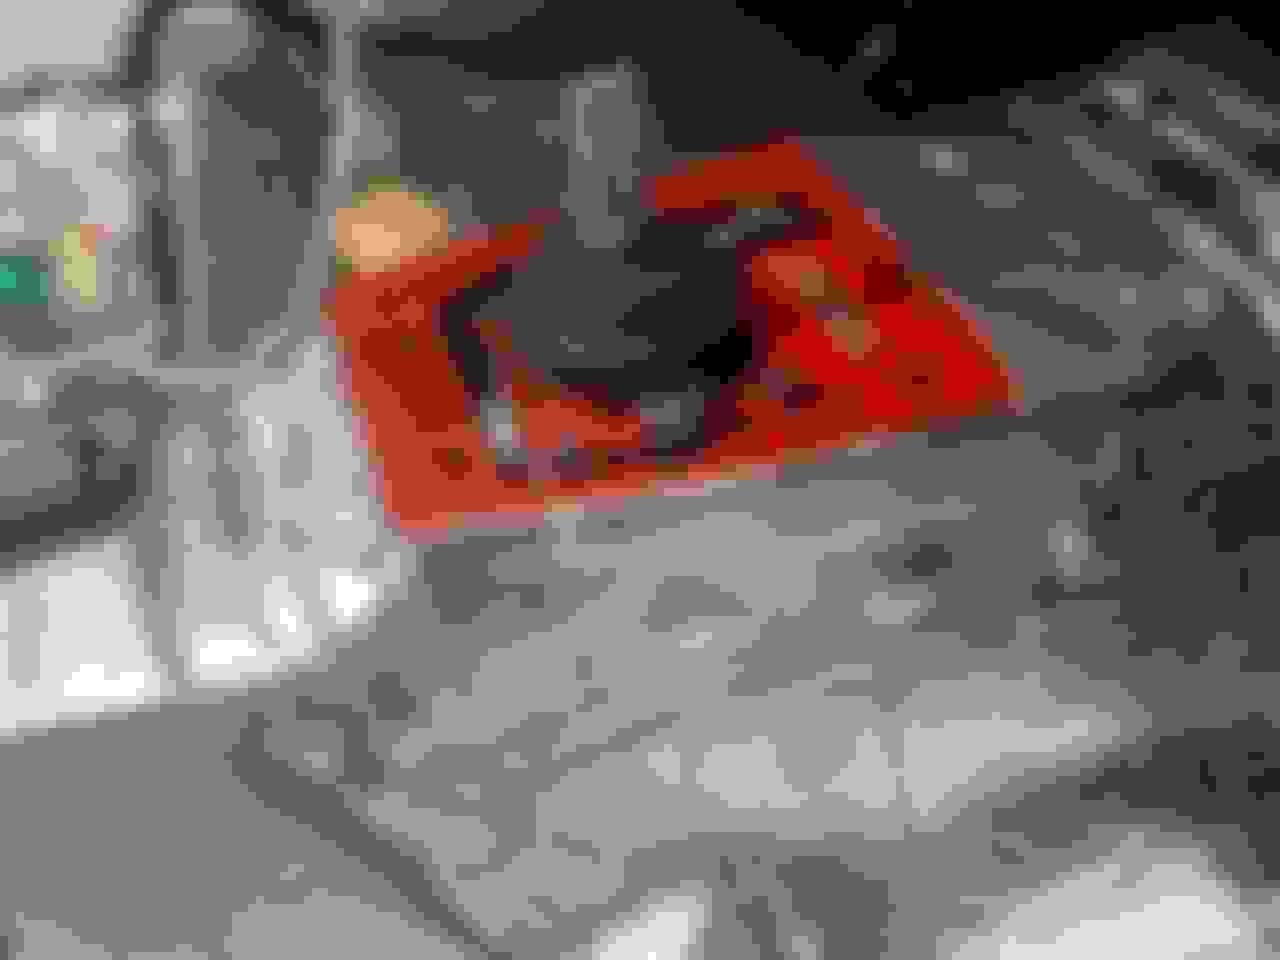
When I was working on the transmission tunnel hump, I was constantly going under the car and raising the transmission "into place." The height was determined by where the Hooker Blackheart Transmission Crossmember needed to be installed. The crossmember is positioned fore and aft by an OEM Ford bolt hole in the "frame" on the driver's and passenger's side. The aft hole has to be drilled by the car builder. I knew that I needed to get the T56 up high in the tunnel to get the crossmember in place. To make matters a little tougher, Hooker's instruction say to use both of the supplied spacers between the Hooker Blackheart Polyurethane Transmission Mount-Red and the crossmember. The T56 sits way up there!
I wanted to get that crossmember up there as accurately as I could get it before I drilled the rear holes. This is the passenger side. Driver's side. Pretty close. You can also see that the crossmember bracket sits on top of the forward edge of the MM SFC's weld bracket.
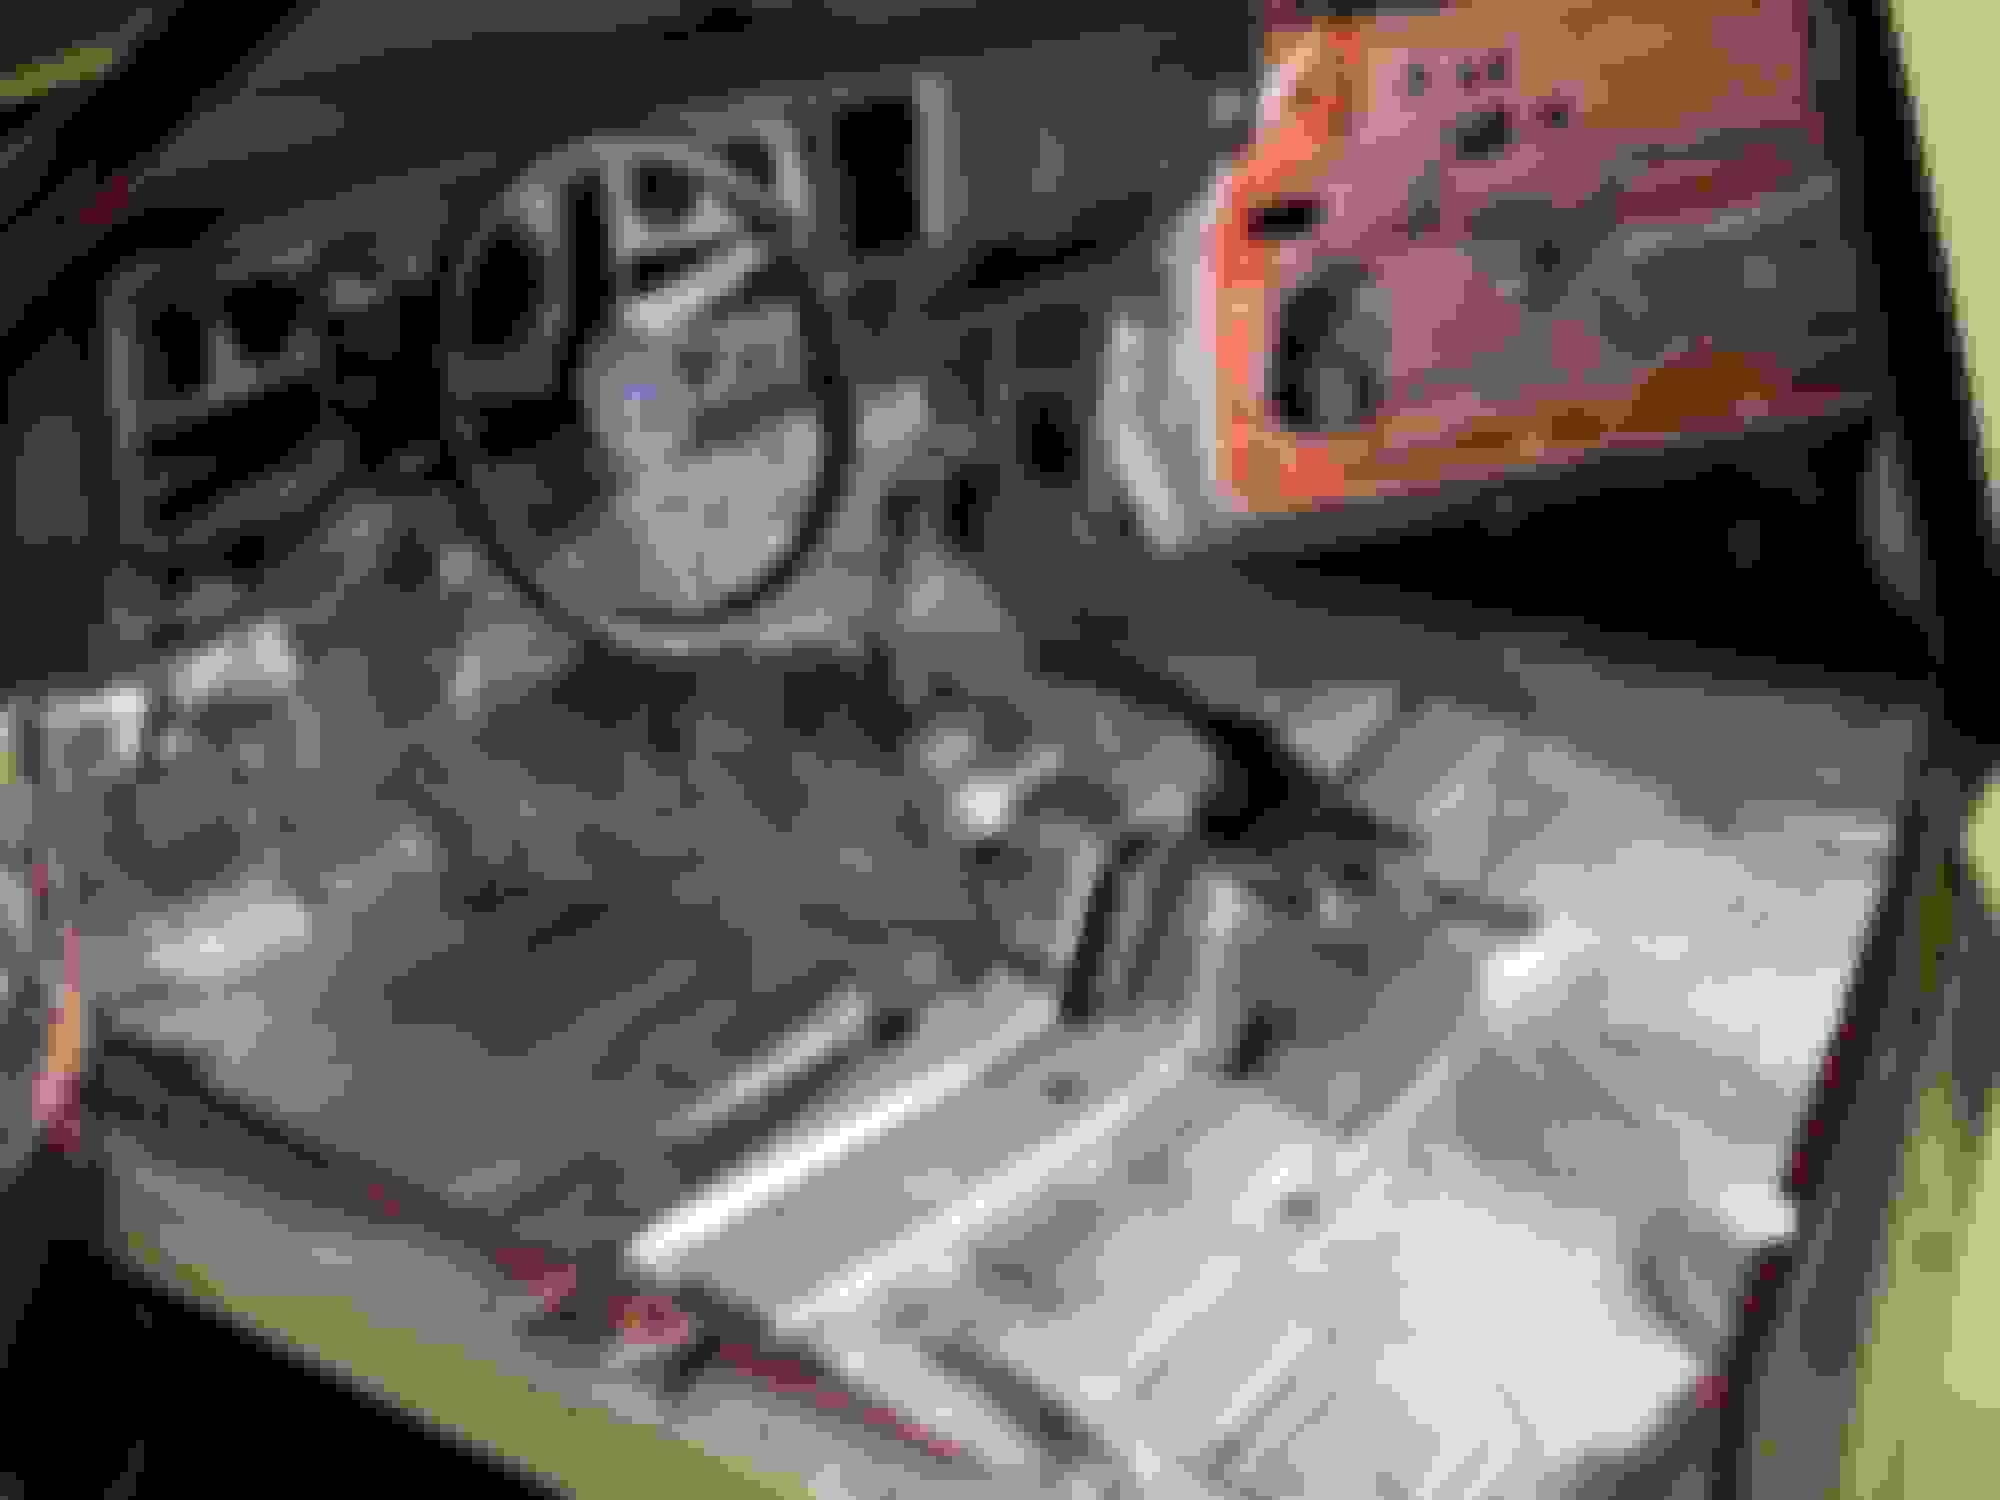
Then I drilled the aft holes for the crossember. Before I could bolt it in, I had to make things work because of a weld tab on the inside of the driver's side Maximum Motorsports SFC and a little bit of weld bead on the passenger side SFC. I describe this in the following pictures.
You can see the OEM Ford hole and the hole that I drilled in the black paint. The scrape marks in the black paint toward the 4 o'clock position of my drilled hole are where the crossmember was hitting some of my weld bead.
I made this spacer to take up the gap on the driver's side between the frame and the crossmember bracket due to the SFC's weld tab. It worked very well.
I had to grind for a little clearance between this passenger side bracket and a SFC weld bead.
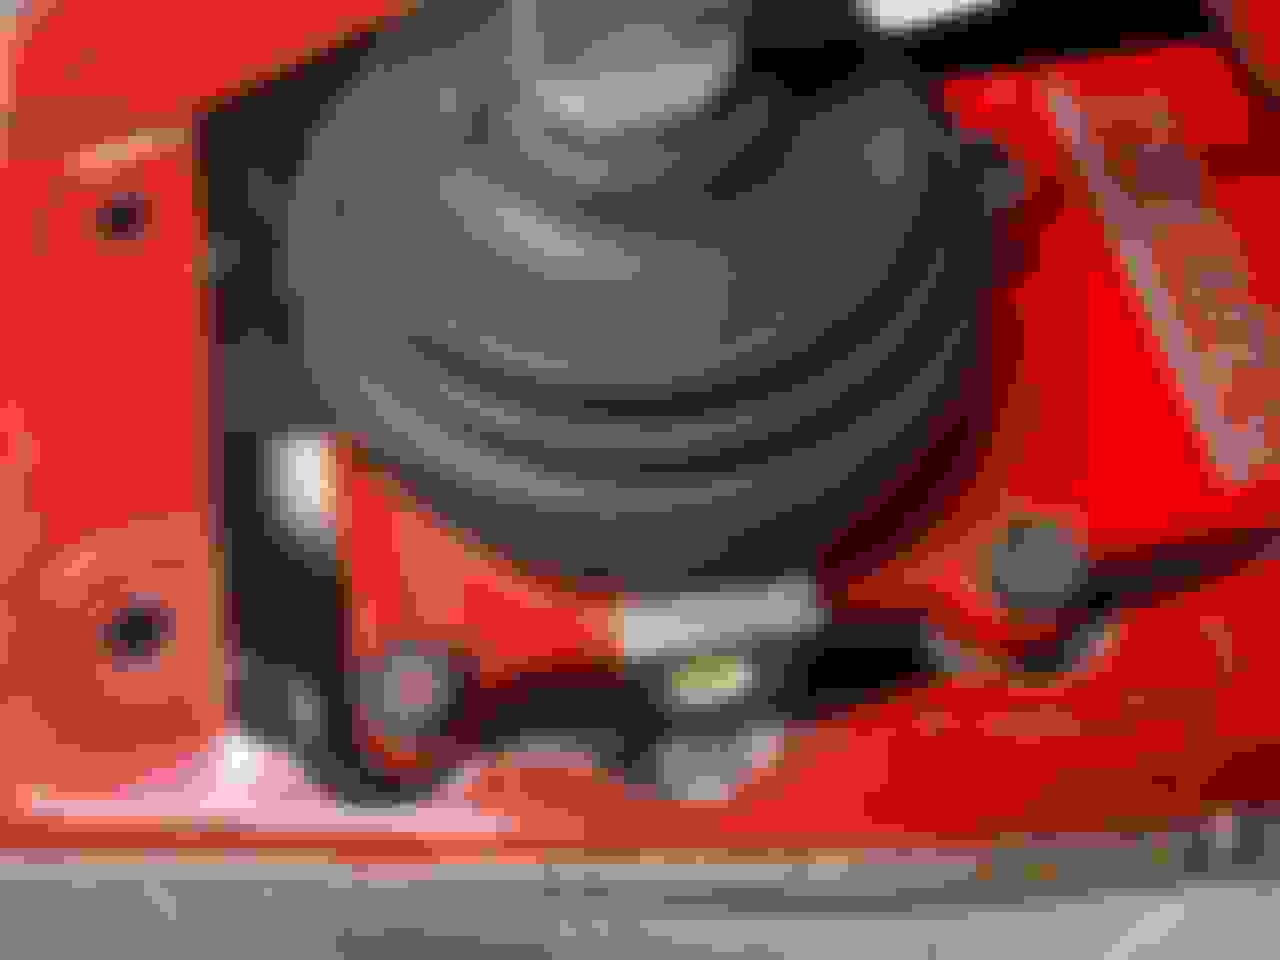
One thing that I didn't like about the Hooker polyurethane transmission mount hardware was the two threaded studs that go into the red mount and through the slots in the crossmember. These are nice studs with included washers and nuts. However, when using 1/2" (as per the instructions for a T56 Magnum) worth of spacers between the trans mount and the crossmember, you aren't left with too many threads. The studs are at least 1/4" too short maybe 3/8". I happened to have some bolts on hand of the correct thread and used them instead.
Finally! The transmission is supported by it's crossmember and not a jack.
What is your engine/tranny angle relative to the unibody? My usual approach is to set engine/tranny angles and pinion angles so the driveshaft will work properly and then engineer the crossmember so it supports the tranny where the tranny needs to be.
I used a digital like he�s shown in the pictures. But had make a little magnetic fixture that stuck to the driveshaft creating a flat surface for reliable/repeatable measurements on that curved surface. And do not trust that the machined surfaces on the ujoint yokes are parallel to the ujoint cups. NONE of mine were.
I set up my angles recently when I installed my torque arm. That's going to be the next chapter of this build thread.
I used my digital angle finder on the rear end's pinion flange and measured 1.9 degrees up. My measurement on the engine's balancer was 2 degrees nose up (transmission tail down.) IIRC, the balancer measurement gave me a little bit of a fit. I have pictures of my measurements and that's how I know the numbers.
According to the Maximum Motorsports torque arm instructions, they recommend the angles to be equal and 3 degrees or less. I fall right in there. It's really easy to change the pinion angle by adding or removing shims from the torque arm.


 02-26-2021, 01:02 PM