
LQ4 into a 3rd Gen/1972 Nova
 06-23-2009, 12:08 PM
#141
hookemdevils22... already two steps ahead of ya. Pulling subframe to clean, strip, and paint, seeing as I have to unbolt it anyways to put in aluminum body mounts and gotta take off the stock control arms...  (yet another "while I'm at it..." thing haha)
I also already have a 3rd gen quick-ratio (was told it's 12.7:1) box in there. Gonna keep the original draglink and idler arm. I installed a new pitman arm when I put in the box (when I first installed the LQ4). Gonna put in new tie rod ends while I'm replacing the tie rod sleeves with threaded hex-rod mild steel ones...

(yet another "while I'm at it..." thing haha)I also already have a 3rd gen quick-ratio (was told it's 12.7:1) box in there. Gonna keep the original draglink and idler arm. I installed a new pitman arm when I put in the box (when I first installed the LQ4). Gonna put in new tie rod ends while I'm replacing the tie rod sleeves with threaded hex-rod mild steel ones...
Last edited by frojoe; 07-13-2009 at 06:49 PM.

 06-23-2009, 02:19 PM
#143
TECH Resident
Join Date: Nov 2007
Location: Texas
Posts: 816
Likes: 0
Received 0 Likes
on
0 Posts
frojoe just an FYI. If you have issues with the tie rods and wheel clearance you can add spacers to the steering arms and move them in for clearance. I had issues running a 8 inch wide rim with 5.5 BS and 2 inch drop spindles. Adding the washers fixed the issue and had no ill efects on steering.
 06-24-2009, 11:06 AM
#146
TECH Resident
Join Date: Nov 2007
Location: Texas
Posts: 816
Likes: 0
Received 0 Likes
on
0 Posts
I used (3) 1/8 thick washers. 3/8 of an inch. I also used a longer bolt on the rear side the steering arm is thicker on mine and I didn't have enough threads engaged into the spindle after I added the washers.
 06-26-2009, 03:14 PM
#150
rockytopper... Do you know how spacing the steering arms would effect the steering through the travel, if it even changes it much at all? I haven't been able to find much info on that...
LS1NOVA... do you have a link to the bumpsteer kit you have? Minimalizing bumpsteer is always good, but I had completely forgotten about it until you mentioned it, thanks for the reminder!
Also, anyone run into inner fender/tire clearance issues with a LOW ride height? Regardless, can people post their rim size/width + BS + tire width & ride height?
With my 245's one 8" rims with 4.325" BS, I'm getting front and back subframe rubbing in the last couple degrees of steering lock in either direction. Now, I'm not sure if I want to bring the rims in any more inboard (AKA go with longer studs and smaller spacer), but realistically, I won't be turned full lock very often. But I do want to have as much clearance as possible with the fender lip, since I want this thing LOW... so this is a bit confusing now.
06-27-2009, 12:48 AM
#151
I have the stage 2 plus kit from SC&C. It uses circle track Howe tie rods if I remember right. Baer offers some rod end type ones that are smaller and give a little more tire/rim clearance.
My wheel/tire specs are:
front 245/45/17 17x8 with 5.25 BS and a 1/8 spacer to gain tie rod clearance
SC&C uppers, stock lowers, stock drum spindles, LS1 brakes, Hotchkis coils
rear 315/35/17 17x11 with 7.75 BS, stock length 12 bolt and S-10 discs.
My wheel/tire specs are:
front 245/45/17 17x8 with 5.25 BS and a 1/8 spacer to gain tie rod clearance
SC&C uppers, stock lowers, stock drum spindles, LS1 brakes, Hotchkis coils
rear 315/35/17 17x11 with 7.75 BS, stock length 12 bolt and S-10 discs.
06-27-2009, 02:24 AM
#152
LS1NOVA... 315 in the rear eh? That must be with a mini-tub, right?
So I guess upgrading to aftermarket control arms is a good idea, if not for the improved camber/caster gain then certainly for the Delrin bushings....
So as far as I can see, there appears to be minimal welds length-wise on my subframe, mainly just folded-over steel...

Only welds I can find are where the two cross-members are welded to the "frame rails", quality looking stuff I'll say...
SO, the question is, should I go through the trouble of welding up the weld-less seams on the frame rails?
I was also thinking about maybe boxing in the bottom of the front cross-member...
And maybe box the connecting piece between the front & back crossmembers, maybe even weld in two more pieces, one on each side of the center connector...

Now I can't afford/don't want to buy an aftermarket subframe. I think the stock one should be able to do just fine, but I want to make it as stiff as possible. This will be a daily driver eventually, but I plan on flogging the crap out of it on the road track as well.
What are the opinions on said welding mods to the subframe? Straight up not worth it? From my engineering experience/schooling, a little bit of metal here and there connecting stuff and boxing C-channels, etc can go a long way in making stuff more rigid, and I would think the fab work/weight of extra metal could be worth it. What do you all think??
So I guess upgrading to aftermarket control arms is a good idea, if not for the improved camber/caster gain then certainly for the Delrin bushings....
So as far as I can see, there appears to be minimal welds length-wise on my subframe, mainly just folded-over steel...
Only welds I can find are where the two cross-members are welded to the "frame rails", quality looking stuff I'll say...
SO, the question is, should I go through the trouble of welding up the weld-less seams on the frame rails?
I was also thinking about maybe boxing in the bottom of the front cross-member...
And maybe box the connecting piece between the front & back crossmembers, maybe even weld in two more pieces, one on each side of the center connector...
Now I can't afford/don't want to buy an aftermarket subframe. I think the stock one should be able to do just fine, but I want to make it as stiff as possible. This will be a daily driver eventually, but I plan on flogging the crap out of it on the road track as well.
What are the opinions on said welding mods to the subframe? Straight up not worth it? From my engineering experience/schooling, a little bit of metal here and there connecting stuff and boxing C-channels, etc can go a long way in making stuff more rigid, and I would think the fab work/weight of extra metal could be worth it. What do you all think??
06-27-2009, 11:43 AM
#153
one of the mags did an article about that. i'm not sure which, and i can't seem to find it anymore, but they basically did the exact same thing you're planning to do. they ground down the stock welds and rewelded it all up. if you have the time and patience, i'd say do it. those things are anemic.
and wtf are you doing at 12:30am on a saturday morning other than jager bombs?
and wtf are you doing at 12:30am on a saturday morning other than jager bombs?
Last edited by hookemdevils22; 06-27-2009 at 11:52 AM.
 06-27-2009, 03:40 PM
#155
tried to read most of this, might put am LS in my 72 nova-have an LQ4 in the chevelle now
couple things concern me on your build-one is the fan shroud-with it so close to the radiator, im affraid air wont flow thru anywhere except the fan opening
the air may just dam up every where else-if it was farther off the core, and tappered like a fact. one, i believe more air flow
the intercooler will really block air to the radiator, esp. at idle-i try to drop them as low as possible, uncover as much as possible-i had a couple that i ended up mounting underneath-on a 68 nova, i actually built a frame with 1" x 1" and dropped it down a little below the bumper to uncover the radiator
sometimes you have to cut slots in the bumper to improve air flow, some bumpers have them from the factory-not pickin on it, just some things i have found over the years that cause problems, and if a car wont cool, your not going anywhere, lol
06-27-2009, 06:14 PM
#156
yes DSE minitubs
pm sent on suspension stuff.
Another thing I though of on the intercooler is to make the front license plate hinge downward, fasten with some rod ends, and cut out the bumper behind it. At the track it would funnel more air right into the intercooler.
pm sent on suspension stuff.
Another thing I though of on the intercooler is to make the front license plate hinge downward, fasten with some rod ends, and cut out the bumper behind it. At the track it would funnel more air right into the intercooler.
06-27-2009, 08:03 PM
#157
hookemdevils22... I think I will go ahead and weld it up, why not eh? Oh and I've had a couple late nights this week so I took it easy last night, still went down to the beach and had some beers though! 
bagged36... Thanks for the compliment! Slowly but surely it's turning into a cooler car...
fordcd ind... Thanks for the comments. This is my first car build let alone a turbo build, so any advice is much appreciated. I realize that the intercooler is blocking the radiator quite a bit, and I agree at idle especially, the airflow to the rad seems like it could be quite restricted. I thought about mounting it in several spots, but there is so little room to work with that I thought putting it front and center mainly behind the grill would be the best...
There are already slots in the bumper, but I was toying with the idea of opening them up even larger as well as providing ducting so all air going into them hits the rad and/or IC. When you had intercoolers mounted beneath the bumper, how well did that work? Were they mounted vertically drawing air from the front, or were they horizontal drawing air from below? What overall areas did the intercoolers have? I would imagine they'd need to be very wide and not very tall?
I considering doing two smaller intercoolers below the bumper, but I figured there wouldn't be enough room to have a beneficial flow area blowing into them if mounted vertically. And if mounted horizontally, that wouldn't take advantage of the high-low pressure difference at the rad support, so fans or ducting directing air up would be needed to create airflow through them.
Any more details or pics or your intercooler experience would be greatly appreciated!!!
Also, the shroud will be fastened to the radiator perimeter with bolts & spacers. Spacers to move it away from the radiator, with no spacers, it would sit flush with the radiator. I was thinking of spacing it off ~1/2", but what would you recommend?? I realize a tapered shroud would in fact make drawing air more streamlined, but my patience/fabricating skills settled for a flat shroud. Plus the electric fan I have is pretty hardcore, so I'm hoping it should be able to do the trick along with a lower-temp thermostat.
LS1NOVA... The hinging or even a removable lincense plate is a great idea, would go nicely with more opened-up bumper holes and some ducting! Also, PM'd you back about the suspension bits.
bagged36... Thanks for the compliment! Slowly but surely it's turning into a cooler car...
fordcd ind... Thanks for the comments. This is my first car build let alone a turbo build, so any advice is much appreciated. I realize that the intercooler is blocking the radiator quite a bit, and I agree at idle especially, the airflow to the rad seems like it could be quite restricted. I thought about mounting it in several spots, but there is so little room to work with that I thought putting it front and center mainly behind the grill would be the best...
There are already slots in the bumper, but I was toying with the idea of opening them up even larger as well as providing ducting so all air going into them hits the rad and/or IC. When you had intercoolers mounted beneath the bumper, how well did that work? Were they mounted vertically drawing air from the front, or were they horizontal drawing air from below? What overall areas did the intercoolers have? I would imagine they'd need to be very wide and not very tall?
I considering doing two smaller intercoolers below the bumper, but I figured there wouldn't be enough room to have a beneficial flow area blowing into them if mounted vertically. And if mounted horizontally, that wouldn't take advantage of the high-low pressure difference at the rad support, so fans or ducting directing air up would be needed to create airflow through them.
Any more details or pics or your intercooler experience would be greatly appreciated!!!
Also, the shroud will be fastened to the radiator perimeter with bolts & spacers. Spacers to move it away from the radiator, with no spacers, it would sit flush with the radiator. I was thinking of spacing it off ~1/2", but what would you recommend?? I realize a tapered shroud would in fact make drawing air more streamlined, but my patience/fabricating skills settled for a flat shroud. Plus the electric fan I have is pretty hardcore, so I'm hoping it should be able to do the trick along with a lower-temp thermostat.
LS1NOVA... The hinging or even a removable lincense plate is a great idea, would go nicely with more opened-up bumper holes and some ducting!
Also, PM'd you back about the suspension bits.
06-28-2009, 07:07 AM
#158
you might start out w/o the i/c, make sure the radiator cools, then set the i/c in place, see what happens-that way you will know what your fighting
on the one i placed underneath, it was a little paral. to the ground, but up a little in the front to catch air
(it did look a little ugly, lol) i tries an air dam, looked uglier
it did drop air temps though, 330 degs out of the Procharger, down to 188 degs out of the i/c to the carb, was never a problem
the one in my 69 now sets low, and i have an AFCO LS conv. radiator, with 2 13" Spawl fans-i never use the 2nd on (first one is on a thermostat) except the thermo. doesnt turn on untill around 205, so sometimes i use the 2nd one manually-hardest thing was actually setting the i/c in so i could cut the holes through the core support, then get the hood latch arm bent around it with full pull
06-28-2009, 12:23 PM
#159
11 Second Club
Join Date: Mar 2008
Location: New Westminster, B.C., Canada
Posts: 445
Likes: 0
Received 1 Like
on
1 Post

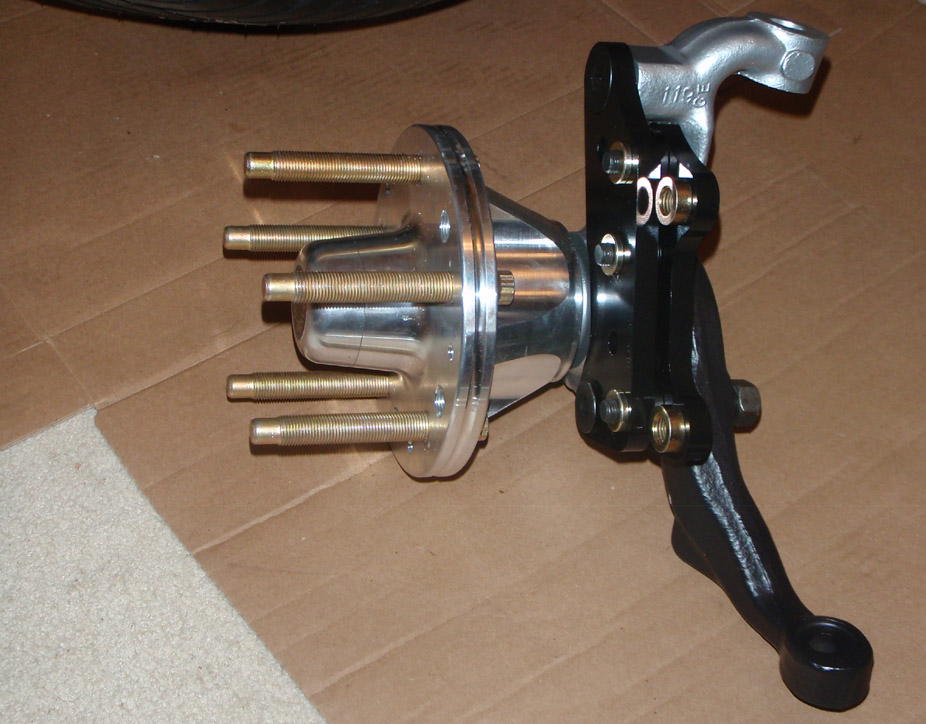
Joe, are your stock front brake drum hubs steel or aluminum? I would assume they are steel. I think I need them. Are they for sale? I'm gonna try and make my own big brake setup.
06-28-2009, 09:03 PM
#160
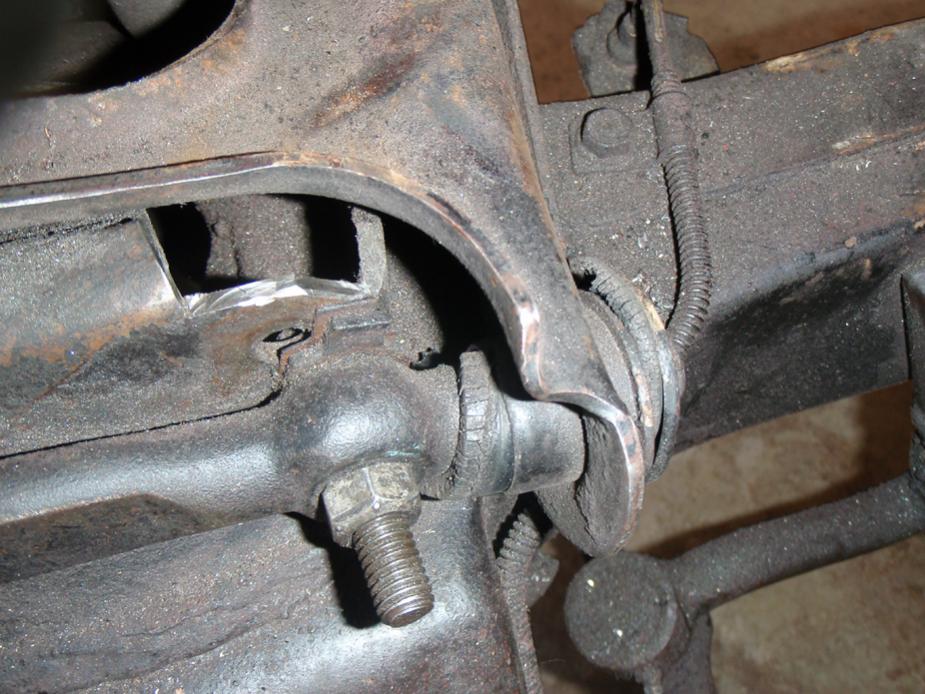
Got a bit more done this weekend. Took off all the suspension pieces. For some reason the top bolt (non-steering-arm bolt) for the drum brake backing plates SUCKED to get out. Penetrating lube and a 36" breaker bar still took 10min for each one to undo.. arg.
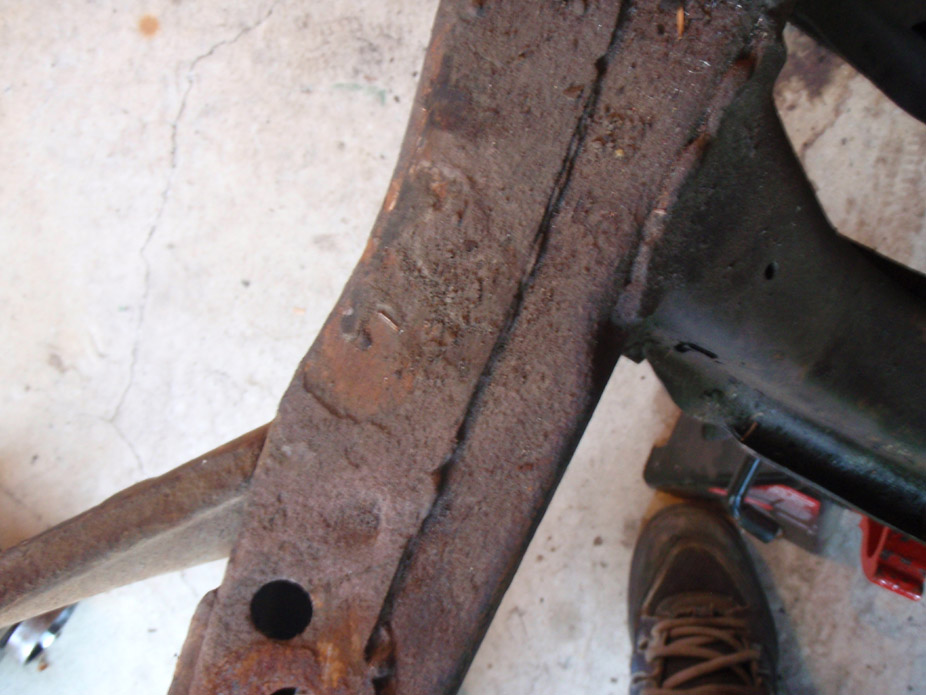
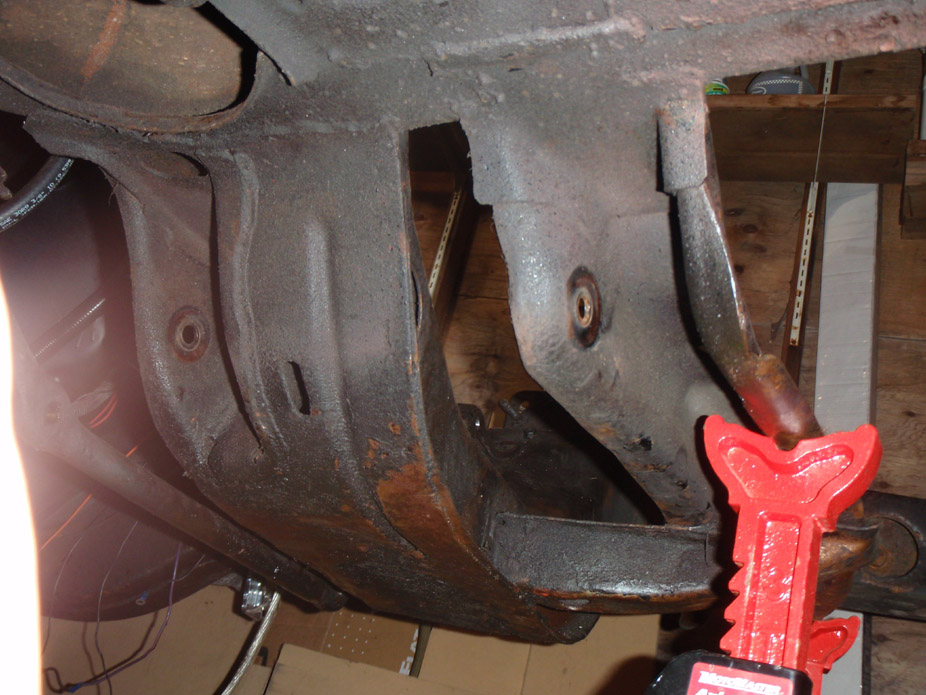
Got subframe off...
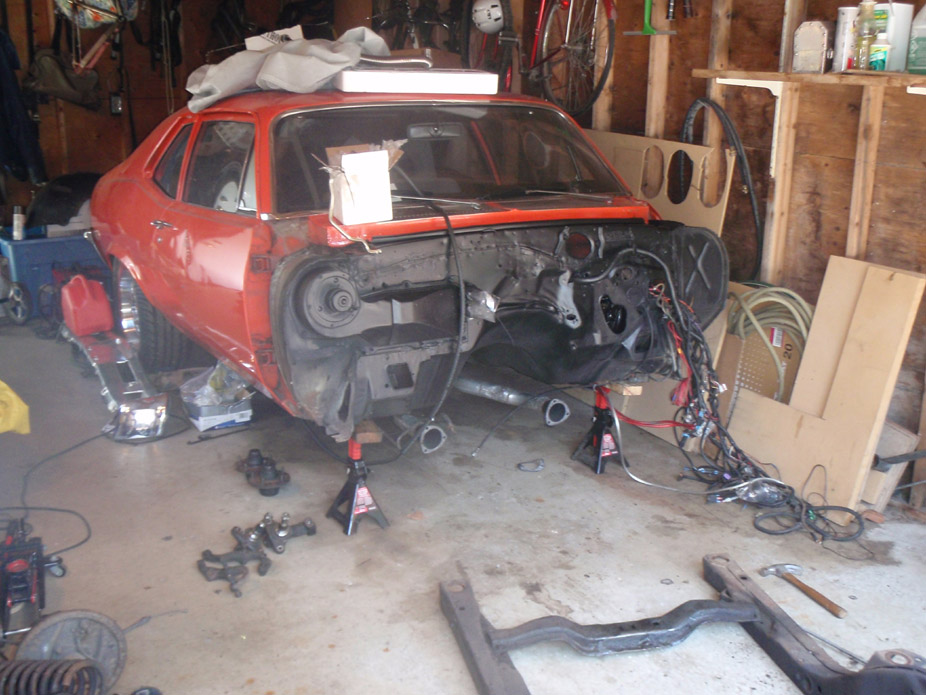
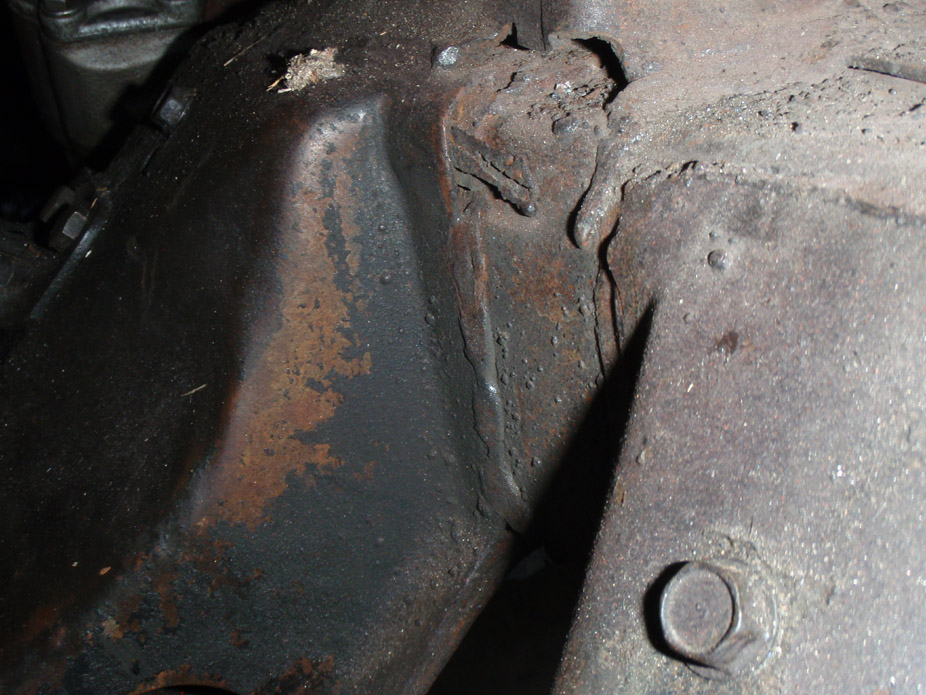
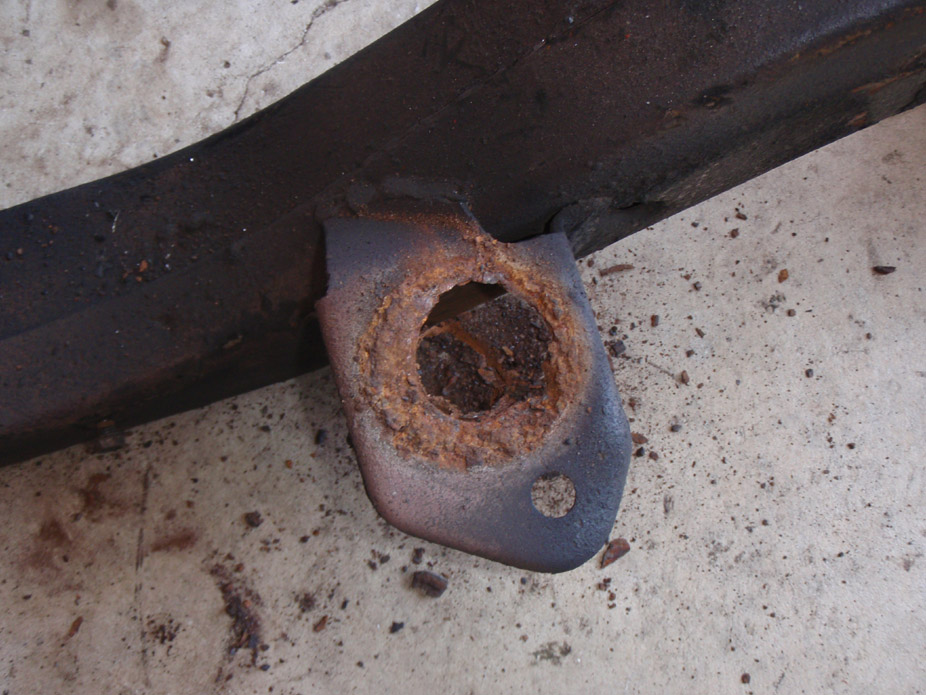
Guess it's a good thing I removed the subframe, and have solid body mounts!
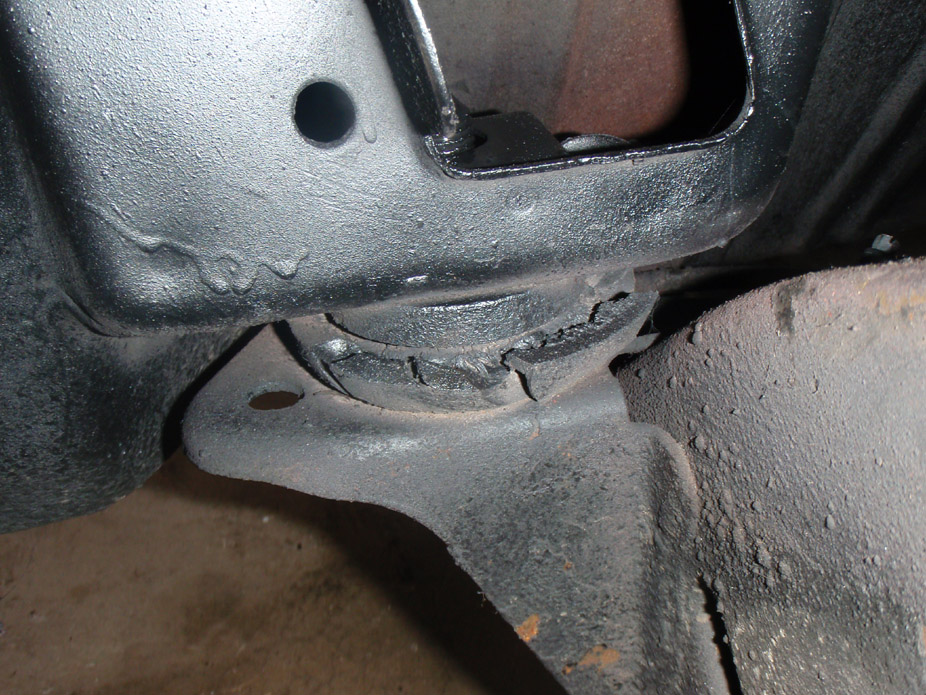
Nooooo... well I guess it's good that only one mount went to **** over 37 years. One more thing on the subframe to fix/weld up...
Before shot... bare drum spindles, took so long to remove everything off them!
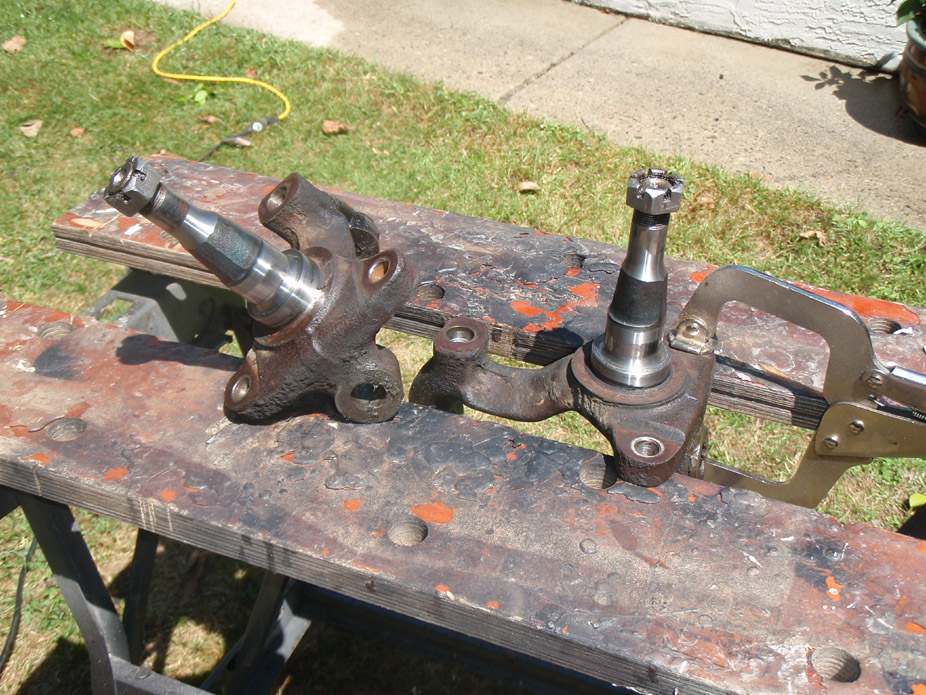
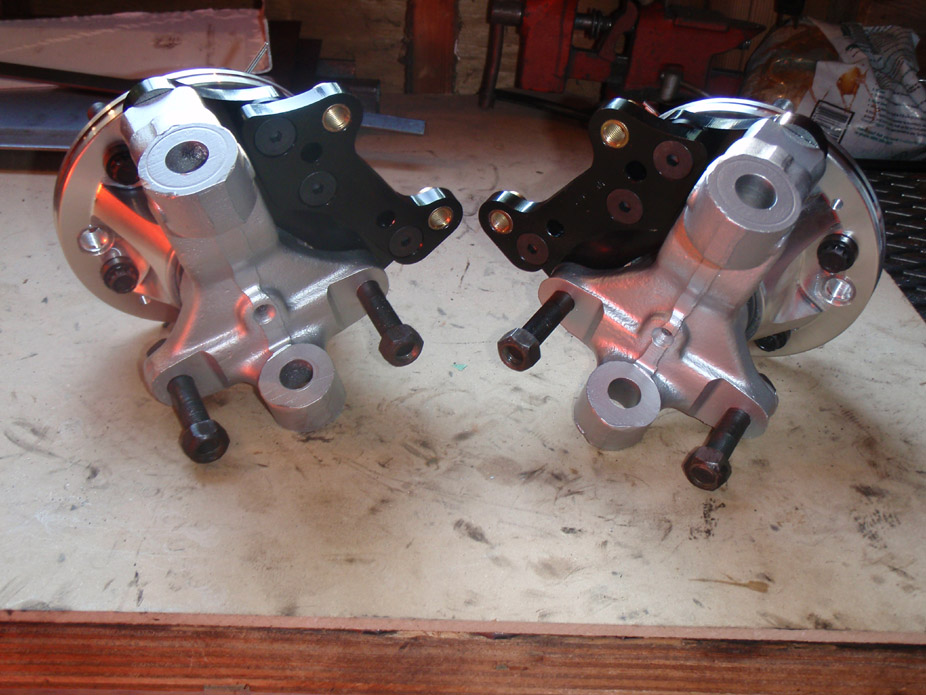
After shot (they be purdy!)...
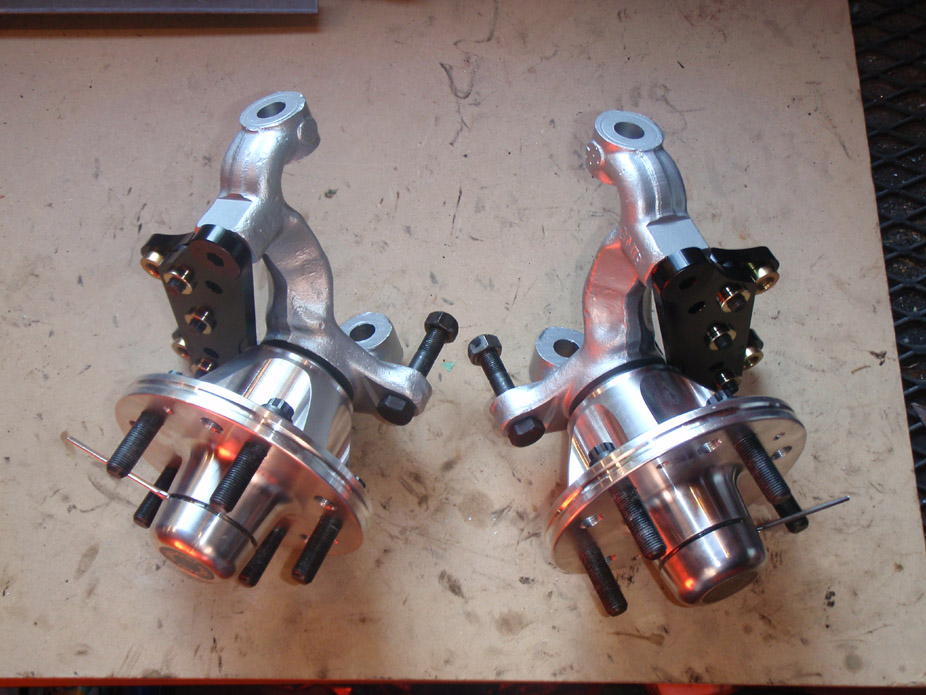
Needed longer studs...

Got subframe off...
Guess it's a good thing I removed the subframe, and have solid body mounts!
Nooooo... well I guess it's good that only one mount went to **** over 37 years. One more thing on the subframe to fix/weld up...
Before shot... bare drum spindles, took so long to remove everything off them!
After shot (they be purdy!)...
Needed longer studs...
Last edited by frojoe; 07-08-2009 at 11:28 PM.