

My take on Home-Made Ram Air.
 05-10-2008, 02:31 AM
#1
This is a mod that I have been meaning to do for a while, to help my car's top-end. It gets out of the hole okay, but is always slower through the big-end.
I got the idea from chrs1313 here.
This is not a write-up per se, but is just showing you how I did it. This mod requires a little patience, and willingness to possibly screw something up.
Here are the supplies I used:
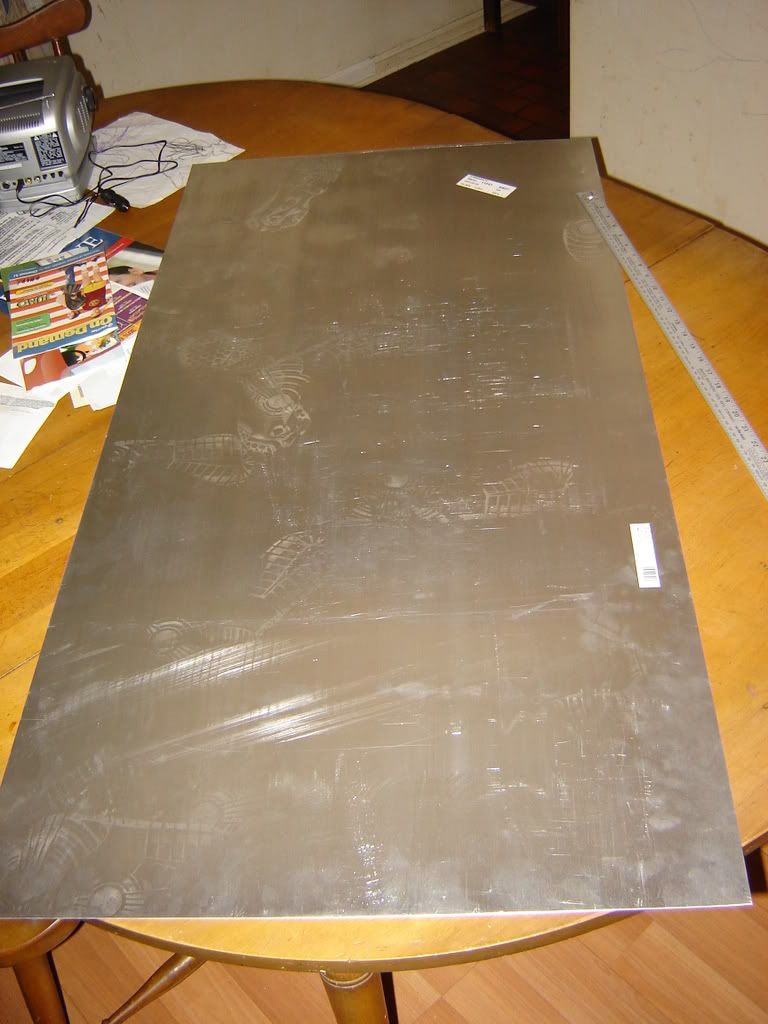
24x48" .025" sheet of aluminum
96" 1/16" thick 3/4" wide aluminum corner trim
Rivet Gun
1/8" aluminum rivets (box of 100)
Aviation snips
Drill, with 1/8" and 3/8" bits
Dremel Tool
Ratchet, with 8mm and 10mm sockets
Marking tool (Sharpie, charcoal pencil, etc...)
My car also has no A/C condensor, since I removed the A/C. It also already had the "Free Ram Air Mod" where you cut out the lower part of the airbox. I do plan to fully seal the intake with clear silicone later, but that's not a priority right now. The bumper support is also out right now. It could be reinstalled easily with minor trimming.
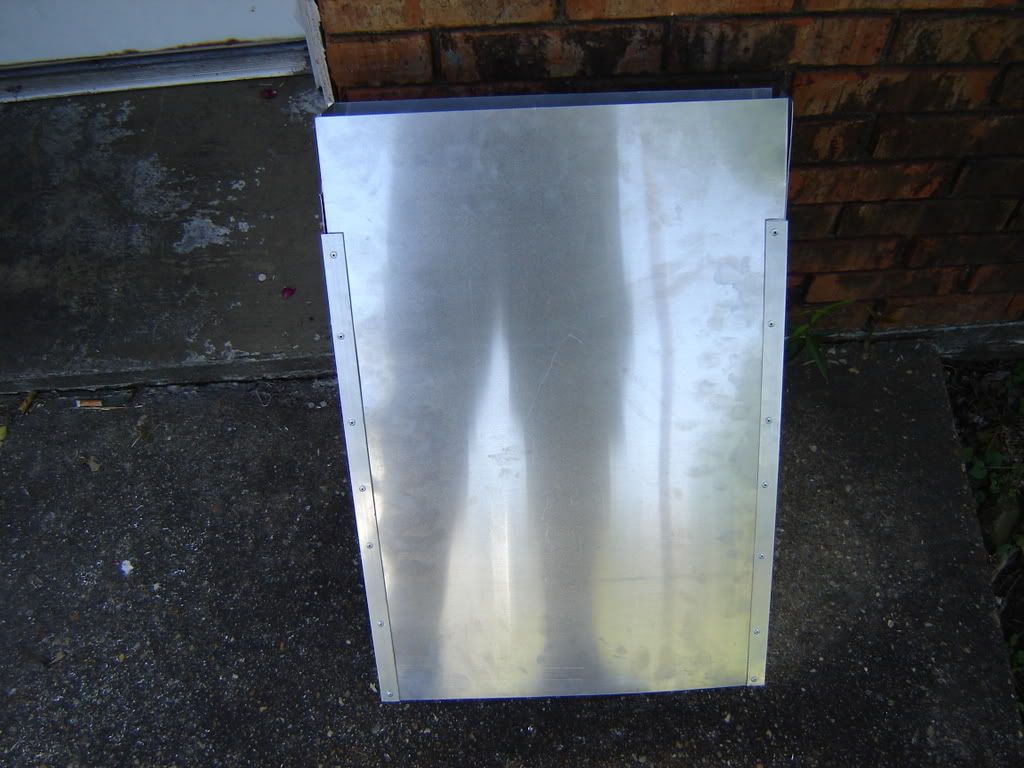
Here's what I started out with, the aluminum itself:
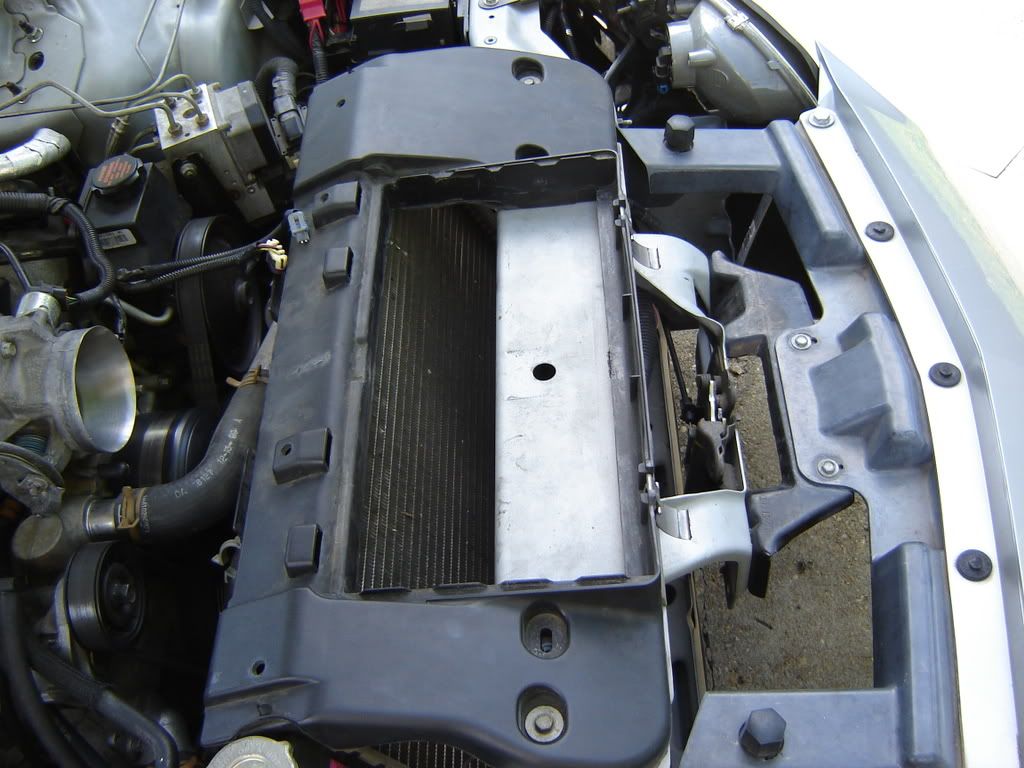
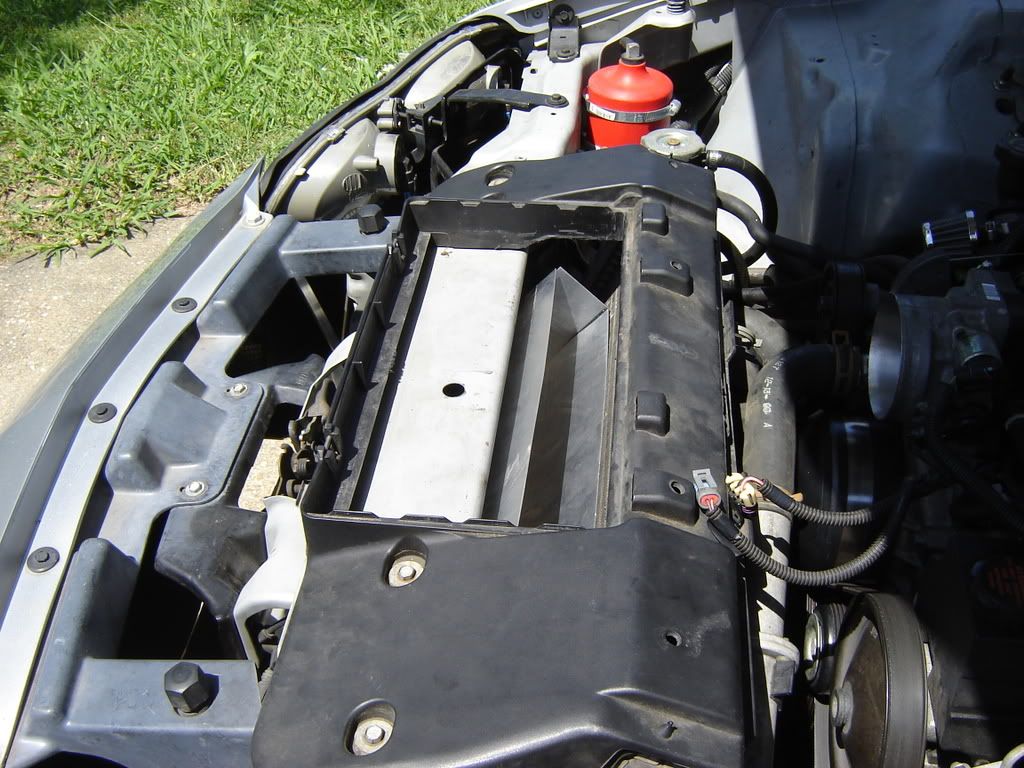
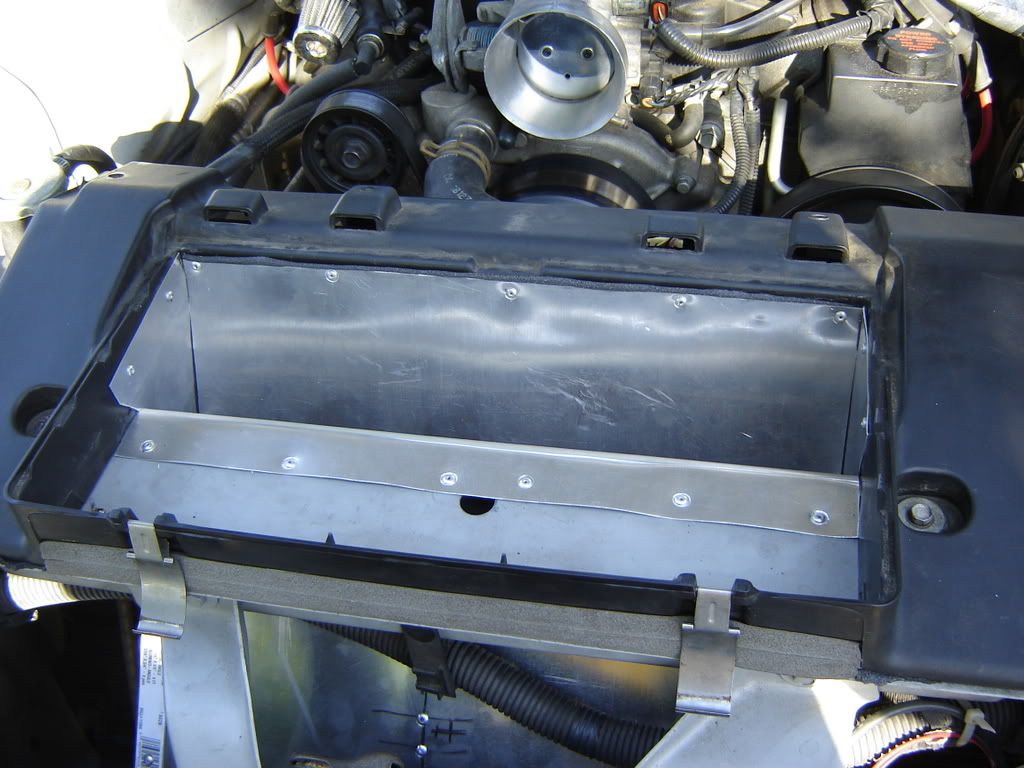
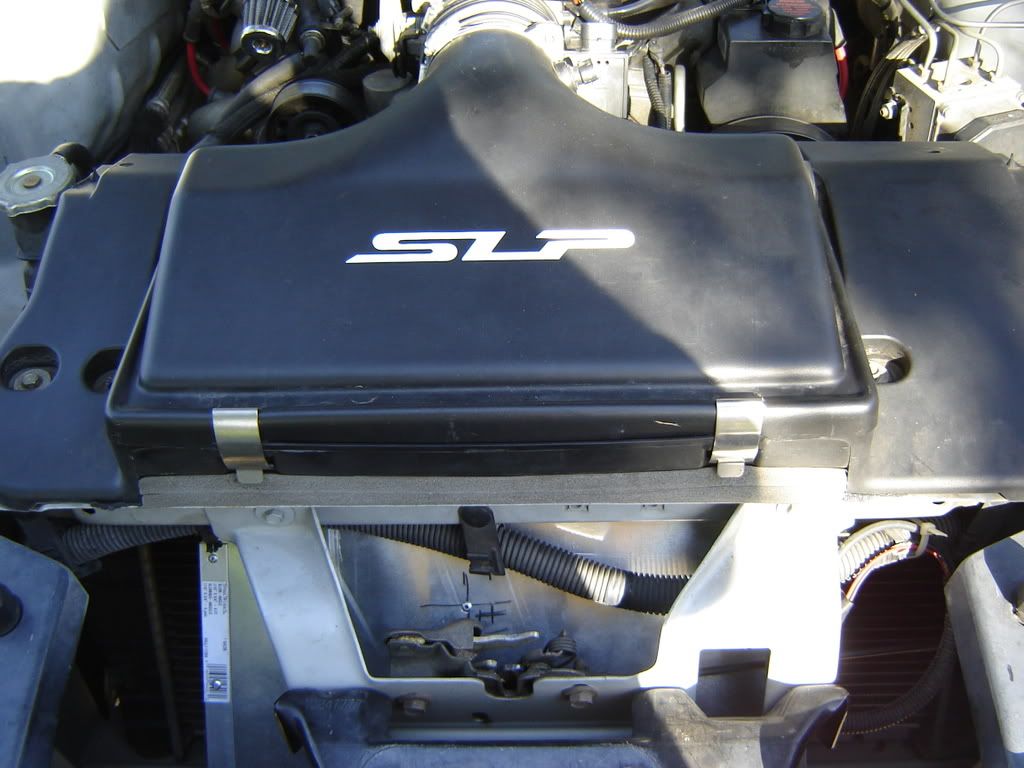
Here is what the lower airbox looked like, before the ram-air, minus the lid, filter, MAF and such.
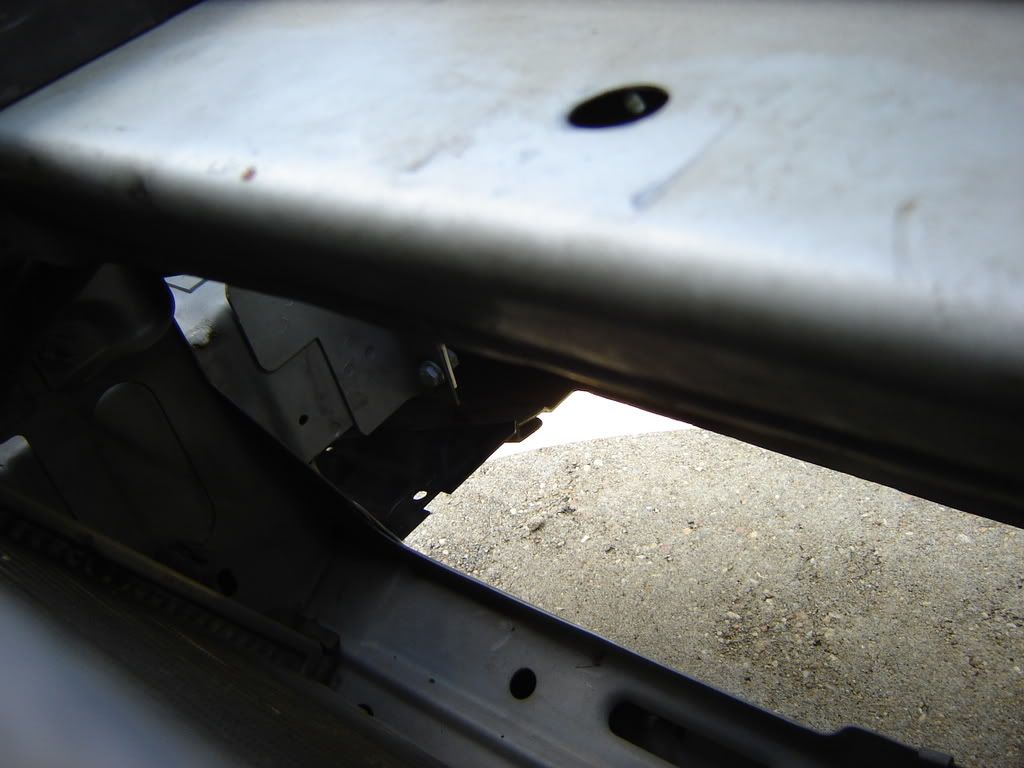
I had previously taken a wide set of vise-grips to the flange under the radiator support. This gives a little more clearance, without having to cut the support. I had also previously cut out the "V" shaped piece that is connected to the lower radiator support below the hood latch. I haven't seen any negative effects from removing this.
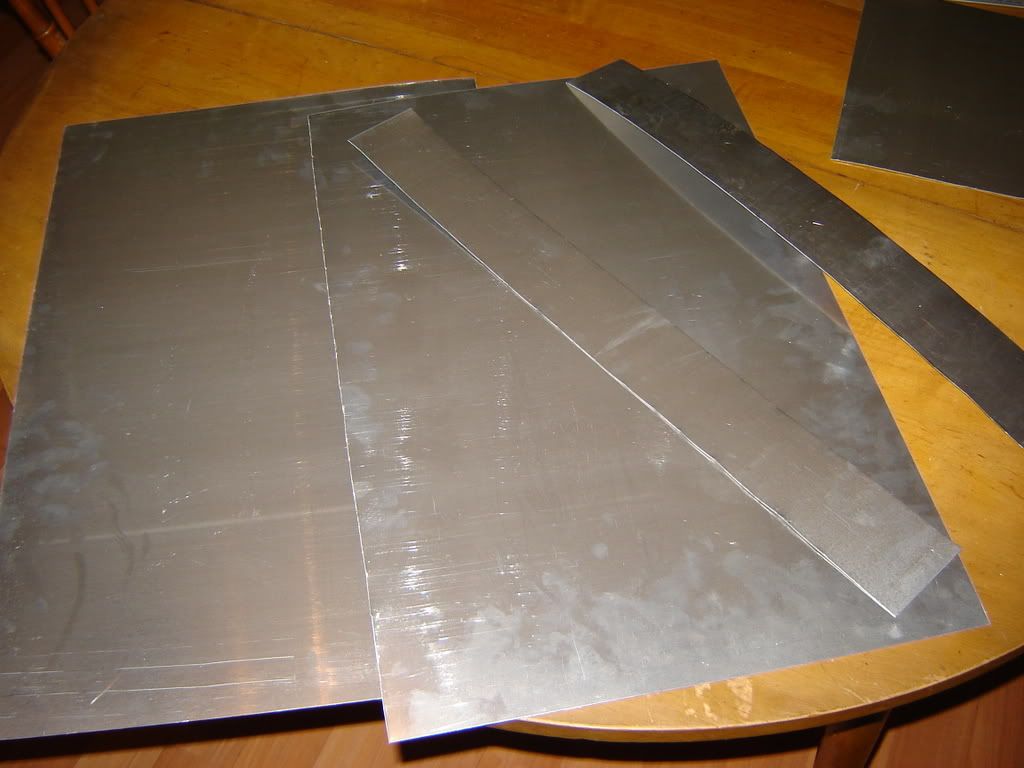
Here are all four pieces, cut and ready to go.
Measurements are:
24"L x 15.625"W for the main pieces
24"L x 2.75"W for the side pieces
I also cut the corner trim into 20" long pieces.
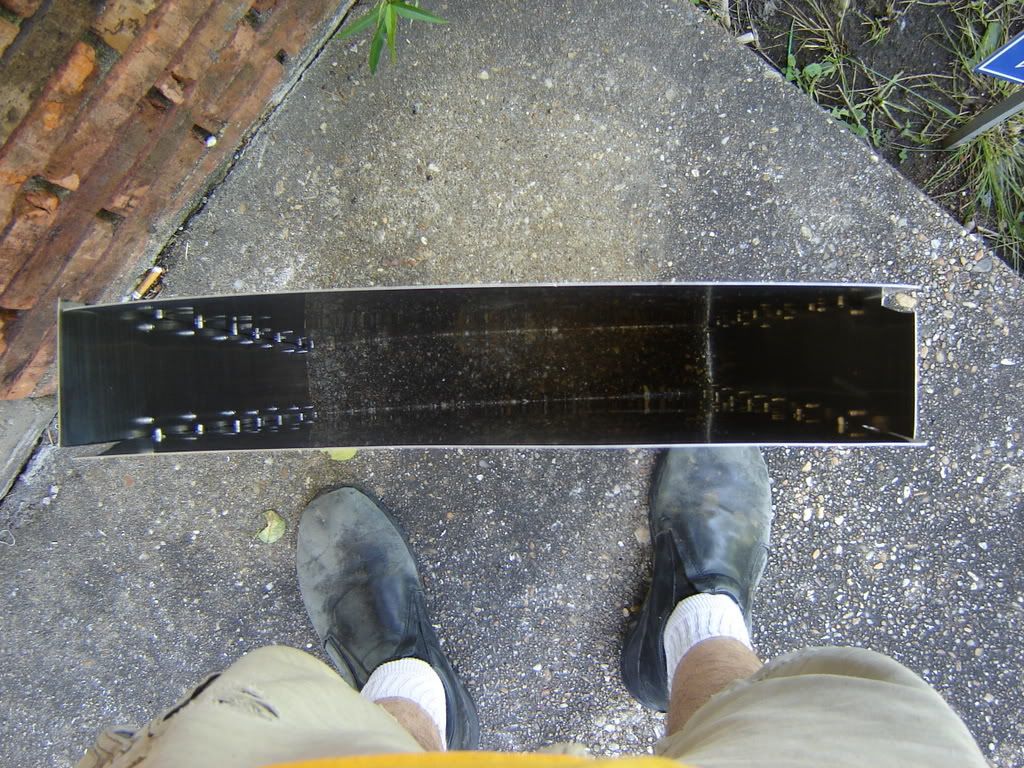
If you do this, be careful around the edges. Aluminum can cut you just as good as a razor blade.
After much drilling and riveting, here is the main scoop peeking out from under the lower airbox. However, I needed to extend it to be able to mount it. I added a 5" piece to the back, and a 3" piece to the front.
Completed scoop:
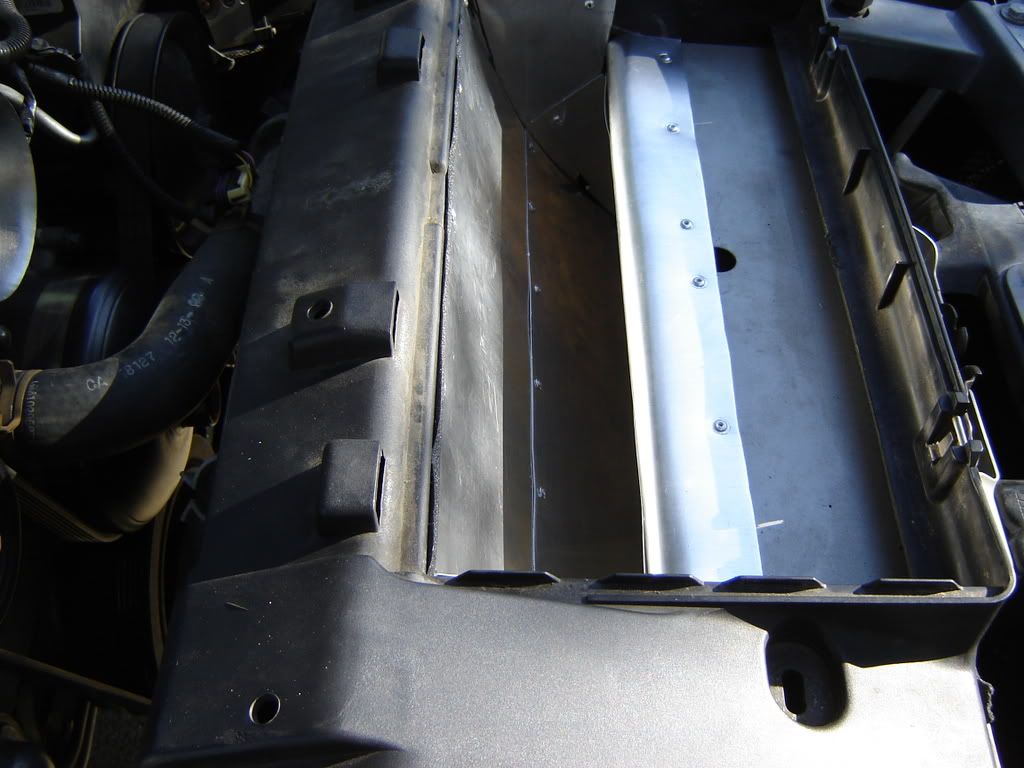
View inside the completed scoop:
Also made two braces to go inside the scoop to help stiffen it at speed, just two little "L's"

Scoop with extensions added on:

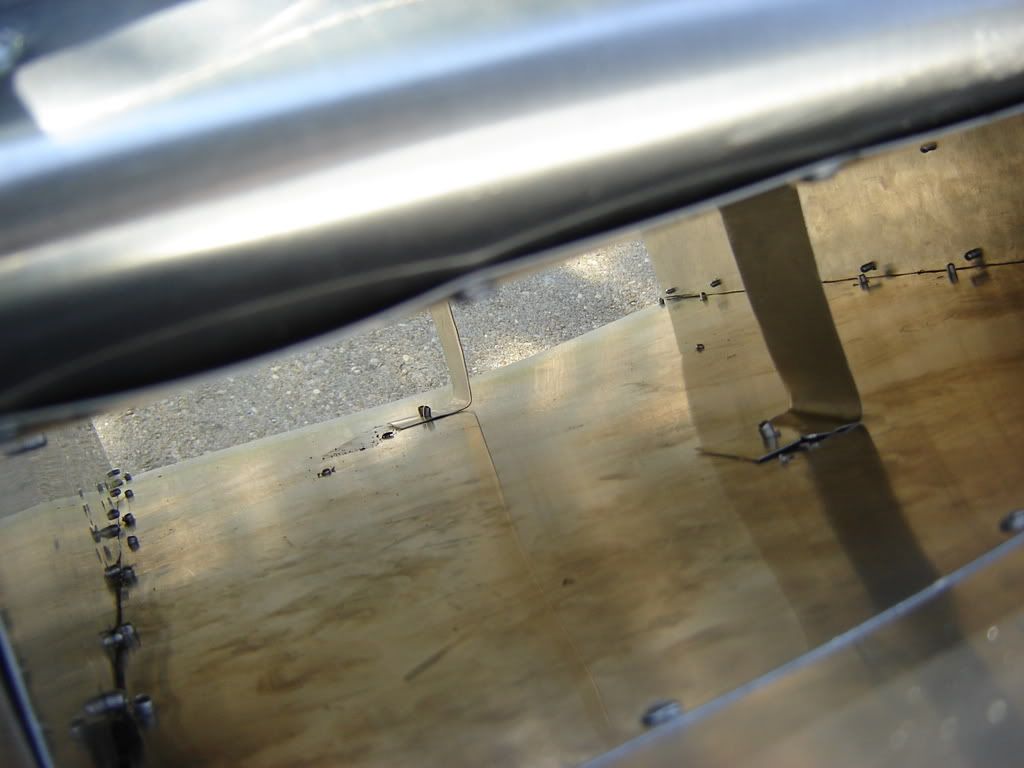
Inside view with braces:

Sealed the lower airbox to the car with foam tape. I also sealed where the two extensions were to be mounted.
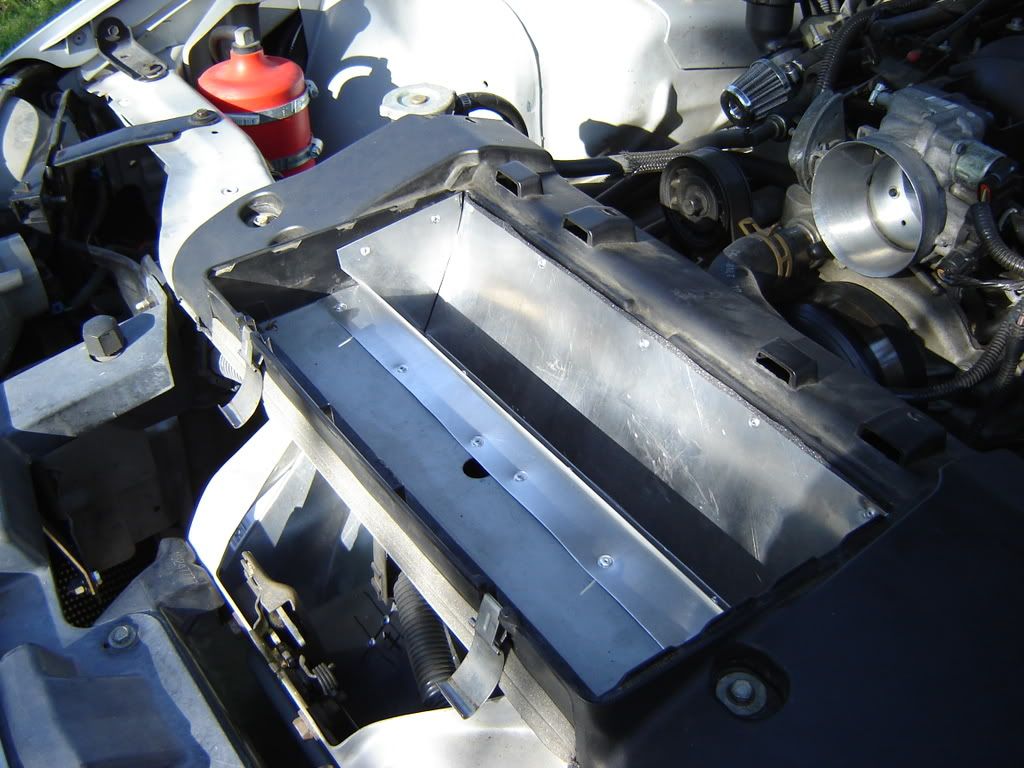
Mounted the intake to the car, via the rear and forward extensions:
Two more views of the intake mounted:
Inside the scoop, looking towards the ground:
Brace I made to keep the intake stable, and give the radiator some room to still get air. I have noticed no change in temperature since the addition of this intake. The brace connects using the chin spoiler bolts.

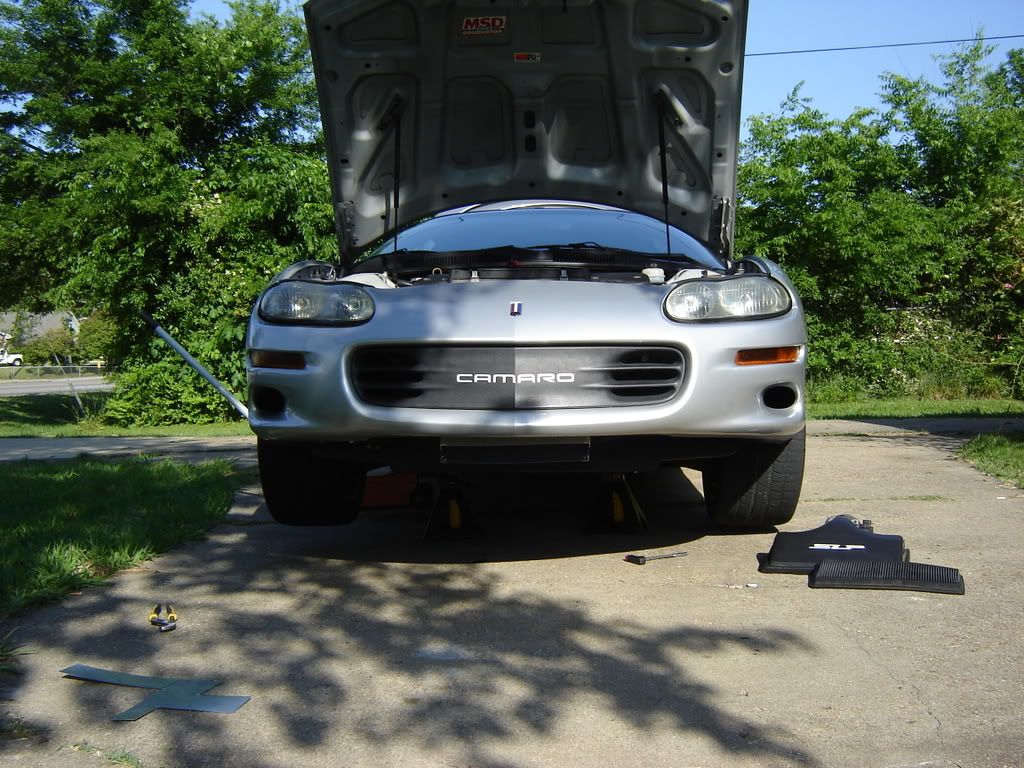
View from the front of the car, ready to suck up cats, dogs, and small birds.
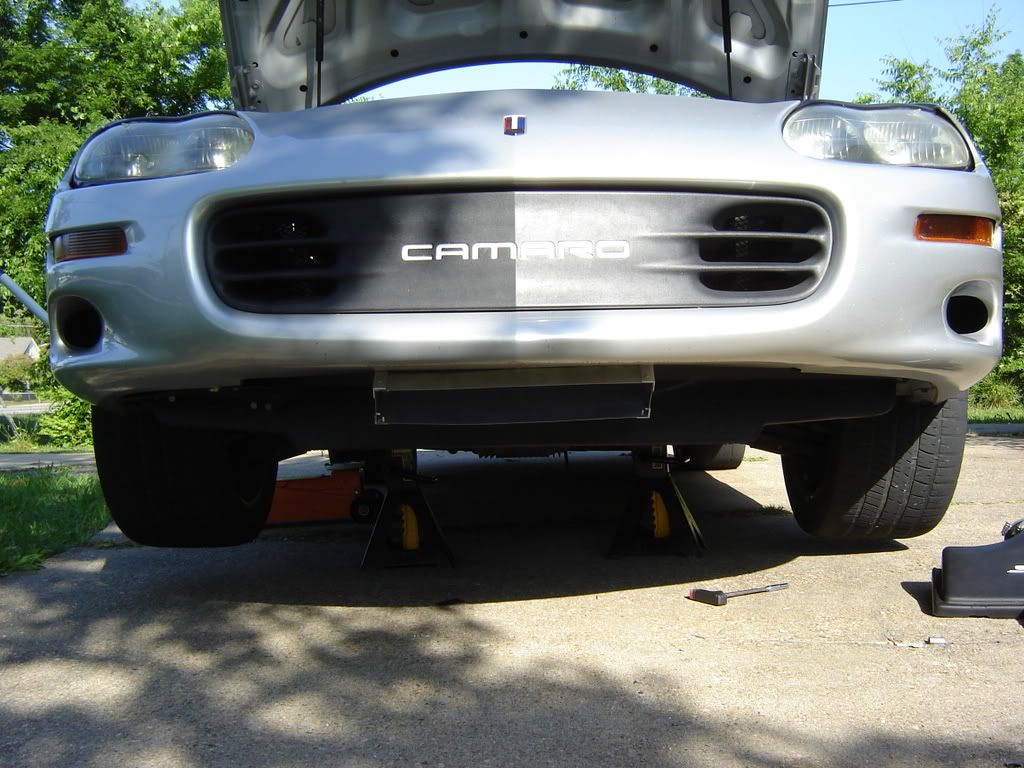
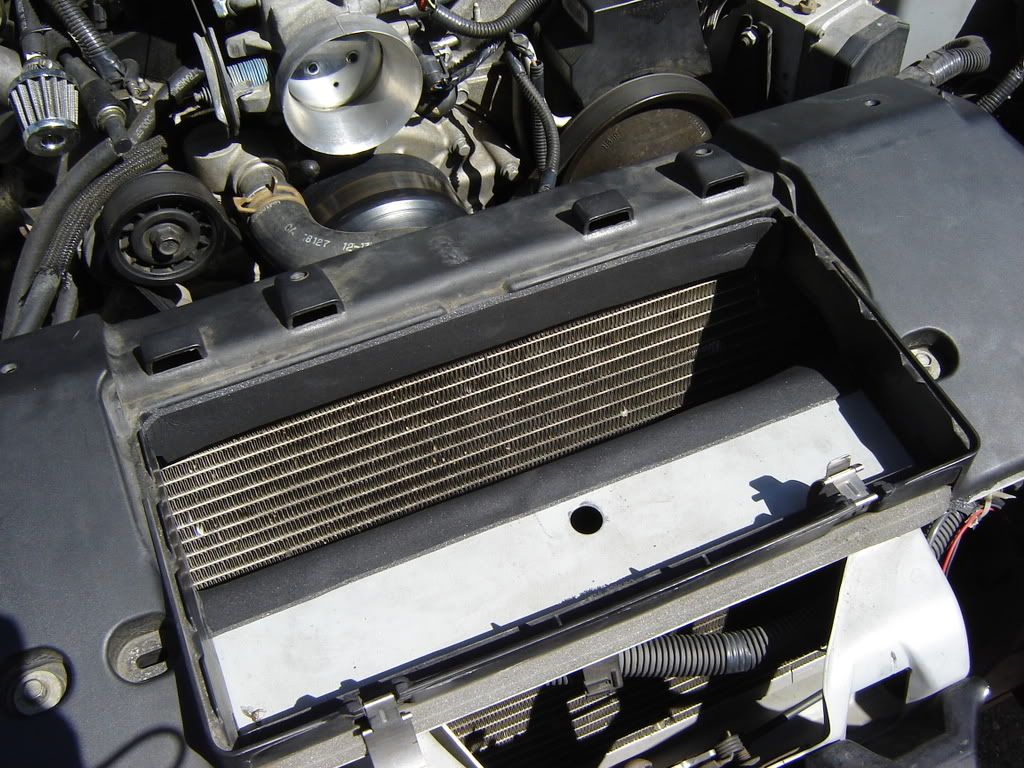
The view from under the hood.
All in all, I am happy with this mod, it made a noticeable difference in throttle response and upper rpm pull once moving. I also got almost 112 mph at the track tonight, in a 2180 DA. Normally the DA must be around 500 for me to trap that high. I should have trapped around low 110's in that air. I expect to see nothing but good results once the intake is sealed and some good air comes around.
This mod cost me around $70, and took about 4 1/2 hours of my time. I consider it time and money well spent.
I got the idea from chrs1313 here.
This is not a write-up per se, but is just showing you how I did it. This mod requires a little patience, and willingness to possibly screw something up.
Here are the supplies I used:
24x48" .025" sheet of aluminum
96" 1/16" thick 3/4" wide aluminum corner trim
Rivet Gun
1/8" aluminum rivets (box of 100)
Aviation snips
Drill, with 1/8" and 3/8" bits
Dremel Tool
Ratchet, with 8mm and 10mm sockets
Marking tool (Sharpie, charcoal pencil, etc...)
My car also has no A/C condensor, since I removed the A/C. It also already had the "Free Ram Air Mod" where you cut out the lower part of the airbox. I do plan to fully seal the intake with clear silicone later, but that's not a priority right now. The bumper support is also out right now. It could be reinstalled easily with minor trimming.
Here's what I started out with, the aluminum itself:
Here is what the lower airbox looked like, before the ram-air, minus the lid, filter, MAF and such.
I had previously taken a wide set of vise-grips to the flange under the radiator support. This gives a little more clearance, without having to cut the support. I had also previously cut out the "V" shaped piece that is connected to the lower radiator support below the hood latch. I haven't seen any negative effects from removing this.
Here are all four pieces, cut and ready to go.
Measurements are:
24"L x 15.625"W for the main pieces
24"L x 2.75"W for the side pieces
I also cut the corner trim into 20" long pieces.
If you do this, be careful around the edges. Aluminum can cut you just as good as a razor blade.
After much drilling and riveting, here is the main scoop peeking out from under the lower airbox. However, I needed to extend it to be able to mount it. I added a 5" piece to the back, and a 3" piece to the front.
Completed scoop:
View inside the completed scoop:
Also made two braces to go inside the scoop to help stiffen it at speed, just two little "L's"
Scoop with extensions added on:
Inside view with braces:
Sealed the lower airbox to the car with foam tape. I also sealed where the two extensions were to be mounted.
Mounted the intake to the car, via the rear and forward extensions:
Two more views of the intake mounted:
Inside the scoop, looking towards the ground:
Brace I made to keep the intake stable, and give the radiator some room to still get air. I have noticed no change in temperature since the addition of this intake. The brace connects using the chin spoiler bolts.
View from the front of the car, ready to suck up cats, dogs, and small birds.
The view from under the hood.
All in all, I am happy with this mod, it made a noticeable difference in throttle response and upper rpm pull once moving. I also got almost 112 mph at the track tonight, in a 2180 DA. Normally the DA must be around 500 for me to trap that high. I should have trapped around low 110's in that air. I expect to see nothing but good results once the intake is sealed and some good air comes around.
This mod cost me around $70, and took about 4 1/2 hours of my time. I consider it time and money well spent.


 05-10-2008, 06:47 AM
#3

Looks good!!!! enjoy your added top end horsepower.Chris really amazed me(his dad) when he made his RAM AIR and ran 11.7x at like 116mph.I really thought he would be lucky to run a 11.90 on that day.We made one for my car the next week and sold my FTRA.
05-10-2008, 08:24 AM
#4
8 Second Club
iTrader: (9)
Join Date: Oct 2005
Location: Ellicott City,MD
Posts: 1,085
Likes: 0
Received 0 Likes
on
0 Posts

Take the baffles out. I was fortunate enough to be able to get my hands on a BG ram air kit and that works amazing. But just get some foam take and make a border around the hole in your hood to help seal it to the air box.
 05-10-2008, 01:05 PM
#6
Next year it won't matter anyway the air's not gonna be coming into the motor from that direction if all goes as planned
Trending Topics
 05-10-2008, 07:16 PM
#12
What little I needed to bend, I did by hand. Otherwise I just cut, drilled, and riveted. I bought the aluminum at the local Lowe's Hardware.
It wouldn't be a problem to do this on a car that still had the condensor, just a little more measuring, and you'd have a smaller opening.
Originally Posted by SPEEDYws6
I need to do this badly, but I still have AC so a little cutting will be needed.
05-13-2008, 10:56 PM
#14
I'll have concrete numbers tomorrow, but I can already tell a difference in gas mileage by the gauge. I'm sitting on a 1/4 tank, my tripometer is at 160, whereas it would normally be at 130. I will report tomorrow night with some mileage numbers after I fill my tank.
I'm enjoying the added throttle response. Tip-in is a lot more crisp, especially at highway speeds. I only expect it to get better after today, since I sealed all the gaps up with clear silicone.
I'm enjoying the added throttle response. Tip-in is a lot more crisp, especially at highway speeds. I only expect it to get better after today, since I sealed all the gaps up with clear silicone.
05-14-2008, 12:12 AM
#15
TECH Addict
iTrader: (12)

Join Date: Apr 2007
Location: carol stream illinois
Posts: 2,160
Likes: 0
Received 0 Likes
on
0 Posts
looks good i was looking into do something similar but its going to be more or so to get air to the front mount intercooler to avoid having to cut up the bumper cover.
05-14-2008, 04:53 PM
#16

Looks good bud i like it alot...especially the brace u made for the radiator to still breath...u will definitely gain at least 15hp with that over nothing at all...I can put money on it...
The only thing that you might wanna do is just cut 2 slits(yellow) into the bottom of the top piece that just peaks out from under the car...
I would cut it back to about where the plasic bumper is and just bend it flush(red), since it will be hard to cut all the way along the flat portion...
let me see if i can get a paint picture to show you...should add even more flow from the air coming off the nose...
LOOKS GREAT MAN...now just watch out for those big curbs and steep declines...trust me i know haha ...mine has seen better days I need to make a new one...
Thanks for the PM too i have been busy with work...
Now go and break my SI E.T.
The only thing that you might wanna do is just cut 2 slits(yellow) into the bottom of the top piece that just peaks out from under the car...
I would cut it back to about where the plasic bumper is and just bend it flush(red), since it will be hard to cut all the way along the flat portion...
let me see if i can get a paint picture to show you...should add even more flow from the air coming off the nose...
LOOKS GREAT MAN...now just watch out for those big curbs and steep declines...trust me i know haha
...mine has seen better days I need to make a new one...Thanks for the PM too i have been busy with work...
Now go and break my SI E.T.
Last edited by chrs1313; 05-14-2008 at 04:58 PM.
05-14-2008, 08:01 PM
#17
Looks good bud i like it alot...especially the brace u made for the radiator to still breath...u will definitely gain at least 15hp with that over nothing at all...I can put money on it...
The only thing that you might wanna do is just cut 2 slits(yellow) into the bottom of the top piece that just peaks out from under the car...
I would cut it back to about where the plasic bumper is and just bend it flush(red), since it will be hard to cut all the way along the flat portion...
The only thing that you might wanna do is just cut 2 slits(yellow) into the bottom of the top piece that just peaks out from under the car...
I would cut it back to about where the plasic bumper is and just bend it flush(red), since it will be hard to cut all the way along the flat portion...
LOOKS GREAT MAN...now just watch out for those big curbs and steep declines...trust me i know haha ...mine has seen better days I need to make a new one...
Thanks for the PM too i have been busy with work...
...mine has seen better days I need to make a new one...Thanks for the PM too i have been busy with work...
Now go and break my SI E.T.
If I don't get higher on the list, no biggie, the bottle is going on in October/November.
 05-14-2008, 08:08 PM
#18
Gas mileage results are in!
I checked mileage this morning, and it was 15.26 mpg
This is above my 3 month long-term average of 15.14 mpg
But wait, it gets better.
I buy gas on Wednesday, I installed the ram-air on Friday. I also made 5 passes at the drag strip on Friday.
Now normally after a trip to the track, my mpg the following Wed is between 13.8 mpg and 14.2 mpg
So you can see that I gained at least 1 mpg from this mod. That's an extra $.26 per gallon off (for my car)
This was 90% city driving, on my daily route, nothing changed from usual.
I'm taking a trip to Florida this weekend, will report back with highway mpg results sometime Monday.
05-14-2008, 08:35 PM
#20
Stock it only got 17-18 in city driving. I know guys who would kill to get my mpg.