Datsun 280z Turbo Build - 5.3 / T7875 / Magnum T56 - Video on page 12!
 04-09-2014, 02:43 PM
#141

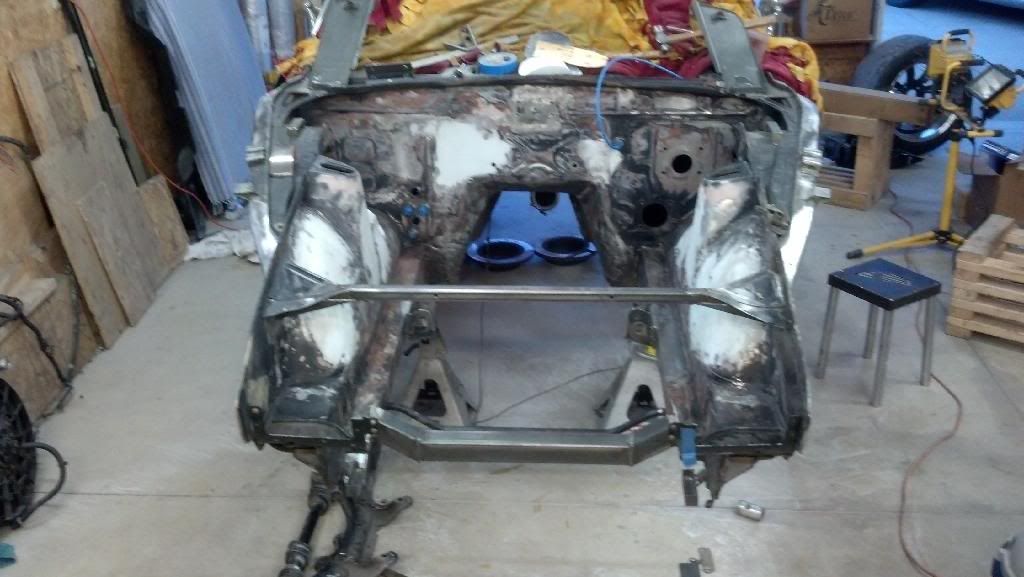
Theres a reason these cars are light... there's nothin to em!
If you've ever put an F body on stands behind the wheels with a Jack under the K member, you know how much they sag. Take that by roughly a factor of 2, and thats what my front end used to do. Its definitely better with the new rails, but whats a couple more lil tubes gonna hurt?! haha.
I look forward to seeing that RX7 if I ever make it to wichita this season
 04-09-2014, 03:04 PM
#142
Lol have you ever jacked up an S30?
Theres a reason these cars are light... there's nothin to em!
If you've ever put an F body on stands behind the wheels with a Jack under the K member, you know how much they sag. Take that by roughly a factor of 2, and thats what my front end used to do. Its definitely better with the new rails, but whats a couple more lil tubes gonna hurt?! haha.
I look forward to seeing that RX7 if I ever make it to wichita this season

From what I've seen if you properly tie the cage into the front rails and shock towers it's pretty darn rigid. A little extra never hurts though!
Come on over... beers on me!

Last edited by Forcefed86; 04-09-2014 at 10:19 PM.
04-14-2014, 07:59 AM
#144
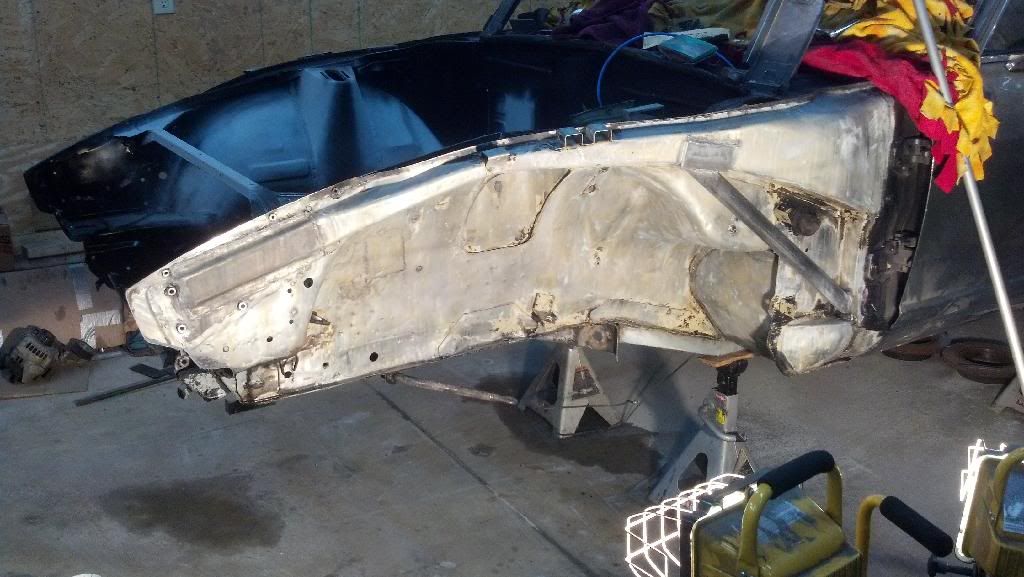
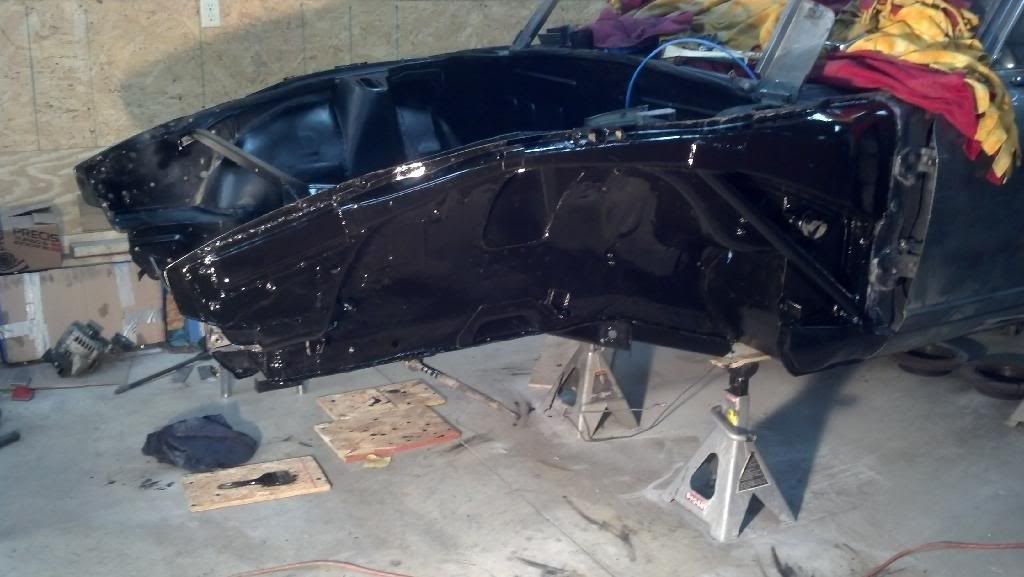
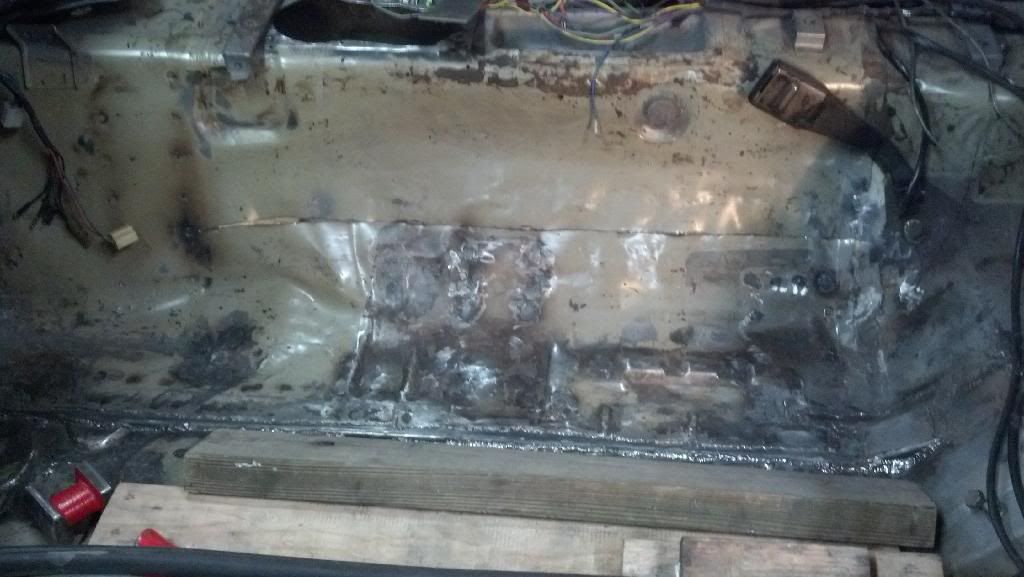
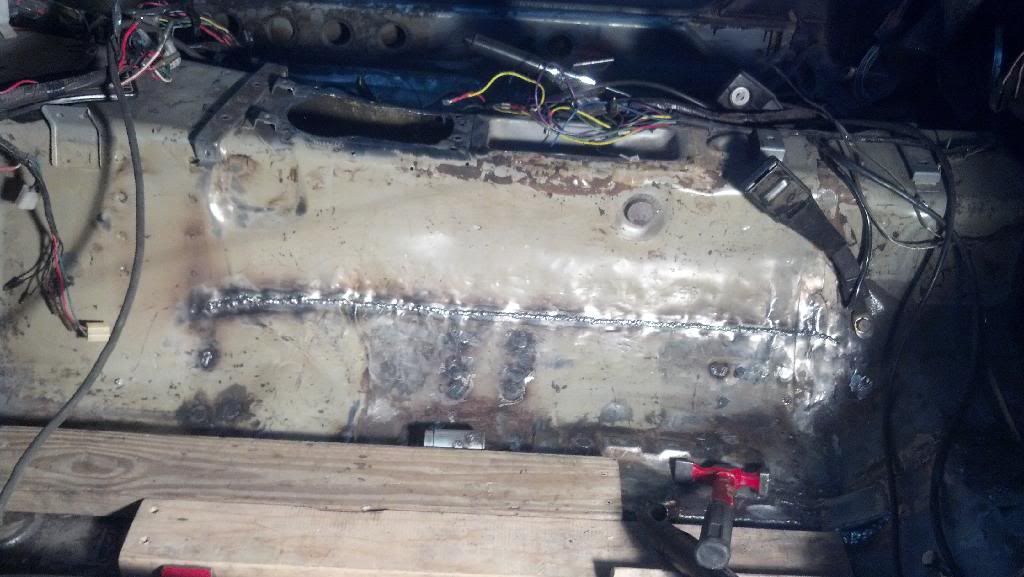
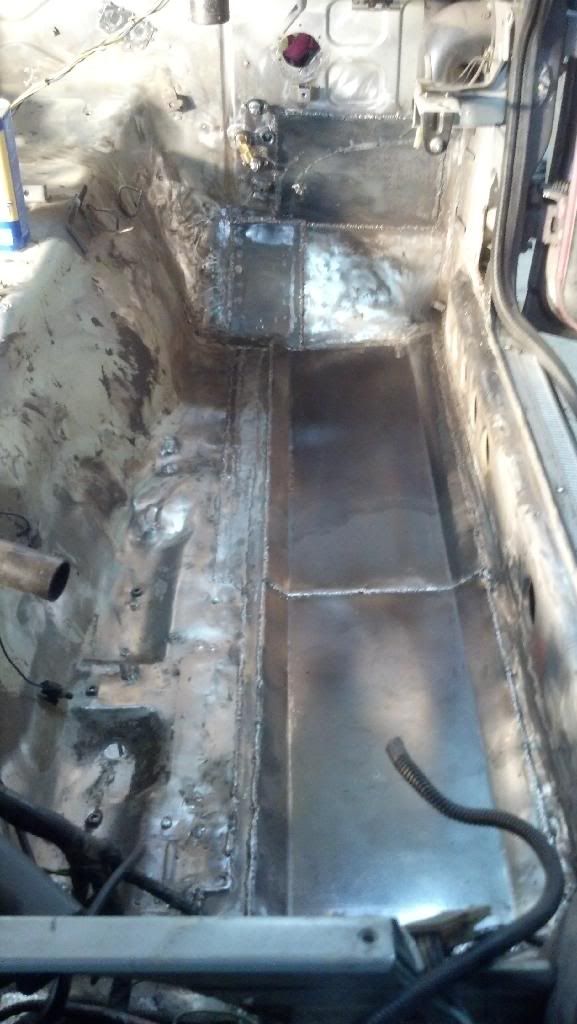
Finished up the engine bay body work this weekend. Little bit of mud, lotta bit of sanding.
First coat of paint is on.
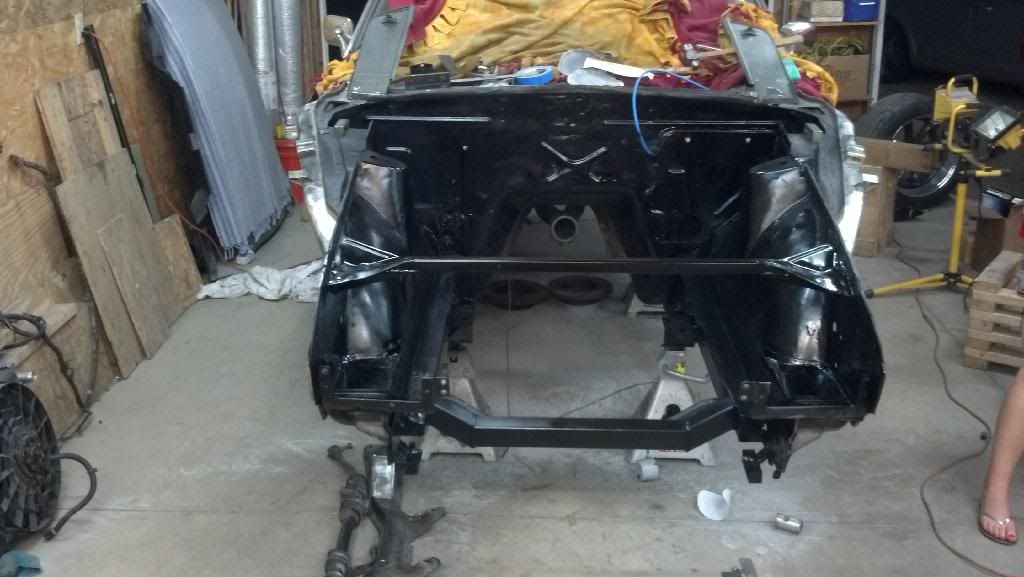
Also got the inner fenders prepped, cleaned, etched, and washed. Whew. Ready for POR 15 tonight. (figured I'd give it a day to fully dry)
First coat of paint is on.
Also got the inner fenders prepped, cleaned, etched, and washed. Whew. Ready for POR 15 tonight. (figured I'd give it a day to fully dry)
04-14-2014, 10:57 AM
#146
Launching!
iTrader: (1)

Join Date: Oct 2013
Location: Browns Valley, CA
Posts: 285
Likes: 0
Received 0 Likes
on
0 Posts
I like how you did the front of the frame. I've been trying to figure out if I want to move the motor forward and upward to make the exhaust easier. Truck manifold would save some money. My balancer sits back behind the steering shaft and a bit below.
 04-23-2014, 09:40 AM
#150
Work has been really busy lately, and I was travelling last weekend for the holiday so progress has been slow.
I had a friend clean my heads in a parts washer at his work, then I started to clean them up some more.
You can see here how the casting was still pretty dirty after being washed. I used a nylon cup brush on them (not the decks) and it really cleaned up nice.
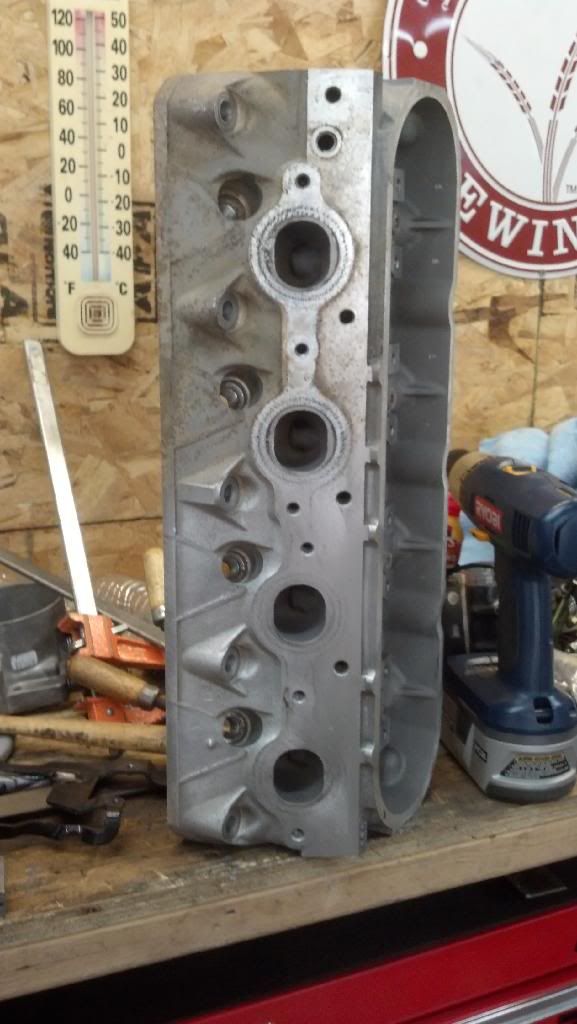
Also cleaned the valves using a scotch brite pad.
Before / after
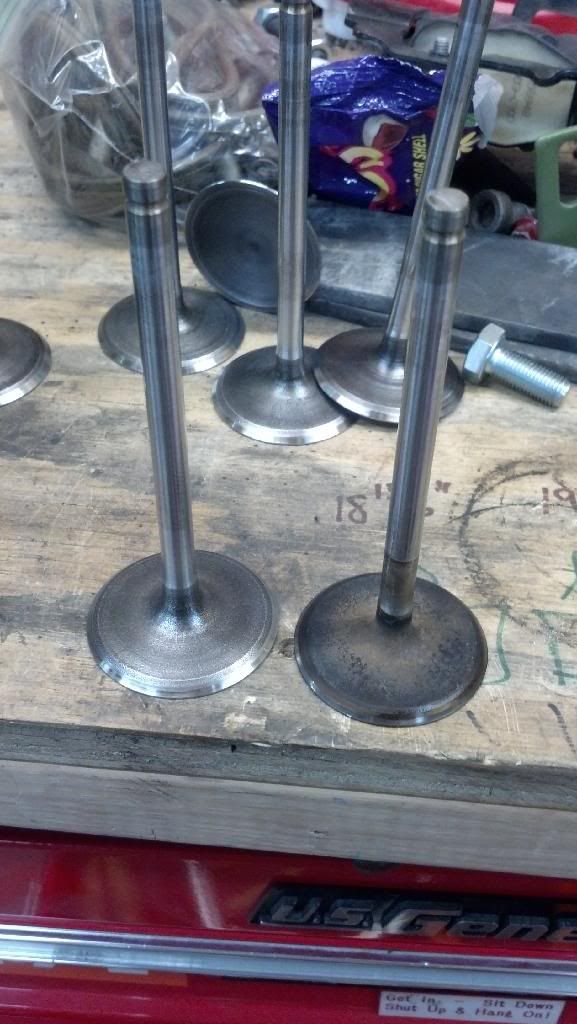
They all cleaned up pretty nice.
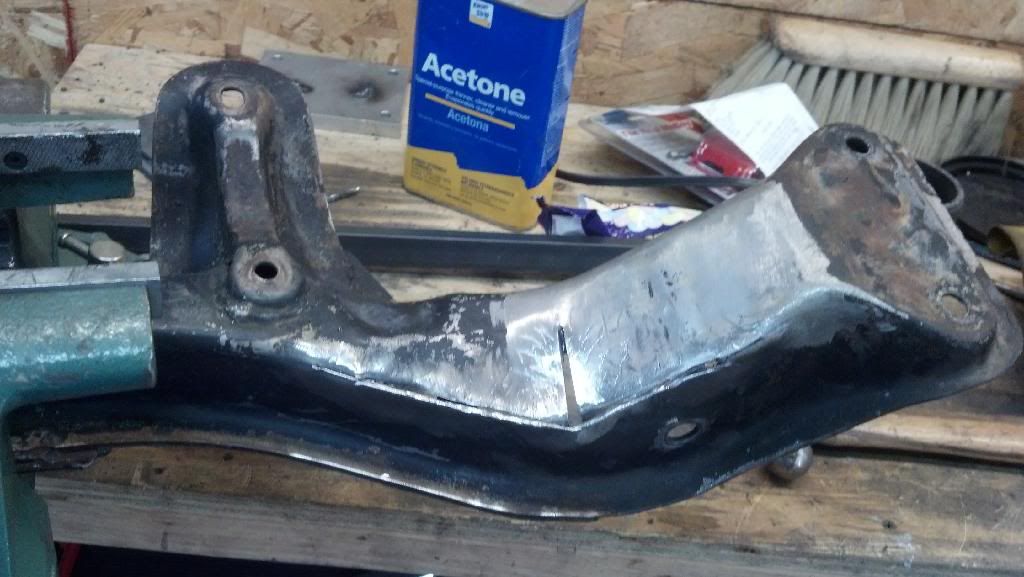
I also POR-15'd my engine mounts, trans mount, lower intercooler mount, and crossmember.
Cam should show up today, completing the puzzle for the 5.3. I'm hoping to get the cylinders honed and that baby together this weekend.
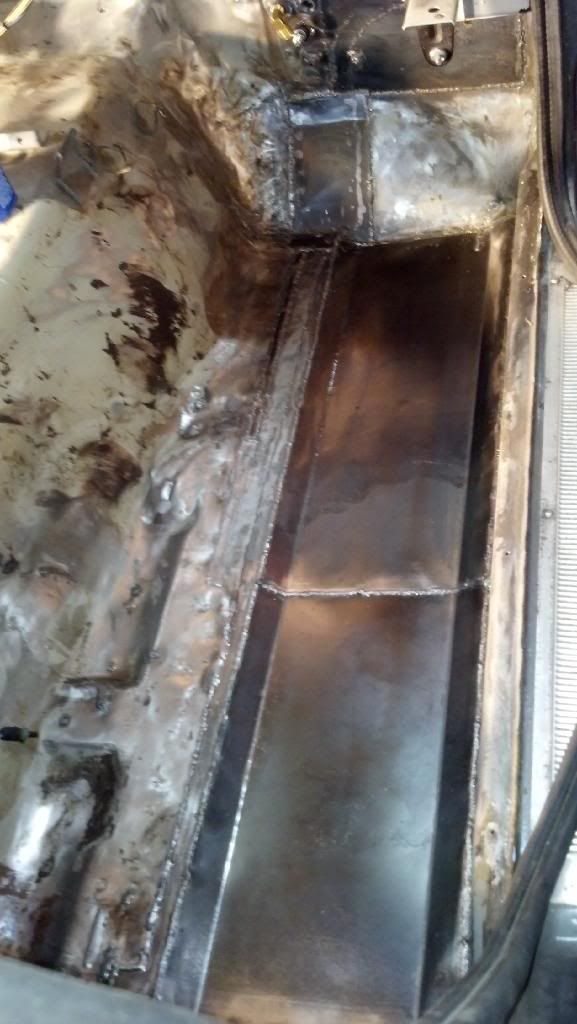
Fuel tank is at the welder getting sumped, and the IC pipes are getting welded.
I'm hoping to get the seat brackets built sometime this week, along with a new diff mount that's a little beefier than the last one.
Driveshaft should be here at the end of next week, and hoping to go to the cage builder sometime soon...... waiting on a phone call.
I'm 90% done with the engine bay, and ready to start installing things. Just a couple areas I need to seam seal and paint!!!
Should be able to make some good progress, and possibly even be making smoke by the end of the weekend.
I had a friend clean my heads in a parts washer at his work, then I started to clean them up some more.
You can see here how the casting was still pretty dirty after being washed. I used a nylon cup brush on them (not the decks) and it really cleaned up nice.
Also cleaned the valves using a scotch brite pad.
Before / after
They all cleaned up pretty nice.
I also POR-15'd my engine mounts, trans mount, lower intercooler mount, and crossmember.
Cam should show up today, completing the puzzle for the 5.3. I'm hoping to get the cylinders honed and that baby together this weekend.
Fuel tank is at the welder getting sumped, and the IC pipes are getting welded.
I'm hoping to get the seat brackets built sometime this week, along with a new diff mount that's a little beefier than the last one.
Driveshaft should be here at the end of next week, and hoping to go to the cage builder sometime soon...... waiting on a phone call.
I'm 90% done with the engine bay, and ready to start installing things. Just a couple areas I need to seam seal and paint!!!
Should be able to make some good progress, and possibly even be making smoke by the end of the weekend.
04-24-2014, 09:28 AM
#151
PHOTO DUMP
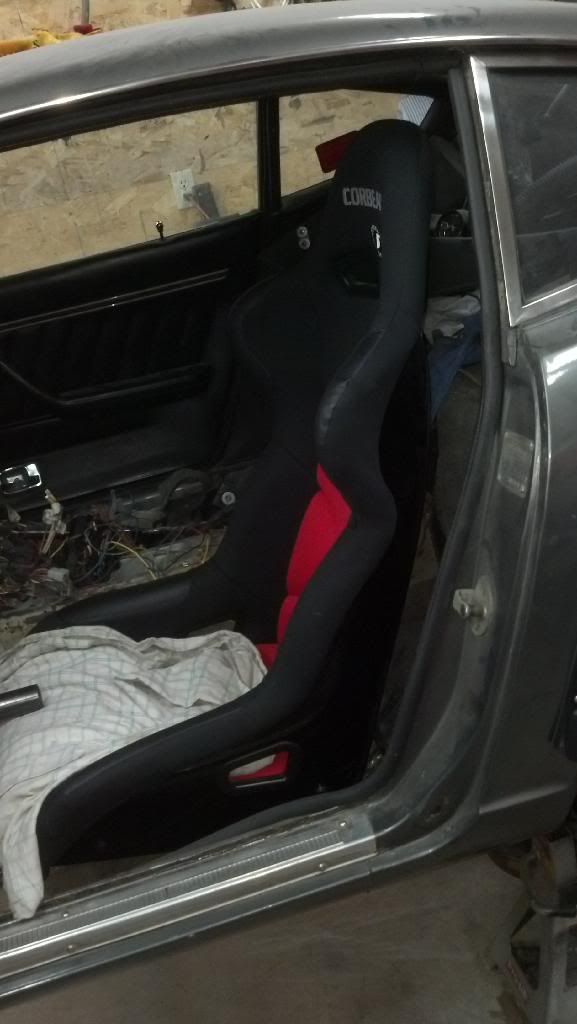
Test fit the new seats. Corbeau FX-1 Pro's
The tranny tunnel has to be modified to make these fit, as there is (was) a large hump for the catalytic converters on the 280's.
Hump shown here with the incision made.
Beating / forming
All welded back up. Didn't have to add any metal, it went back together pretty nice.
Modified my crossmember for a little more downpipe clearance. Don't have the completed pictures yet....
Started building my new coil bracket for the pass. side. This should get the coils up high enough for me to snake plug wires through.
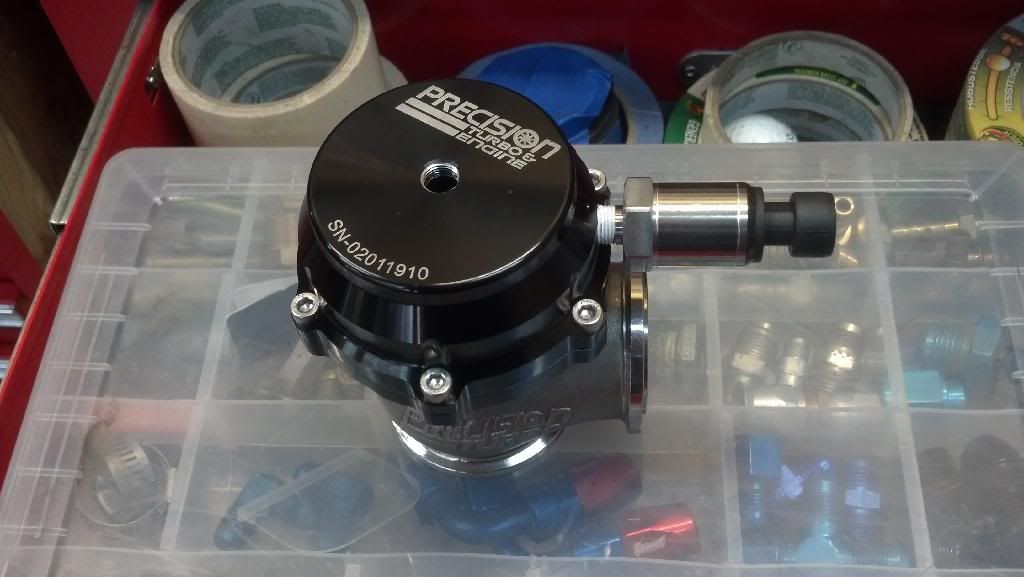
Drilled / tapped the hat on my wastegate for the Holley pressure transducer.
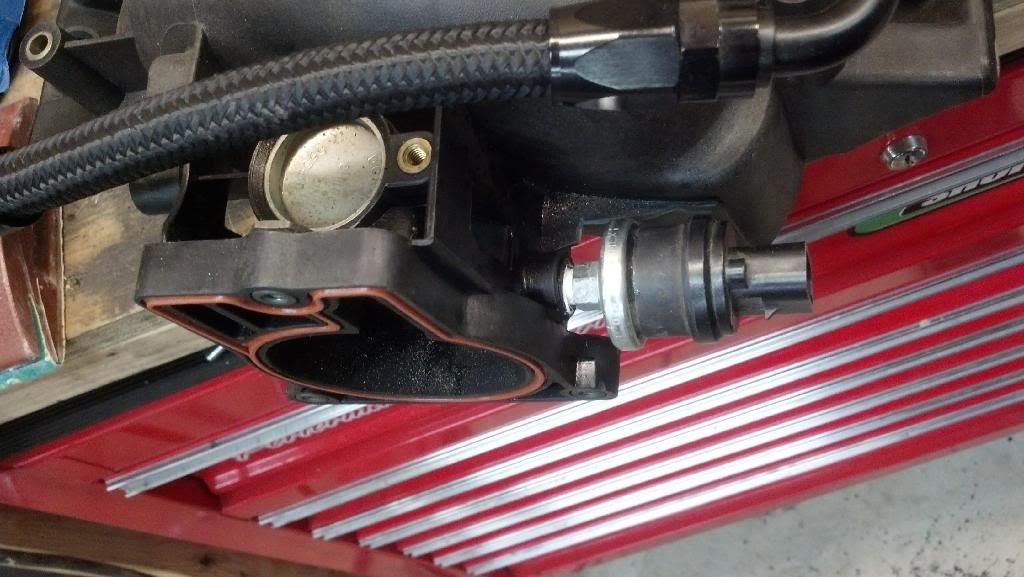
Drilled / tapped intake for several things. Here's the Hobbs switch that will be turning on secondary fuel pumps.
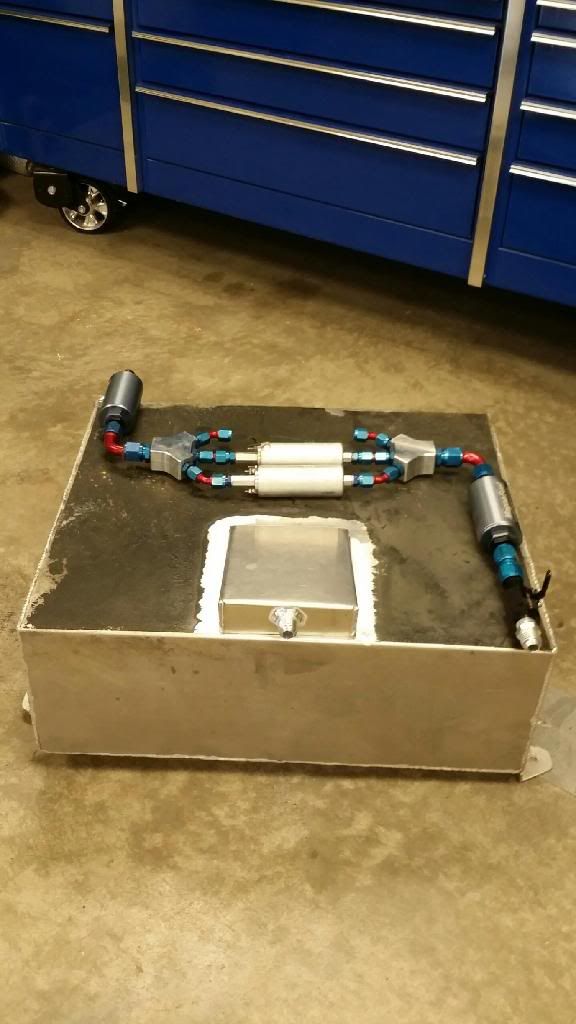
Pic from the fabricator doing the fuel tank sump.
Thats all for now. Really looking forward to the weekend.
Test fit the new seats. Corbeau FX-1 Pro's
The tranny tunnel has to be modified to make these fit, as there is (was) a large hump for the catalytic converters on the 280's.
Hump shown here with the incision made.
Beating / forming
All welded back up. Didn't have to add any metal, it went back together pretty nice.
Modified my crossmember for a little more downpipe clearance. Don't have the completed pictures yet....
Started building my new coil bracket for the pass. side. This should get the coils up high enough for me to snake plug wires through.
Drilled / tapped the hat on my wastegate for the Holley pressure transducer.
Drilled / tapped intake for several things. Here's the Hobbs switch that will be turning on secondary fuel pumps.
Pic from the fabricator doing the fuel tank sump.
Thats all for now. Really looking forward to the weekend.
04-28-2014, 01:17 PM
#152
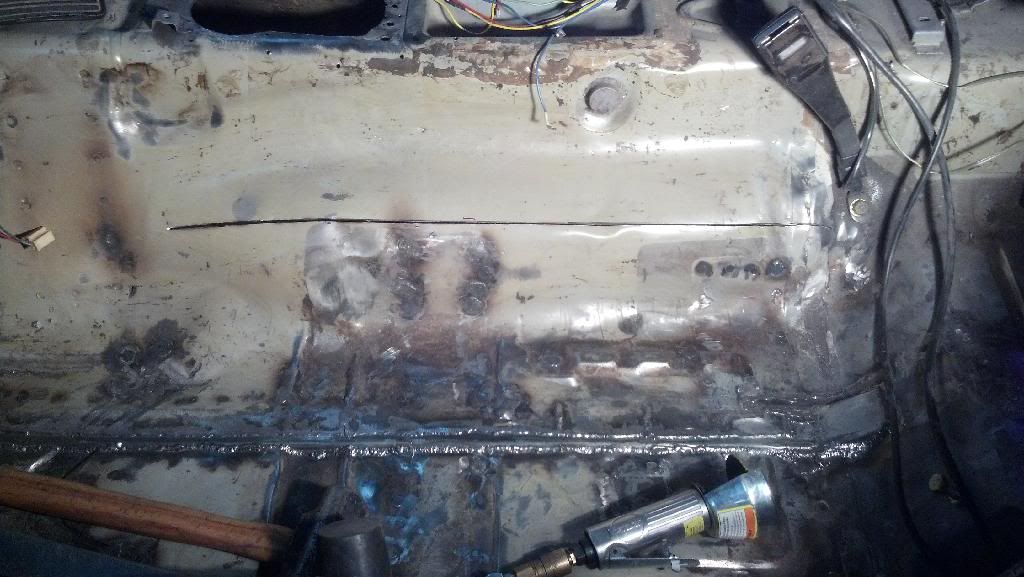
Finished removing the pass. side seat bracket, and instead of taking the time to repair all the holes in the floor pan, I decided to replace it.
Cleaned the 5.3 heads, and block sanded the decks with 400. Pretty nice compared to what they were!
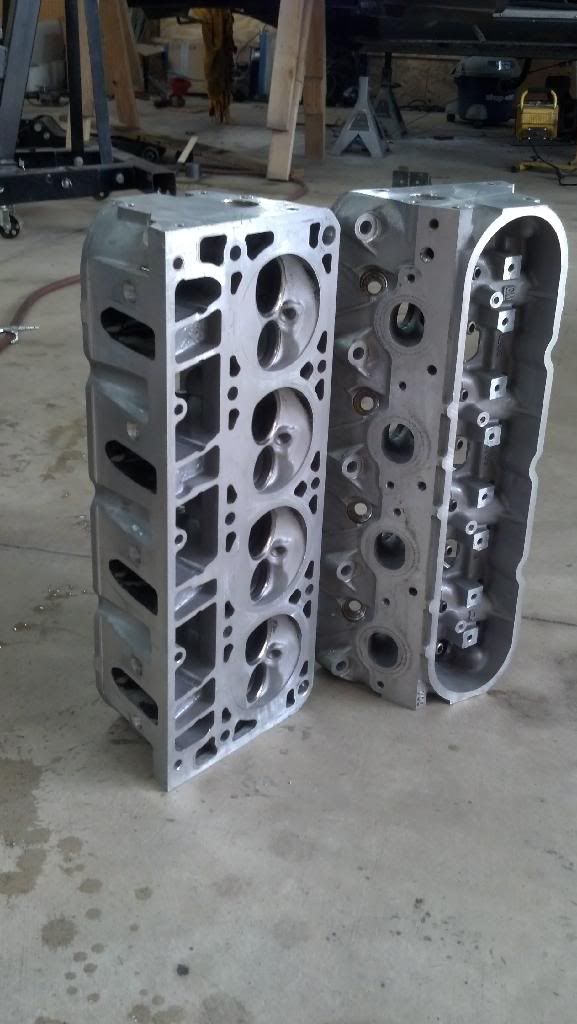
Cleaned the 5.3 heads, and block sanded the decks with 400. Pretty nice compared to what they were!
 05-02-2014, 08:55 AM
#154
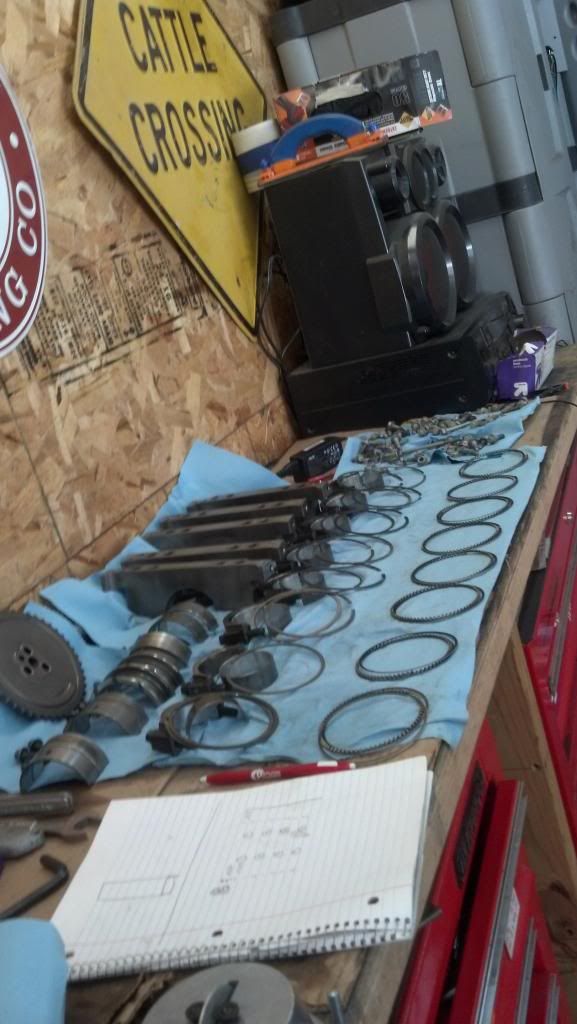
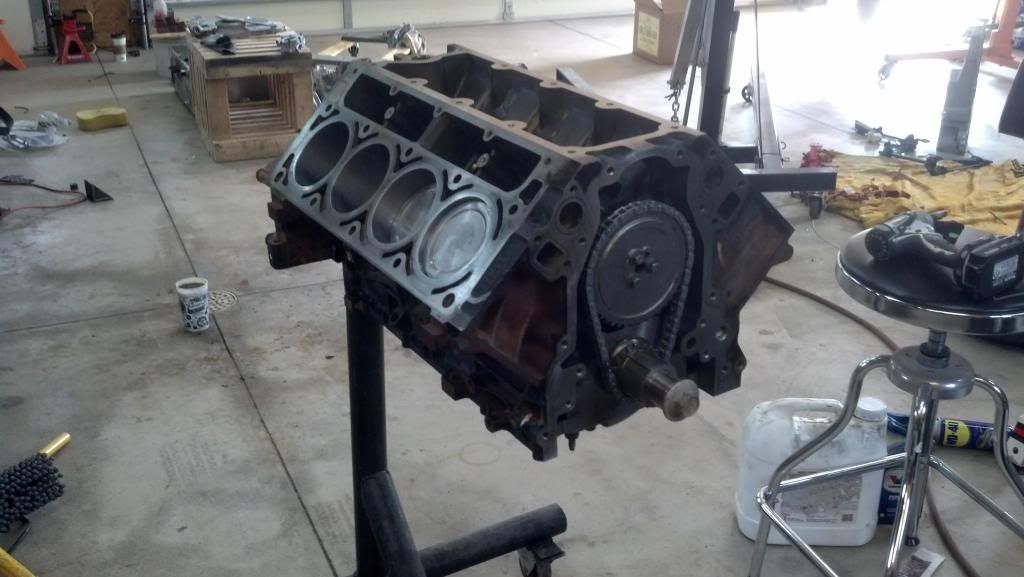
Started dis-assembly on the 5.3 last night. Pretty sure this thing never had an oil change in its 60K mile life!!! Its super oil stained and dirty.
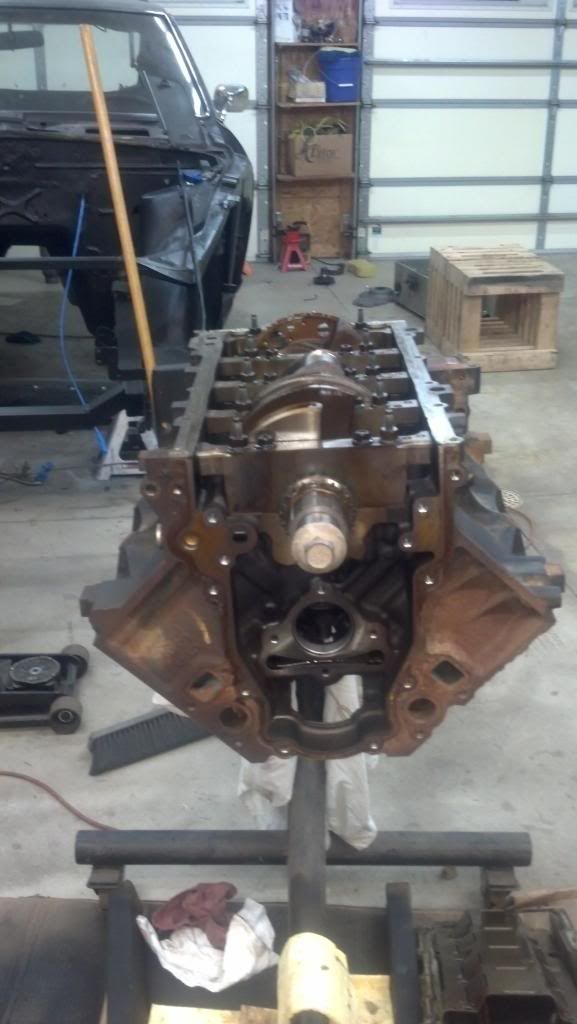
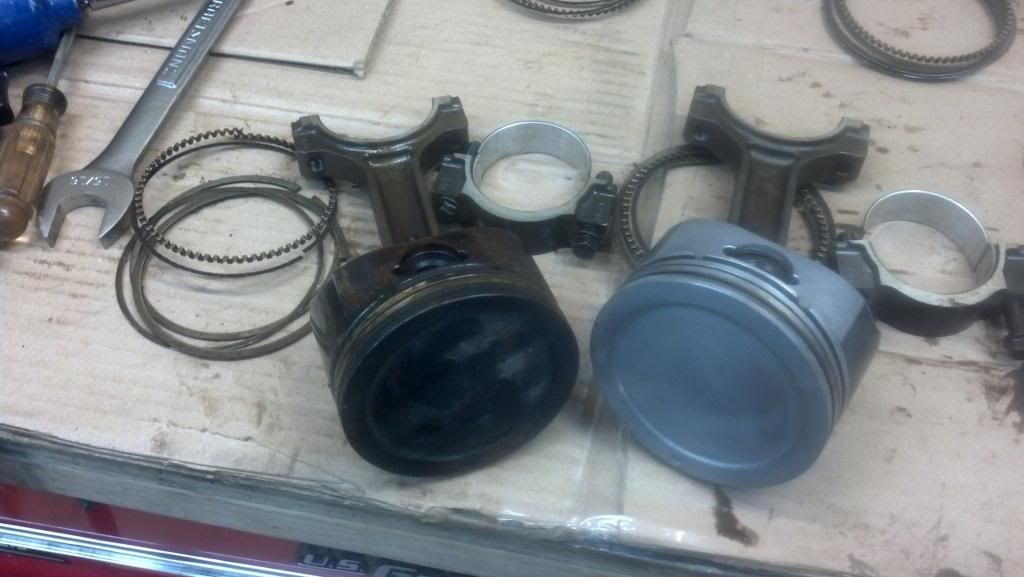
Pulled all the pistons / rods, labeled them, took the rings off, and soaked them in some high power degreaser (seen here to sit overnight).
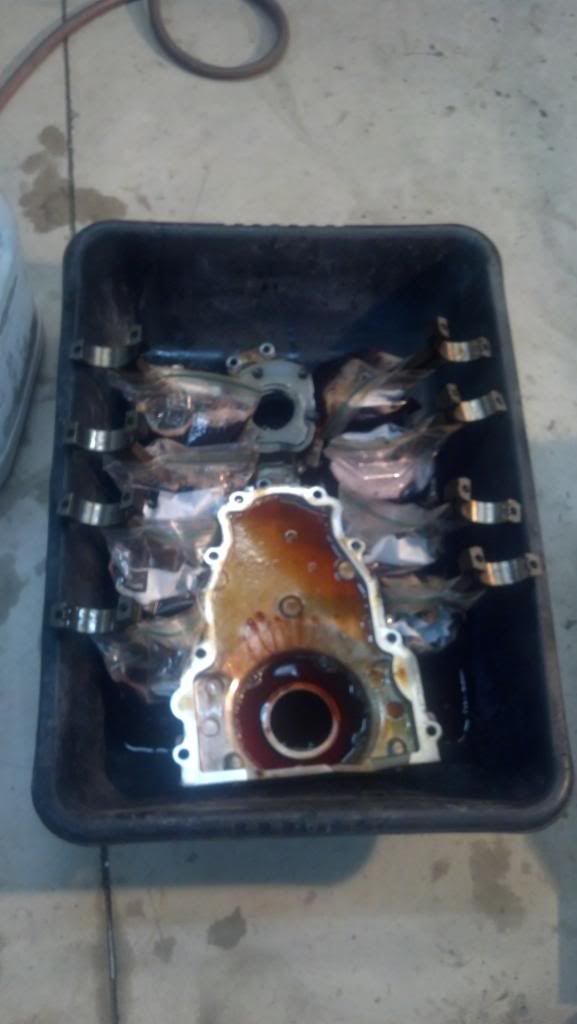
After about 10 minutes and some very minor scrubbing, it looks like they'll clean up nice.
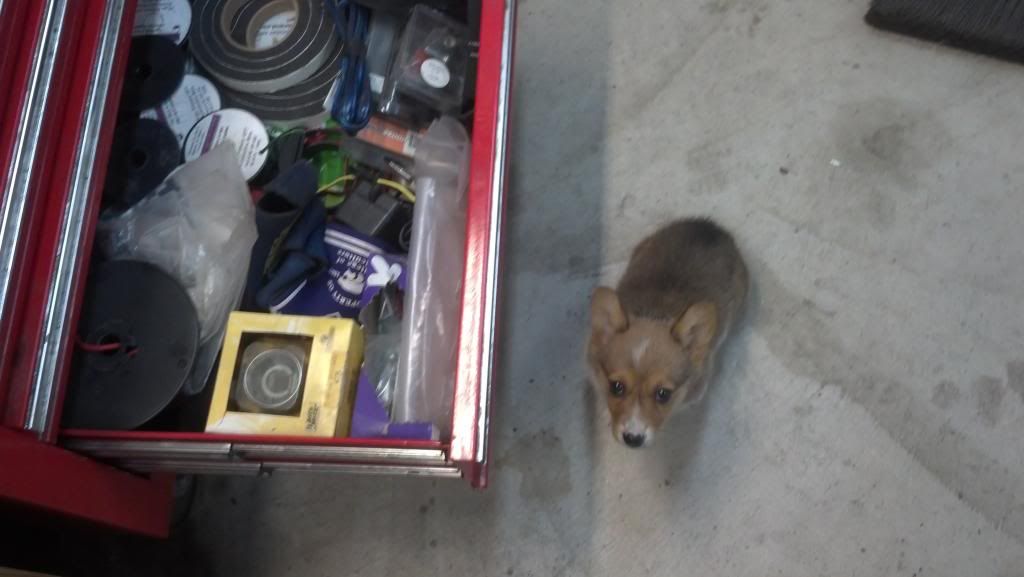
Can't forget the shop help! My lil corgi pup, Nia.
Plan is to ball hone the engine, and install new rings.
To those who have done this before - Should I keep the crank in it, cover it well, and clean thoroughly,
OR do I pull the crank out, hone, clean, re-assemble?
Are those of you re-using main bolts torquing them to spec (lbft + angle) or just a lbft value?
Good thread on Main bolt stretch.....https://ls1tech.com/forums/generatio...-little-2.html
Thanks!!!
Pulled all the pistons / rods, labeled them, took the rings off, and soaked them in some high power degreaser (seen here to sit overnight).
After about 10 minutes and some very minor scrubbing, it looks like they'll clean up nice.
Can't forget the shop help! My lil corgi pup, Nia.
Plan is to ball hone the engine, and install new rings.
To those who have done this before - Should I keep the crank in it, cover it well, and clean thoroughly,
OR do I pull the crank out, hone, clean, re-assemble?
Are those of you re-using main bolts torquing them to spec (lbft + angle) or just a lbft value?
Good thread on Main bolt stretch.....https://ls1tech.com/forums/generatio...-little-2.html
Thanks!!!
Last edited by STEEPSS; 05-02-2014 at 09:16 AM.
05-02-2014, 09:29 AM
#155
Did you mark the cyl the pistons came out of? What are the rings gapped at now? Do the cylinders look good? I can’t imagine you’d need to hone or replace the rings at 45k. I bet the original rings aren’t even gapped wide enough yet to run large amounts of boost at 45k. IMO the current rings should already be seated better than a new set with a ball hone job would be. IMO your not doing yourself any favors with the “replacing them for peace of mind” mentality in this case.
There is actually a service letter from GM out there stating the rods and mains are not TTY hardware and can be reused. Few independent tests I read about showed some OE rod bolts would start to permanently stretch after multiple torque cycles. (don’t recall the exact amount of cycles) I wouldn’t go crazy with the OE stuff checking bearing clearances and torquing and un-torquing the OE fasteners several times. I wouldn’t think twice about checking/replacing your bearings and retorquing them once or twice. I used the GM TTA specs.
If you plan on popping off the mains to look at the bearings anyway, I’d pull the crank. If you don’t, I’d brake clean the crap out of the eng. If the motor is degreased first the metal dust doesn’t tend to stick as badly. Then slap a clean oily rag over the rod journals and go to town with the ball hone. Then use brake clean and shop air again to flush out as much as possible.
According to all the big engine builders I know, cleanliness is a key point in engine assy. They’d all say take the crank out, do your “machine work” hot tank it, then assemble. I say it’s a JY motor and half the fun is the ability to slap OEM junk together quickly and easily.
05-02-2014, 08:06 PM
#156
Did you mark the cyl the pistons came out of? What are the rings gapped at now? Do the cylinders look good? I can’t imagine you’d need to hone or replace the rings at 45k. I bet the original rings aren’t even gapped wide enough yet to run large amounts of boost at 45k. IMO the current rings should already be seated better than a new set with a ball hone job would be. IMO your not doing yourself any favors with the “replacing them for peace of mind” mentality in this case.
There is actually a service letter from GM out there stating the rods and mains are not TTY hardware and can be reused. Few independent tests I read about showed some OE rod bolts would start to permanently stretch after multiple torque cycles. (don’t recall the exact amount of cycles) I wouldn’t go crazy with the OE stuff checking bearing clearances and torquing and un-torquing the OE fasteners several times. I wouldn’t think twice about checking/replacing your bearings and retorquing them once or twice. I used the GM TTA specs.
If you plan on popping off the mains to look at the bearings anyway, I’d pull the crank. If you don’t, I’d brake clean the crap out of the eng. If the motor is degreased first the metal dust doesn’t tend to stick as badly. Then slap a clean oily rag over the rod journals and go to town with the ball hone. Then use brake clean and shop air again to flush out as much as possible.
According to all the big engine builders I know, cleanliness is a key point in engine assy. They’d all say take the crank out, do your “machine work” hot tank it, then assemble. I say it’s a JY motor and half the fun is the ability to slap OEM junk together quickly and easily.
There is actually a service letter from GM out there stating the rods and mains are not TTY hardware and can be reused. Few independent tests I read about showed some OE rod bolts would start to permanently stretch after multiple torque cycles. (don’t recall the exact amount of cycles) I wouldn’t go crazy with the OE stuff checking bearing clearances and torquing and un-torquing the OE fasteners several times. I wouldn’t think twice about checking/replacing your bearings and retorquing them once or twice. I used the GM TTA specs.
If you plan on popping off the mains to look at the bearings anyway, I’d pull the crank. If you don’t, I’d brake clean the crap out of the eng. If the motor is degreased first the metal dust doesn’t tend to stick as badly. Then slap a clean oily rag over the rod journals and go to town with the ball hone. Then use brake clean and shop air again to flush out as much as possible.
According to all the big engine builders I know, cleanliness is a key point in engine assy. They’d all say take the crank out, do your “machine work” hot tank it, then assemble. I say it’s a JY motor and half the fun is the ability to slap OEM junk together quickly and easily.
Anyway,
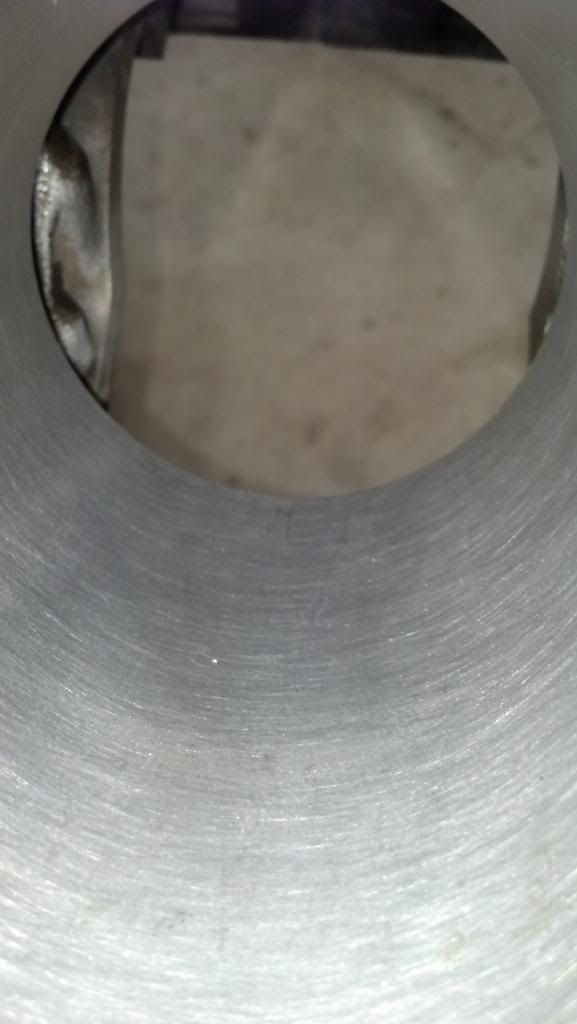
I ended up taking the crank out, and honing the cylinders. They all cleaned up nicely except the #8, which had a slight amount of surface rust where some moisture had sat next to the piston.
Yes, I labeled everything, and its all laid out nice and neat.
Here's the pics of the cylinder in question
You can see the spot at the end of my finger, missing the crosshatching...
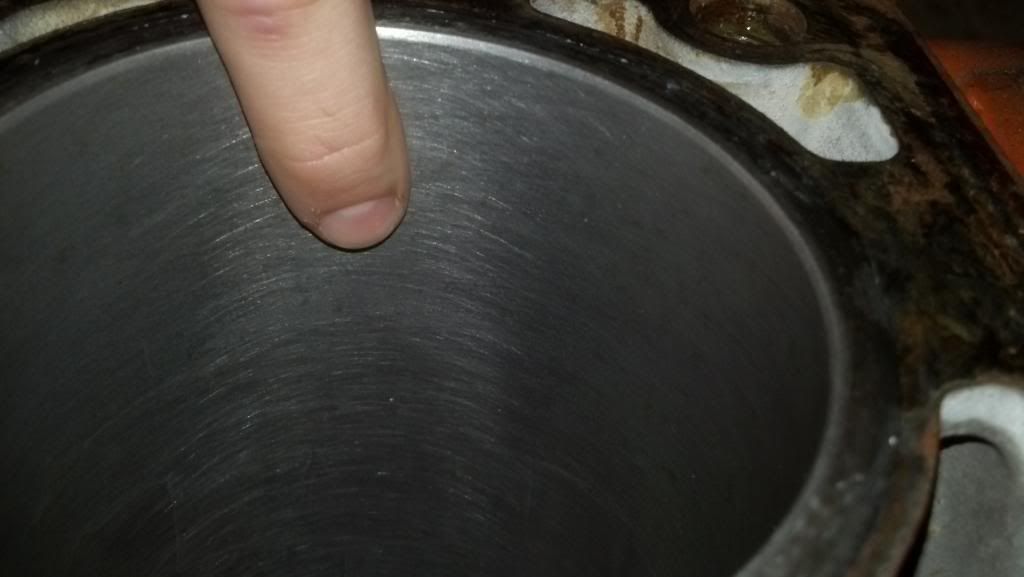
Again... about halfwa down the cylinder wall .
Now my question is: do I just put the stock rings back in it, opening them up to say .028"?
OR do I spend the time to put the new sealed power rings in, and just hope that the #8 heals itself?
FYI it kinda drags when you run a fingernail over it.
Haaaalp
05-05-2014, 10:02 AM
#157
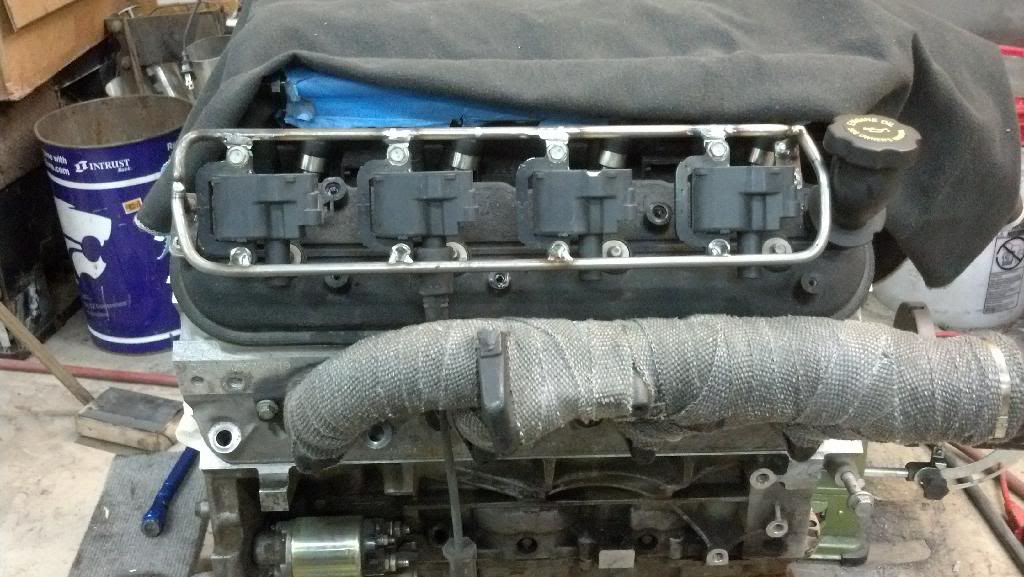
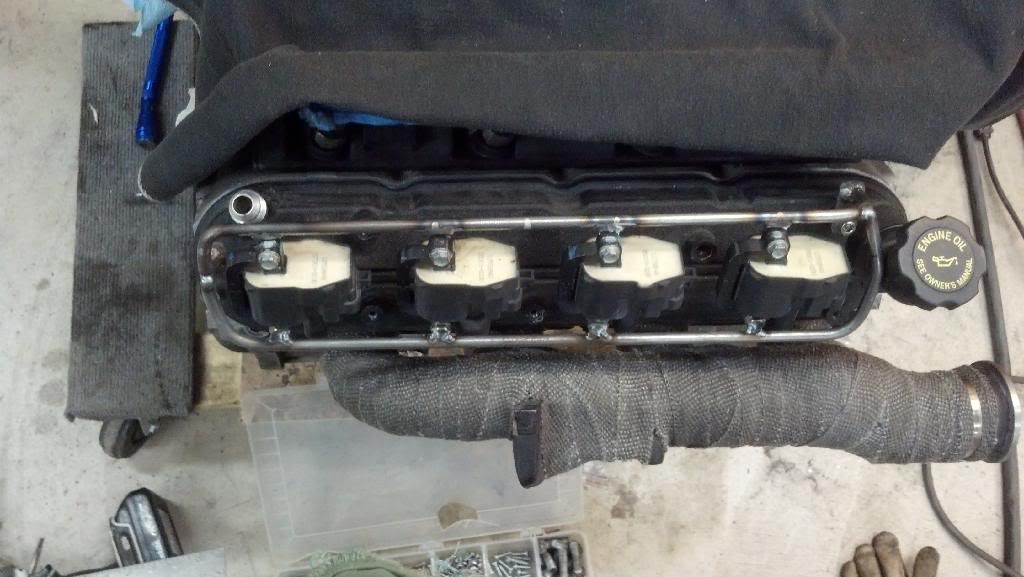
Made a good bit of progress on the engine yesterday.
Cleaning cleaning cleaning
Before prepping the gasket surfaces

Washing the ol girl in the driveway!
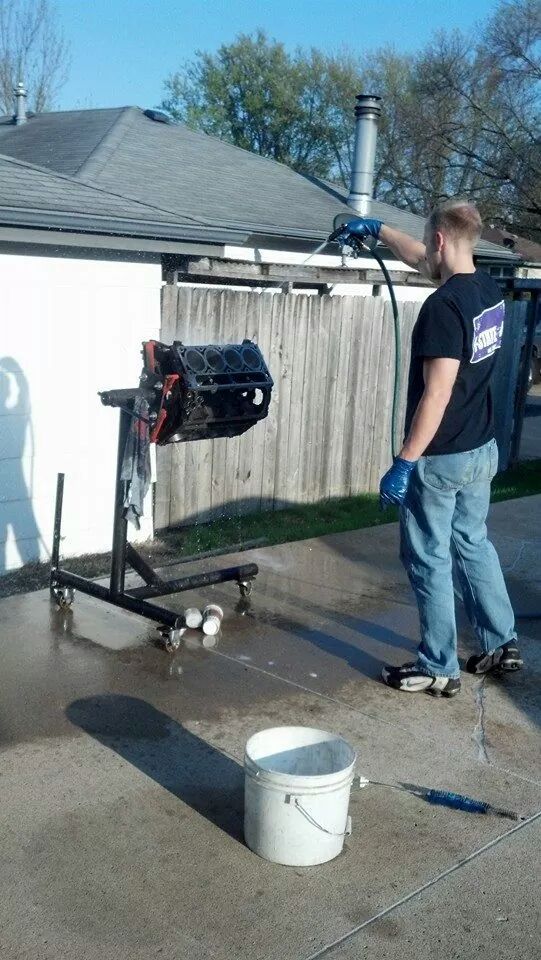
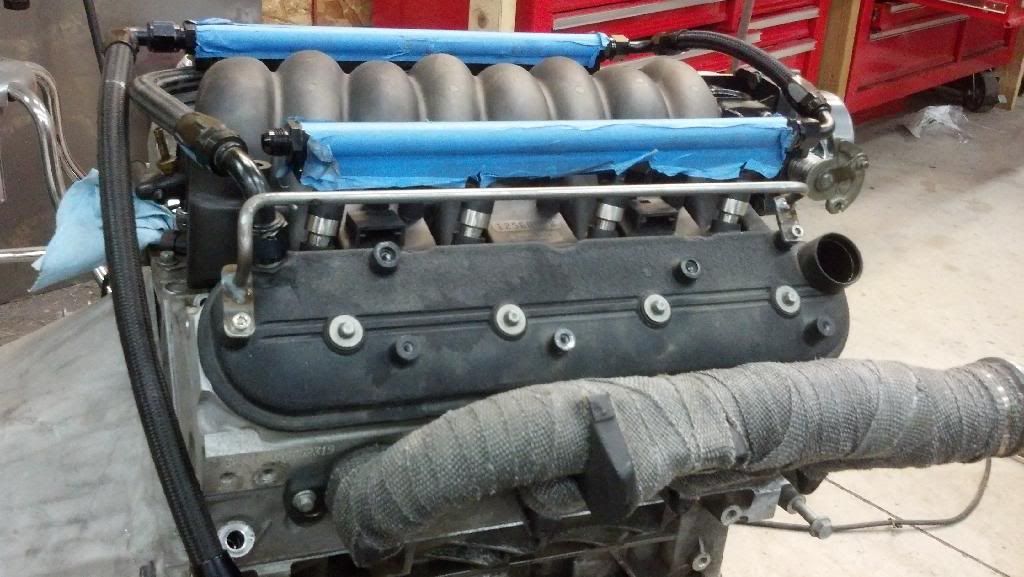
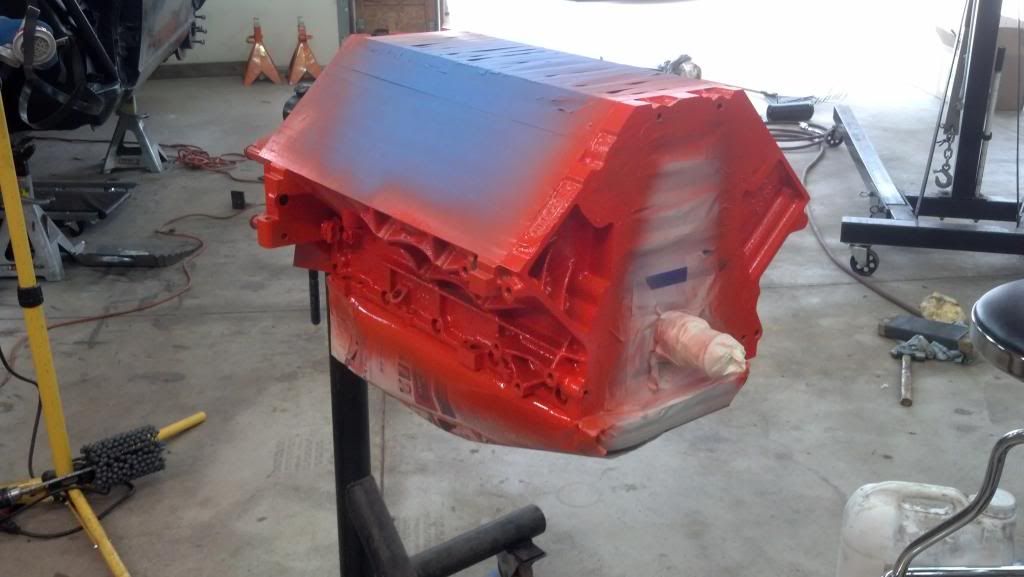
Everything back together, ready for paint
Primed and painted......Because Chevys are Orange!!!!!
Cleaning cleaning cleaning
Before prepping the gasket surfaces
Washing the ol girl in the driveway!
Everything back together, ready for paint
Primed and painted......Because Chevys are Orange!!!!!
Last edited by STEEPSS; 05-07-2014 at 07:22 AM.
 05-07-2014, 07:39 AM
#160
I finished lapping the valves last night, and washed them down to prepare for assembly.
Here they are after installing the new BTR Platinum springs
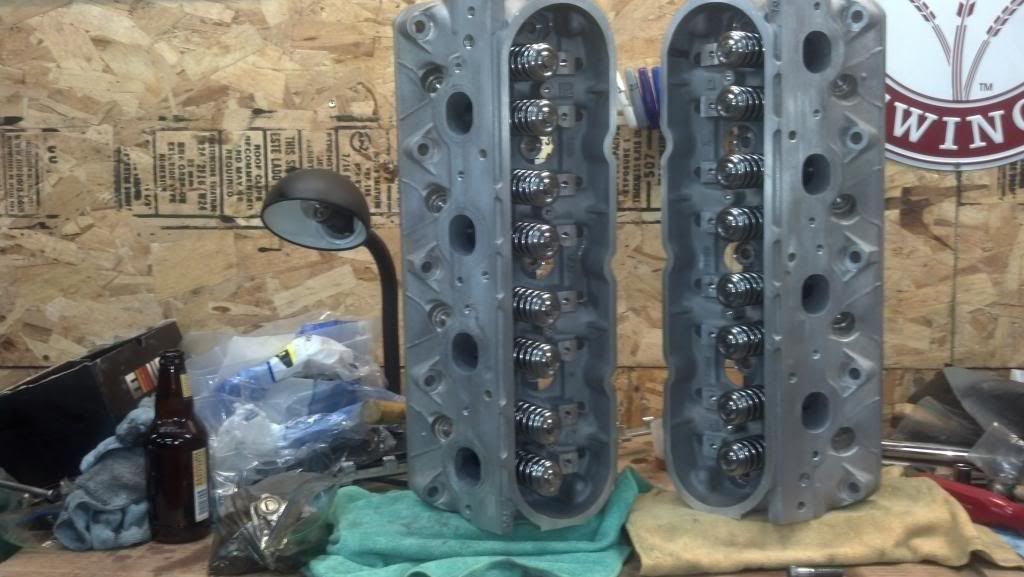
Excuse the bench, it was getting a bit deep by this point!!!
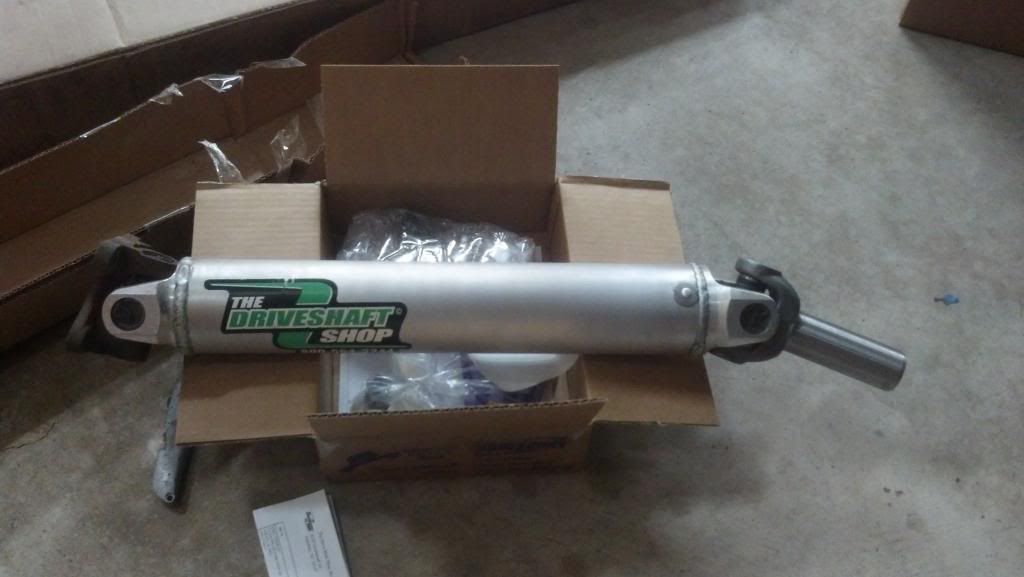
Also, my 'shaft showed back up from DSS (new yoke and shorter for magnum t56).
I ordered a Trick Flow timing chain dampener. My LS2 chain is a bit sloppy for my liking. This is the kit that allows use on the blocks that arent drilled for a dampener. ... I'll post it up when it comes in.
Here they are after installing the new BTR Platinum springs
Excuse the bench, it was getting a bit deep by this point!!!
Also, my 'shaft showed back up from DSS (new yoke and shorter for magnum t56).
I ordered a Trick Flow timing chain dampener. My LS2 chain is a bit sloppy for my liking. This is the kit that allows use on the blocks that arent drilled for a dampener. ... I'll post it up when it comes in.