Finally pulling the trigger on parts!
Pardon my memory... You went with a Cometic .040 right? Your quench will be better than mine right off the bat. Your cam is a lot bigger as well. A4 or not, I still see this making good numbers. Once the suspension is in place, I see track times to follow.
Btw, my MWC subframe connectors are for sale. I never got around to installing them. If you're interested...
Btw, my MWC subframe connectors are for sale. I never got around to installing them. If you're interested...
Powerwise? I don't think 500 is happening. Not with a big stall A4. And I'm very skeptical of 500 in a 346 anyway.
But anything over 450 would be good with the stall. Had I milled down for a little more compression, that might have helped a little bit. But I didn't want to cut the heads down too far. Limits me a little when I rebuild the bottom end down the road.
But anything over 450 would be good with the stall. Had I milled down for a little more compression, that might have helped a little bit. But I didn't want to cut the heads down too far. Limits me a little when I rebuild the bottom end down the road.
Thread Starter
Joined: Aug 2004
Posts: 11,258
Likes: 146
From: Pace, FL
Pardon my memory... You went with a Cometic .040 right? Your quench will be better than mine right off the bat. Your cam is a lot bigger as well. A4 or not, I still see this making good numbers. Once the suspension is in place, I see track times to follow.
Btw, my MWC subframe connectors are for sale. I never got around to installing them. If you're interested...
Btw, my MWC subframe connectors are for sale. I never got around to installing them. If you're interested...
Thread Starter
Joined: Aug 2004
Posts: 11,258
Likes: 146
From: Pace, FL
No, I didn't. I knew what I needed, so I cut them a little deeper than what was needed (and exhaust was sort of borderline). I confirmed radial clearance, however.
I loved my car. I still do, and I miss it. I just came across a car I've always wanted, at the mileage that was MORE than acceptable to me, and I bit.
There are plans for this car however. No worries there... Just have to stay tuned and see what happens.
Thread Starter
Joined: Aug 2004
Posts: 11,258
Likes: 146
From: Pace, FL
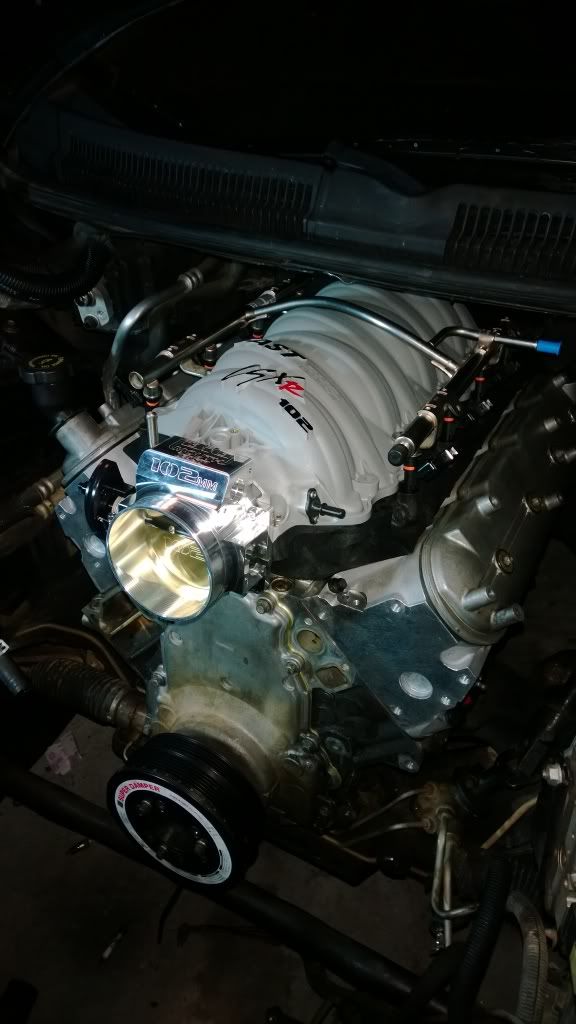
Okay, so late update. The engine is back in the car (sort of).
I started my Saturday off by messing with the ATI damper. I started a thread about it, but resolved the issue once I torqued everything down, since it is a very tight fit between the hub and pulley.
Anyway, I got it ready to go, coated some anti-seize on the crank, and installed it on my motor with the Hawk install tool, removed that and installed the stock bolt and torqued to 240 ft-lbs to fully seat it, and then looked at the pulley. It looked like it was sticking really far out. So, I removed it, took a look at the hub and the stock balancer and they were both the same size within like .009" of an inch. So, I installed the stock balancer to see what depth it would install to, but didn't take that measurement before the teardown (which is what I really needed - SO DO IT). The measurements between stock and the ATI pulley were a wash, even though it looked like the ATI was much further out.
So my fear was the double roller timing chain and oil pump spacers had pushed everything out too far, because the balancers were sitting flush - this was verified with me re-installing the pulley three separate times. And I even took my die cutter and knocked down some of the crank snout that had been chewed up when I removed the balancer originally. That didn't seem to make a difference. See the pic below. It looks to be a fairly healthy gap. But it is flush with the oil pump and fully seated. The crank seal also seems to be snug against it. One thing is the stock balancer has a much thicker ring around the back of the a/c pulley which might be making this look funky.
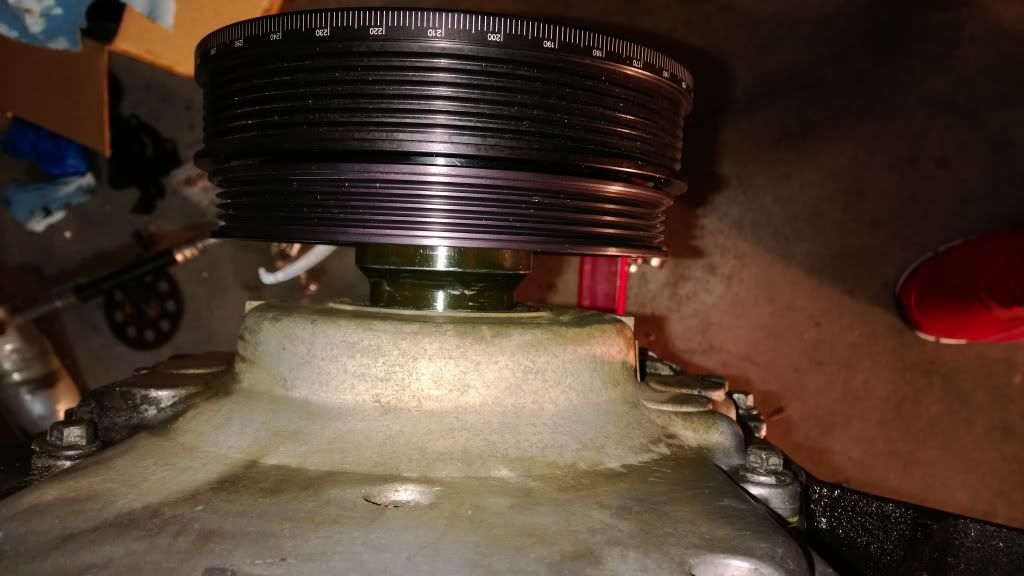
I did take a look at the original balancer and you can see the line of rust on it where the hub was protected by the front crank seal. The depth of that line of rust and where the ATI pulley sits is pretty much spot on and the ribs of the pullies look to line up perfectly. But, is there an issue with the oil pump being spaced out and the damper?
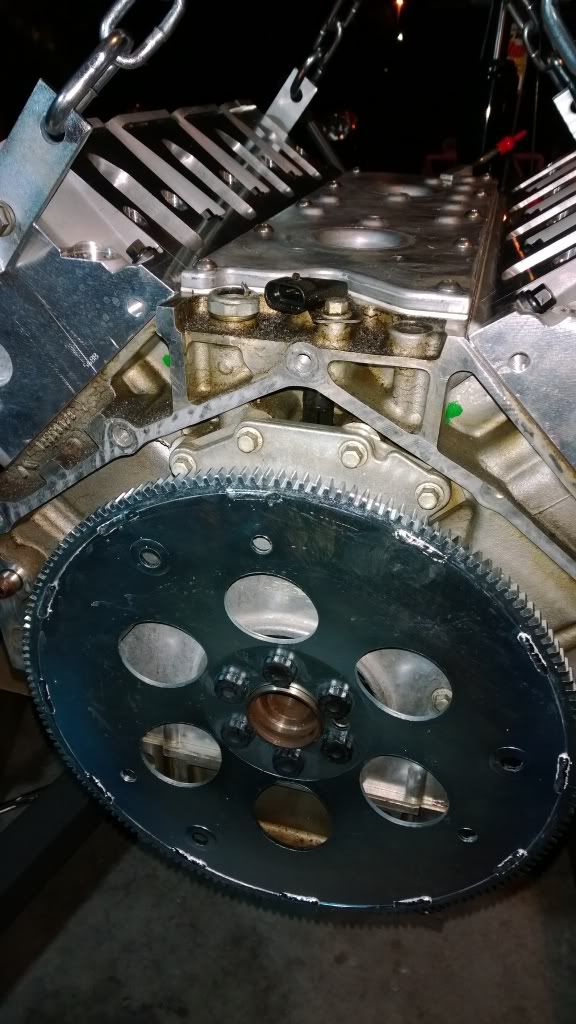
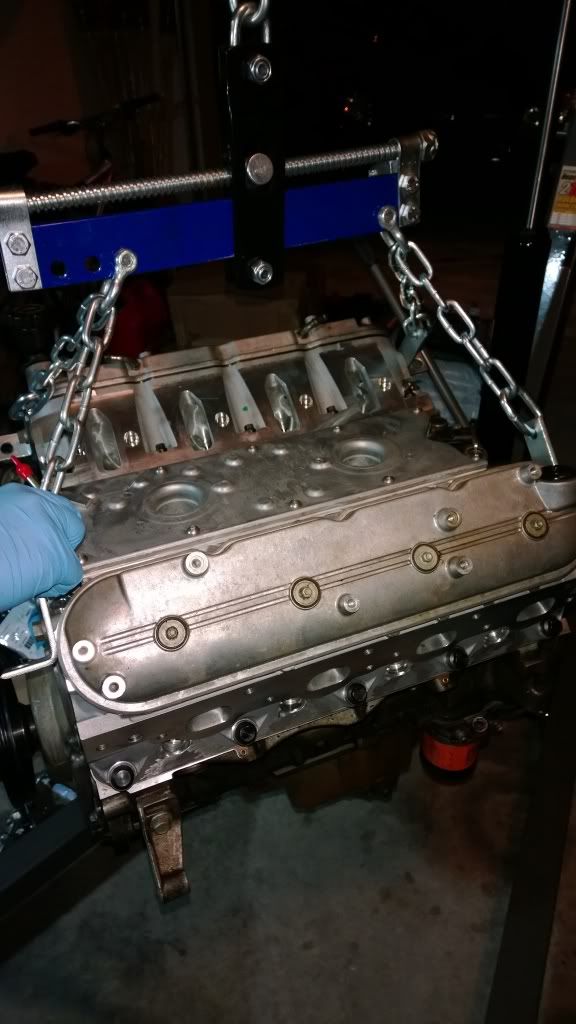
So after fooling with that way too long, and disassembling the ATI balancer a couple of times to remove it, we moved on to the valve covers, new flexplate, and the motor mounts. Luckily, the valve covers cleaned up pretty well in a bath of mineral spirits, the Hughes Flexplate installed with no problem, and the motor mounts weren't that bad. See the pics.
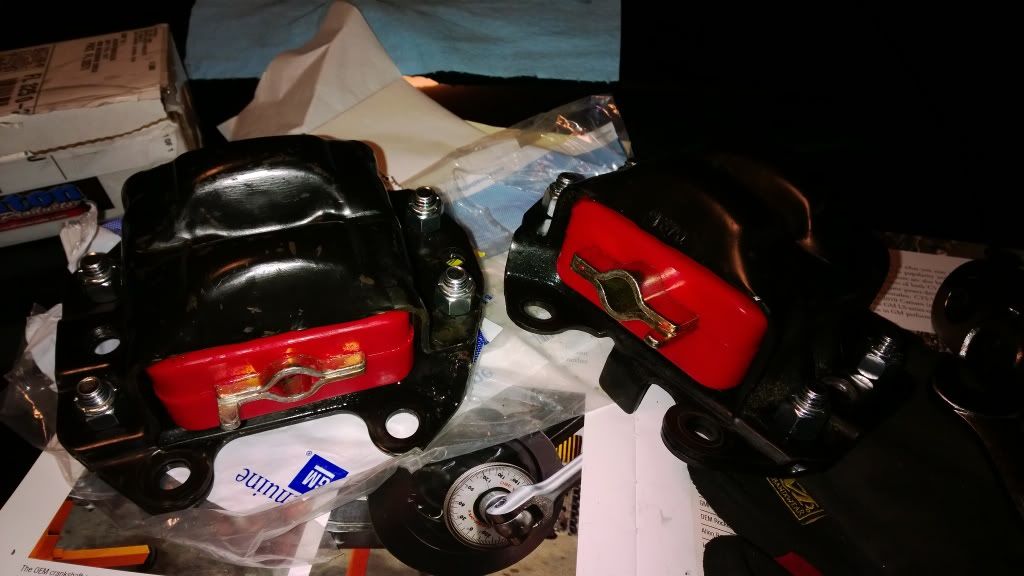
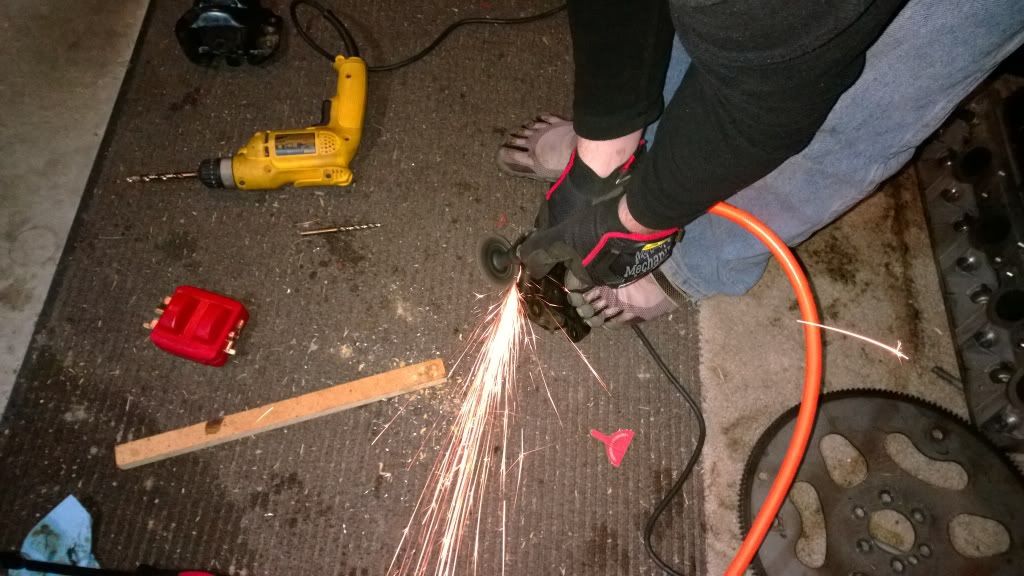
Here you can see the fun we had knocking down the rivets so we could open the clamshell and install the Prothane mounts.
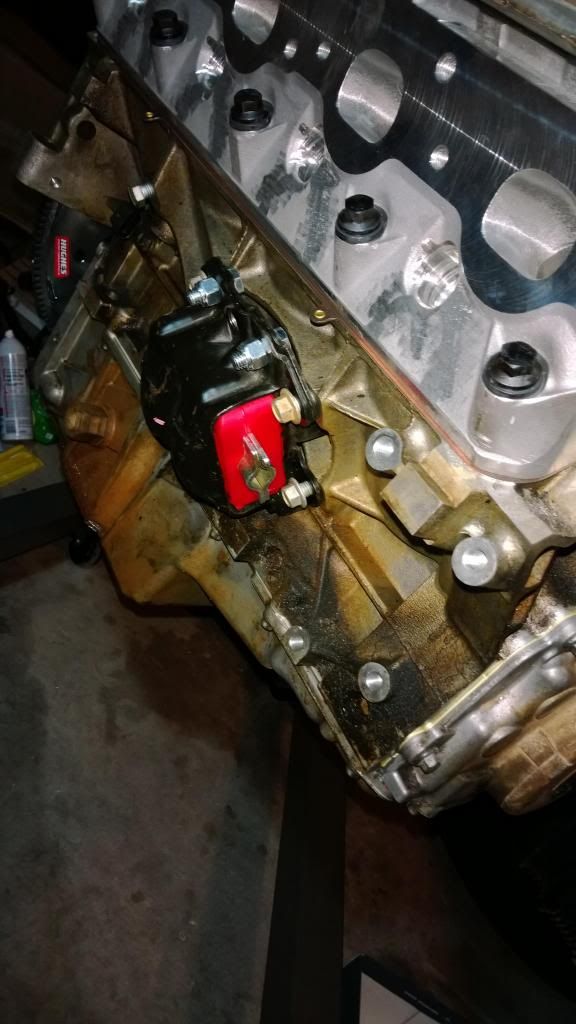
Motor ready to be installed:

New motor mounts installed:
The problem is, only one side lined up when we installed the motor in the car. And I was under the car bench pressing the motor into place and no matter how I turned it and while one was installed, the other would not line up correctly. But the tabs sit in the cradle as they are supposed to sit, so I'm not sure I know what's wrong. But uninstalling the mounts and swapping or re-positioning them doesn't seem like it would fix much. Any suggestions?
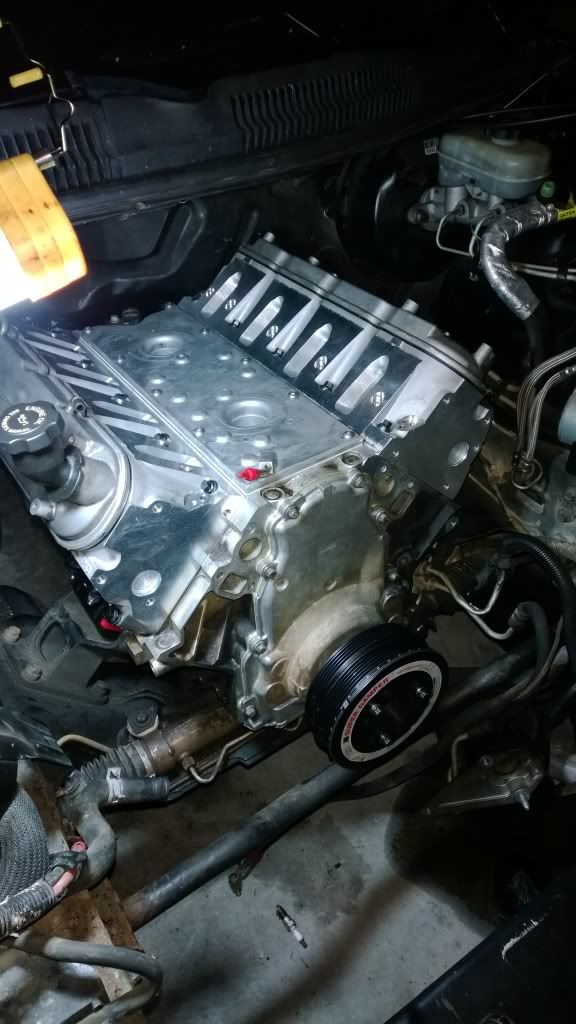
Here it is in the car. We're done for today. Will try to get the other motor mount installed tomorrow and then the transmission goes in... and maybe a test fit with the alternator to make sure that front pulley is aligned.
I started my Saturday off by messing with the ATI damper. I started a thread about it, but resolved the issue once I torqued everything down, since it is a very tight fit between the hub and pulley.
Anyway, I got it ready to go, coated some anti-seize on the crank, and installed it on my motor with the Hawk install tool, removed that and installed the stock bolt and torqued to 240 ft-lbs to fully seat it, and then looked at the pulley. It looked like it was sticking really far out. So, I removed it, took a look at the hub and the stock balancer and they were both the same size within like .009" of an inch. So, I installed the stock balancer to see what depth it would install to, but didn't take that measurement before the teardown (which is what I really needed - SO DO IT). The measurements between stock and the ATI pulley were a wash, even though it looked like the ATI was much further out.
So my fear was the double roller timing chain and oil pump spacers had pushed everything out too far, because the balancers were sitting flush - this was verified with me re-installing the pulley three separate times. And I even took my die cutter and knocked down some of the crank snout that had been chewed up when I removed the balancer originally. That didn't seem to make a difference. See the pic below. It looks to be a fairly healthy gap. But it is flush with the oil pump and fully seated. The crank seal also seems to be snug against it. One thing is the stock balancer has a much thicker ring around the back of the a/c pulley which might be making this look funky.
I did take a look at the original balancer and you can see the line of rust on it where the hub was protected by the front crank seal. The depth of that line of rust and where the ATI pulley sits is pretty much spot on and the ribs of the pullies look to line up perfectly. But, is there an issue with the oil pump being spaced out and the damper?
So after fooling with that way too long, and disassembling the ATI balancer a couple of times to remove it, we moved on to the valve covers, new flexplate, and the motor mounts. Luckily, the valve covers cleaned up pretty well in a bath of mineral spirits, the Hughes Flexplate installed with no problem, and the motor mounts weren't that bad. See the pics.
Here you can see the fun we had knocking down the rivets so we could open the clamshell and install the Prothane mounts.
Motor ready to be installed:
New motor mounts installed:
The problem is, only one side lined up when we installed the motor in the car. And I was under the car bench pressing the motor into place and no matter how I turned it and while one was installed, the other would not line up correctly. But the tabs sit in the cradle as they are supposed to sit, so I'm not sure I know what's wrong. But uninstalling the mounts and swapping or re-positioning them doesn't seem like it would fix much. Any suggestions?
Here it is in the car. We're done for today. Will try to get the other motor mount installed tomorrow and then the transmission goes in... and maybe a test fit with the alternator to make sure that front pulley is aligned.
Very nice man. Almost there, I know you're excited. I hate when little things hold up a project like your motor mounts, damper, etc.. anyways look forward to seeing it fully installed. Keep it up man.
LS1 Tech Stories
The Best V8 Stories One Small Block at Time

6 Common C5 Corvette Failures and What's Involved In Repairing Them
Pouria Savadkouei
Retro Modern Bandit Pontiac Trans AM Comes With Burt Reynolds' Autograph
Verdad Gallardo
Top 10 Greatest Cadillac V Series Performance Models Ever, Ranked
Pouria Savadkouei
Top 10 Most Powerful Chevy Trucks Ever Made!

Hennessey's New Supercharged Silverado ZR2 Has 700 HP
Verdad Gallardo
Coachbuilt N2A Anteros Is an LS2-Powered C6 Corvette In Italian Clothes
Verdad Gallardo
Awesome K5 Blazer Restomod Comes With C7 Corvette Power
Verdad Gallardo
10 Camaros You Should Never Buy

10 LS Engine Myths That Refuse to Die
Verdad Gallardo Jake, I have a Rollmaster double roller timing set as well. I can assure you that the lower gear is machined to compensate for the install depth of the damper. Yes the oil pump is spaced out bu the hub seats on the lower timing gear.
Joined: Mar 2007
Posts: 1,145
Likes: 51
From: Saskatchewan, Canada - where arguing "DA" is for the slow and weak...
1. At least wear safety shoes when using your feet as a vice.  ; and
; and
2. You will need to loosen the pedestals at the K-member and the mounts on the block to generate enough slack to progressively bring it all together. You've already seen what forcing stuff does (crank snout).
2. You will need to loosen the pedestals at the K-member and the mounts on the block to generate enough slack to progressively bring it all together. You've already seen what forcing stuff does (crank snout).
1. At least wear safety shoes when using your feet as a vice. ; and
2. You will need to loosen the pedestals at the K-member and the mounts on the block to generate enough slack to progressively bring it all together. You've already seen what forcing stuff does (crank snout).
2. You will need to loosen the pedestals at the K-member and the mounts on the block to generate enough slack to progressively bring it all together. You've already seen what forcing stuff does (crank snout).
Thread Starter
Joined: Aug 2004
Posts: 11,258
Likes: 146
From: Pace, FL
1. At least wear safety shoes when using your feet as a vice. ; and
2. You will need to loosen the pedestals at the K-member and the mounts on the block to generate enough slack to progressively bring it all together. You've already seen what forcing stuff does (crank snout).
2. You will need to loosen the pedestals at the K-member and the mounts on the block to generate enough slack to progressively bring it all together. You've already seen what forcing stuff does (crank snout).
Dr. Are you coating your headers? I read an article discussing coating, and under the hood temps were as follows : 850* uncoated; ceramic coated 288*. I had no idea it'd be that drastic of a difference!
I simply don't see them cutting temps when the motor is "hot and bothered".
I believe in wrap.
AGAIN, this is JUST ME. I don't want 20 people jumping in here saying this and that, which they will, but none the less. I believe more in wrap than I do any coating.