
And my 4L80E swap begins
 01-24-2012, 05:29 PM
#1
Well, to give a background of my story, here's a link to my thread I made when I blew my engine back in November of 2010.
https://ls1tech.com/forums/florida-m...ew-engine.html
To make it short, I blew my stock ls1. Then, after it sitting for a few months I decided to pick up a shortblock on craigslist. After getting it in I found out it had a spun rod bearing. After taking it to the machine shop and getting a quote on fixing that, I got a great deal on an LQ4 shortblock. I added milled heads and a cam and have been running that for awhile now. I then found out I bent the 31 spline strange axles I had launching at 6000 rpms. After finally getting a new set from strange, I decided that sticking with an M6 would be costly. So I sold my t56 setup and am now piecing together a 4L80E setup.
The purpose of this thread is to give a play by play of my experience in this swap. There's a few writeups on tech for the swap, but I haven't seen but a few that are geared toward the budget minded of us. I'm gonna try to do this as cheaply as possibly, but still having a reliable setup. I'll keep a running tally on this thread of my actual costs for EVERYTHING involved, so those out there wanting to know what it'll take to do this with a budget will have some sort of reference to go by. I'll keep updating the original post when I make new purchases and post the cost.
4L80E $200
ATSG rebuild manual $26.88
Flexplate and Spacer $55
HPTuners $499
MWC 4l80e crossmember $160
Jake's transbrake $450
RevMax Stage 5 Converter $760
making it work with '98 computer $20
Used Direct Drum $90
34 element sprag $46
New reverse band $29.75
various gaskets/seals $53.82
Shifter switch plug $40.27
Th400 Slip yoke $50
Tranny coolers $50
Madman dipstick $85
Misc. wiring supplies $45
Powder coat case $125
Hose/clamps for cooler $50
14 quarts fluid $65
I'll be going with a stock 4l80e (or rebuilding stock one myself). If it needs a rebuild, I'll attempt it myself and picking up a ATSG manual off of Ebay to help along the way. I'll be using a transbrake setup from Jake. I'll be tuning with HP tuners using my '98 pcm and wiring help from Slow67. For the converter, I'm leaning towards getting a non billet lockup from Revmax more than likely to help with cost and the fact I'll only push around 550whp if I go with nitrous. I'll be using a custom crossmember from MWC. I'll be getting a used flexplate and spacer. And probably pick up a lokar dipstick.
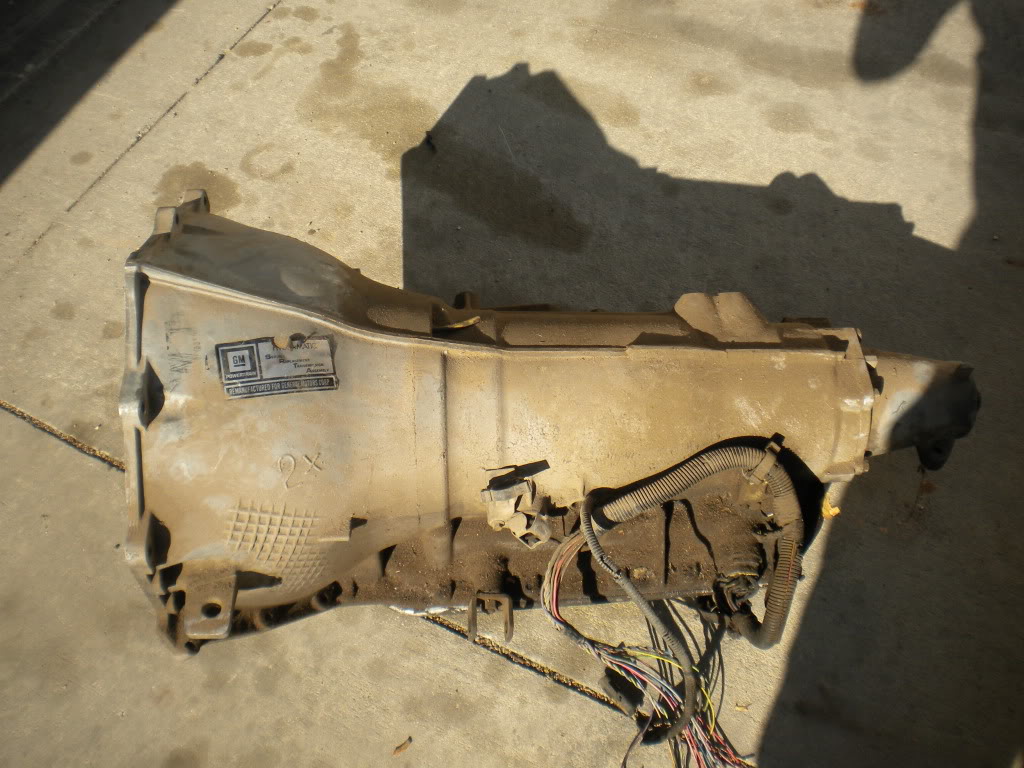
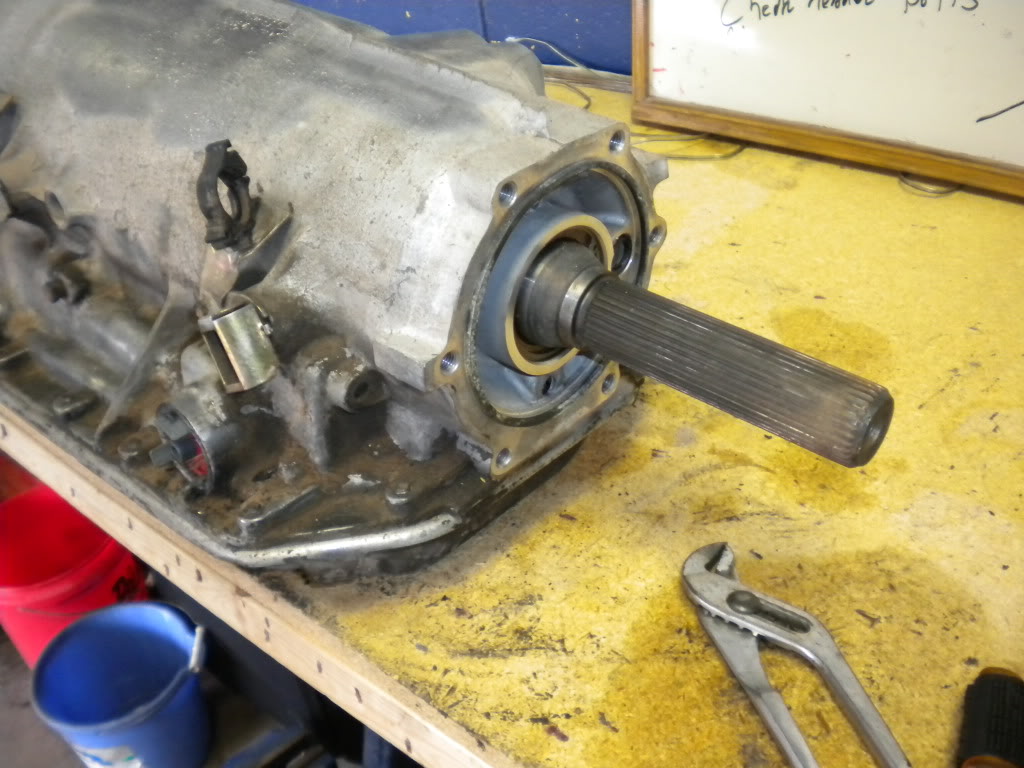
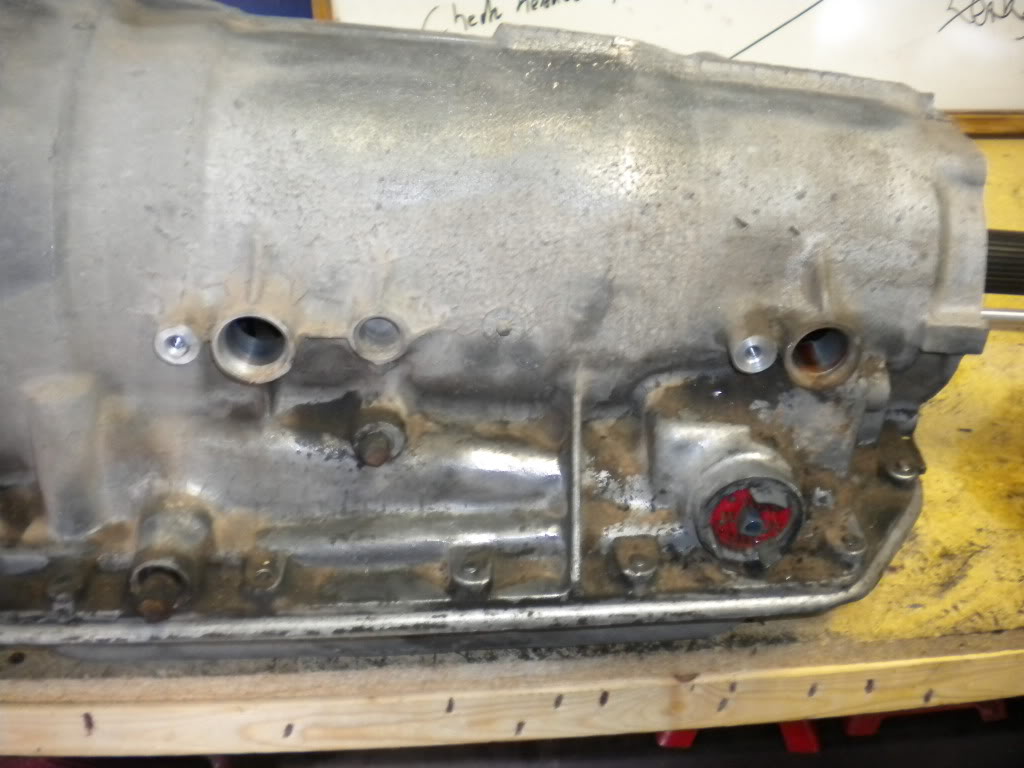
Today I picked up a 4L80E local that I found on Craigslist. I got it for a whopping $200! It's supposedly a '92 and came from a van. But, it has a full slip yoke (not the bolt on), and has been rebuilt (so probably has new wiring). It is missing a few pump bolts that they "borrowed" for another transmission. It was supposedly running fine when pulled. However, I'll be taking a look at things once I open it up when I install Jake's transbrake. Here are some pics.
As I bought her

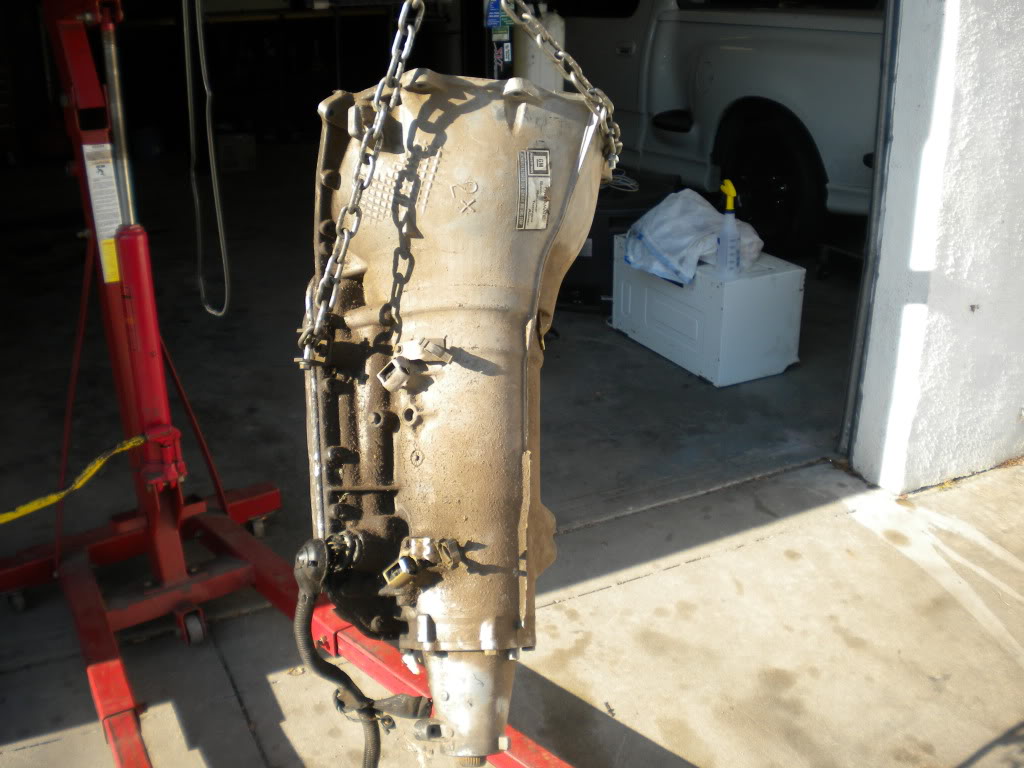
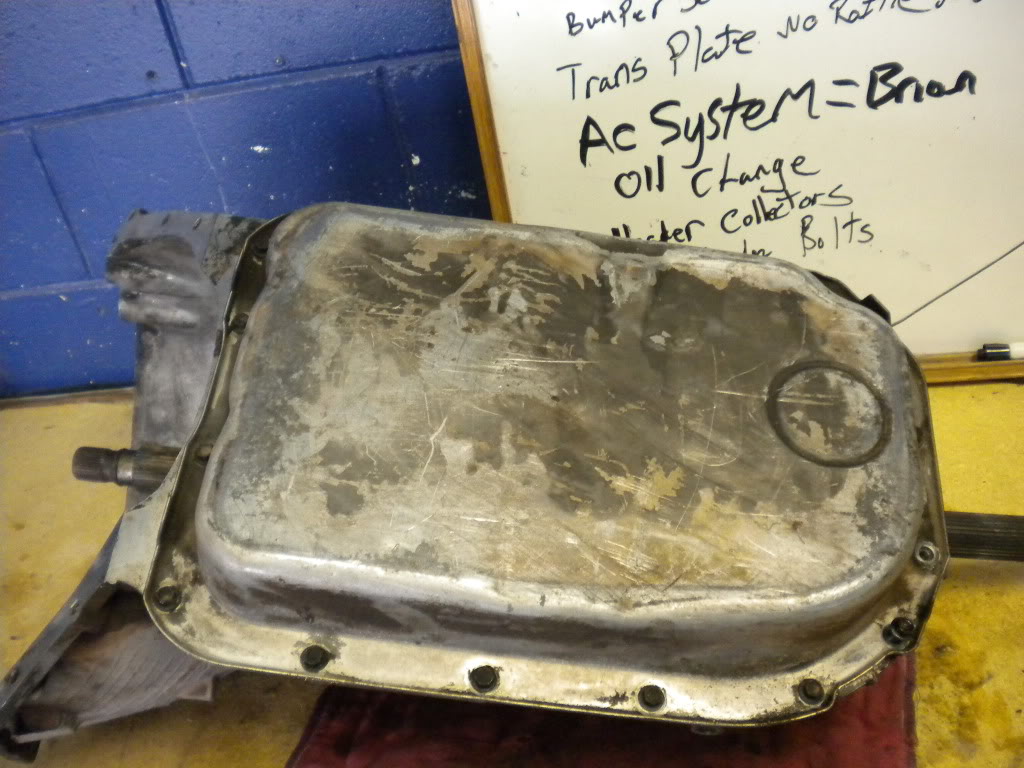
getting ready for some cleaning
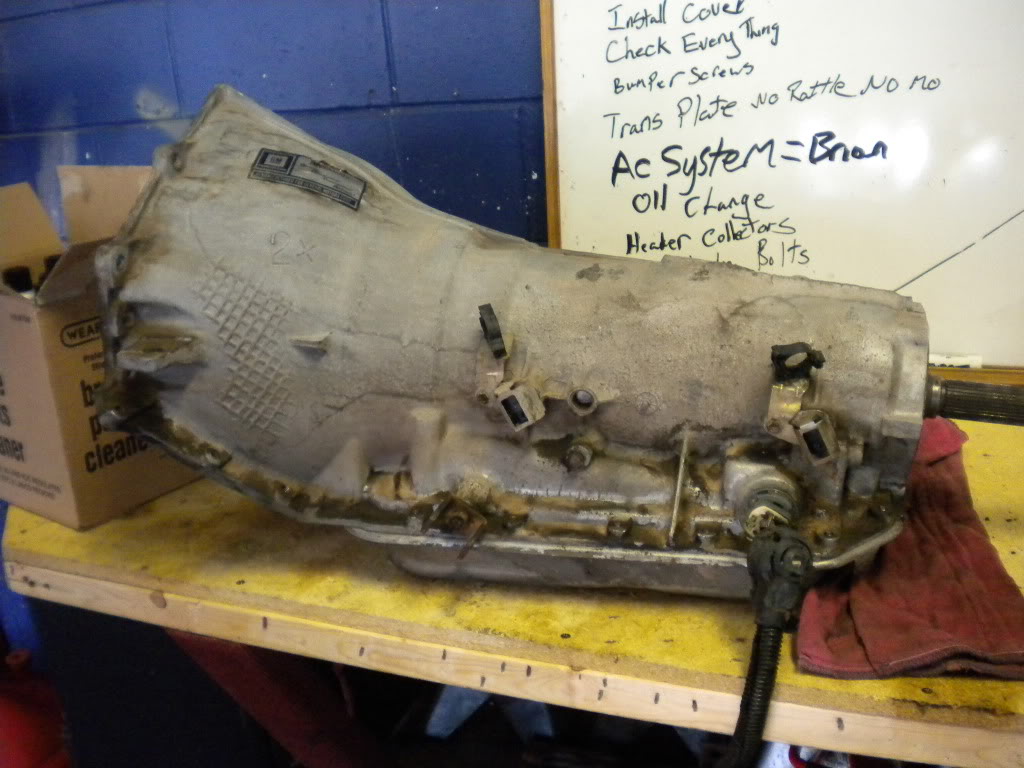
after cleaning
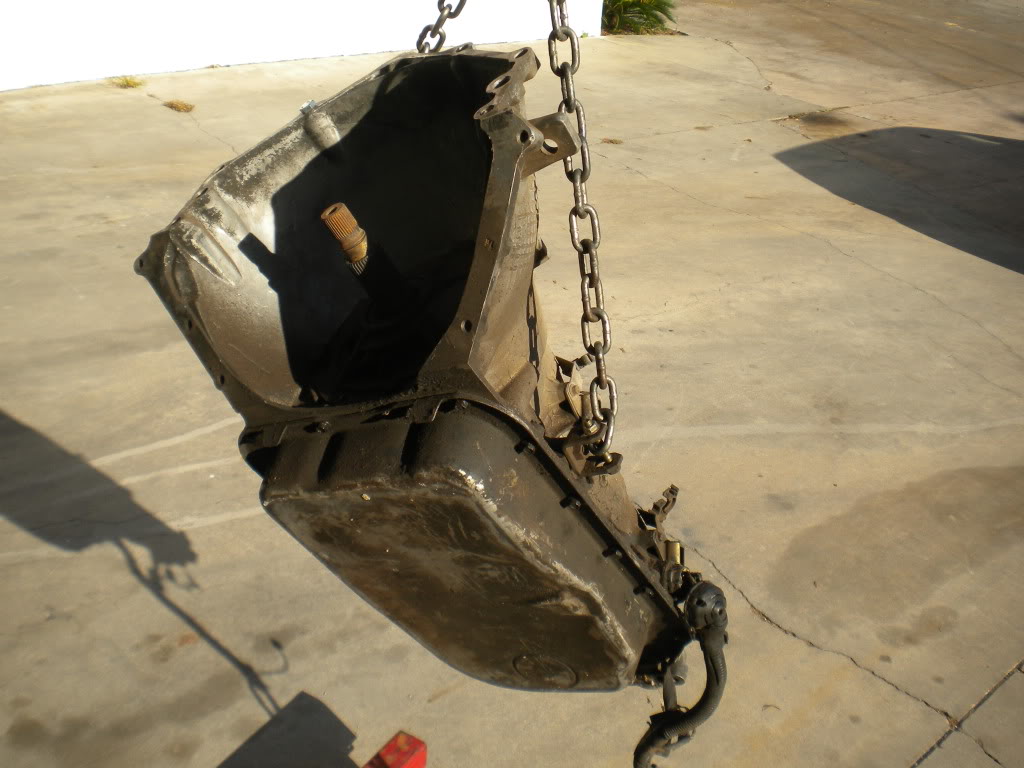
slip on yoke ftw!
https://ls1tech.com/forums/florida-m...ew-engine.html
To make it short, I blew my stock ls1. Then, after it sitting for a few months I decided to pick up a shortblock on craigslist. After getting it in I found out it had a spun rod bearing. After taking it to the machine shop and getting a quote on fixing that, I got a great deal on an LQ4 shortblock. I added milled heads and a cam and have been running that for awhile now. I then found out I bent the 31 spline strange axles I had launching at 6000 rpms. After finally getting a new set from strange, I decided that sticking with an M6 would be costly. So I sold my t56 setup and am now piecing together a 4L80E setup.
The purpose of this thread is to give a play by play of my experience in this swap. There's a few writeups on tech for the swap, but I haven't seen but a few that are geared toward the budget minded of us. I'm gonna try to do this as cheaply as possibly, but still having a reliable setup. I'll keep a running tally on this thread of my actual costs for EVERYTHING involved, so those out there wanting to know what it'll take to do this with a budget will have some sort of reference to go by. I'll keep updating the original post when I make new purchases and post the cost.
4L80E $200
ATSG rebuild manual $26.88
Flexplate and Spacer $55
HPTuners $499
MWC 4l80e crossmember $160
Jake's transbrake $450
RevMax Stage 5 Converter $760
making it work with '98 computer $20
Used Direct Drum $90
34 element sprag $46
New reverse band $29.75
various gaskets/seals $53.82
Shifter switch plug $40.27
Th400 Slip yoke $50
Tranny coolers $50
Madman dipstick $85
Misc. wiring supplies $45
Powder coat case $125
Hose/clamps for cooler $50
14 quarts fluid $65
I'll be going with a stock 4l80e (or rebuilding stock one myself). If it needs a rebuild, I'll attempt it myself and picking up a ATSG manual off of Ebay to help along the way. I'll be using a transbrake setup from Jake. I'll be tuning with HP tuners using my '98 pcm and wiring help from Slow67. For the converter, I'm leaning towards getting a non billet lockup from Revmax more than likely to help with cost and the fact I'll only push around 550whp if I go with nitrous. I'll be using a custom crossmember from MWC. I'll be getting a used flexplate and spacer. And probably pick up a lokar dipstick.
Today I picked up a 4L80E local that I found on Craigslist. I got it for a whopping $200! It's supposedly a '92 and came from a van. But, it has a full slip yoke (not the bolt on), and has been rebuilt (so probably has new wiring). It is missing a few pump bolts that they "borrowed" for another transmission. It was supposedly running fine when pulled. However, I'll be taking a look at things once I open it up when I install Jake's transbrake. Here are some pics.
As I bought her
getting ready for some cleaning
after cleaning
slip on yoke ftw!
Last edited by black00ssFL; 03-27-2012 at 06:21 PM.
 01-24-2012, 09:26 PM
#2
TECH Enthusiast
iTrader: (7)

Join Date: Jan 2011
Location: Longbeach, CA
Posts: 590
Likes: 0
Received 0 Likes
on
0 Posts

subscribing with a meaningless post.
I guess yours will be a bit different than mine in that you have a T56 now, I'll be going from a 60 to an 80, but still.. useful information incoming.
I guess yours will be a bit different than mine in that you have a T56 now, I'll be going from a 60 to an 80, but still.. useful information incoming.
01-30-2012, 12:29 PM
#7
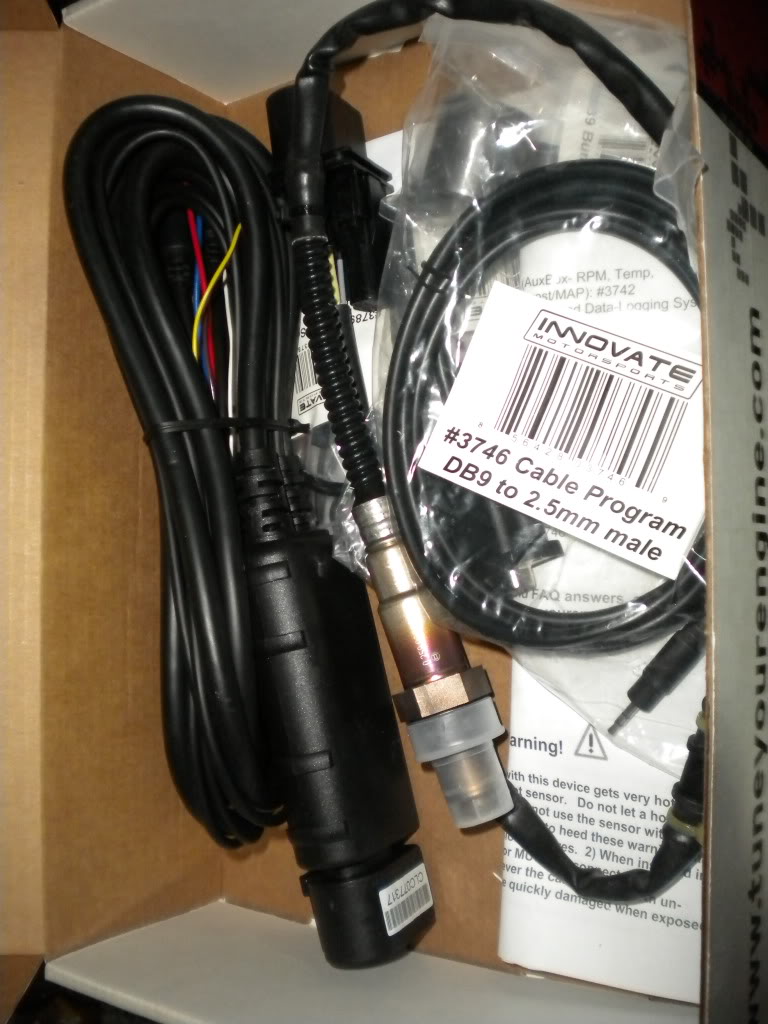
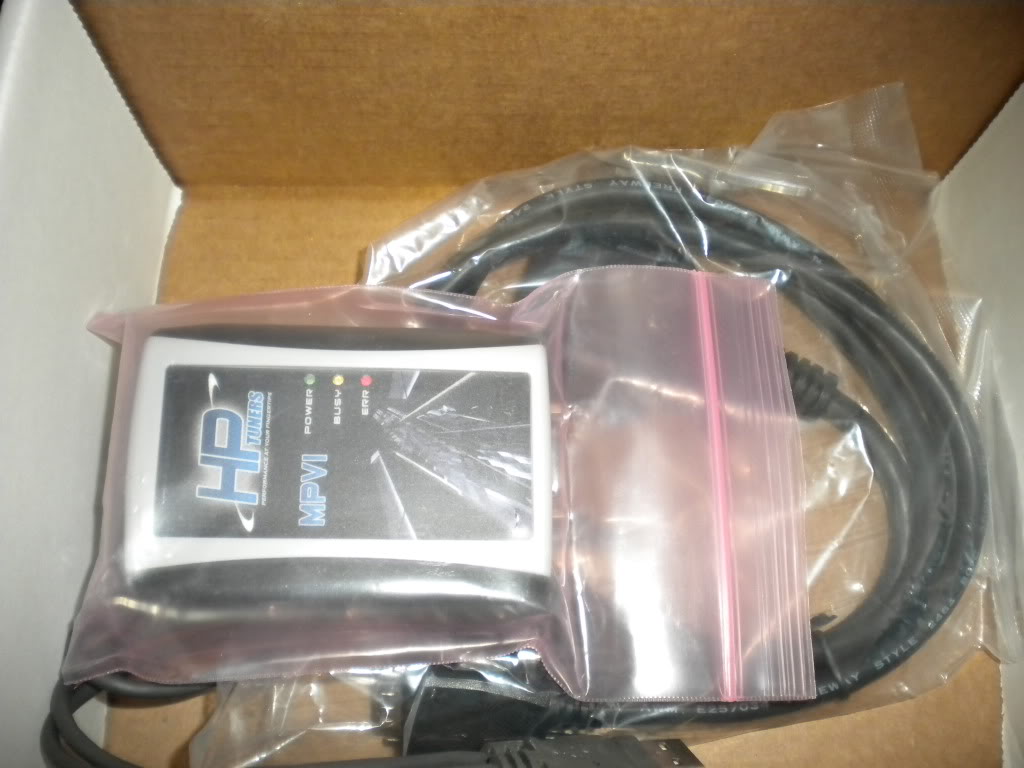
Alright, did some ordering today. Picked up Hp Tuners from lethal racing ($499, plus $129 for wideband but you don't need the wideband for this swap), Jake's 4l80e transbrake setup ($450 shipped, tax time sale), MidWest Chassis 4L80e crossmember ($160 shipped, returning customer discount :-) ), and after talking to a few converter places I'm told my only real option with a transbrake and nitrous in the future is to go with a Billet setup. Ended up going with a RevMax Stage 5 Billet converter with 4,000 stall ($725) which will more than handle what I'll be doing.
Now I just need to figure out the wiring harness issue. There's a couple sponsors that sell m6->4l80e harness, but they're all $200 or so. Not quite wanting to spend that much for just a harness. Anyone know of anything cheaper?
Now I just need to figure out the wiring harness issue. There's a couple sponsors that sell m6->4l80e harness, but they're all $200 or so. Not quite wanting to spend that much for just a harness. Anyone know of anything cheaper?
Trending Topics
01-31-2012, 10:43 PM
#11
And I guess I can throw the "budget" aspect of my build out the window, lol. Going with the transbrake and the billet converter kinda did that. However, getting a standard "shift kit" (jake's valve body kit is only $110) and a non-billet converter ($300-450) can really take some costs out. I guess the actual cost of the transmission is the only thing left that's actually "budget" now.
02-02-2012, 05:29 PM
#12
Got the pedals in today. Also got the manual and jake's transbrake in the mail. Also got a nice surprise from jake too. He threw in some pump bolts I needed and a set of direct clutches (he knew I would be rebuilding this on my own and I asked him what are some common things that'll need to be replaced).
Rest of my week is busy, so it looks like I'll probably get to tearing the tranny down next week.
Rest of my week is busy, so it looks like I'll probably get to tearing the tranny down next week.
 02-03-2012, 07:13 AM
#15
TECH Enthusiast
iTrader: (7)
Join Date: Jan 2011
Location: Longbeach, CA
Posts: 590
Likes: 0
Received 0 Likes
on
0 Posts
You're gonna do the rebuild yourself?
wow.. I've only been inside a 60E one time (indirectly at that.. I was watching a guy rebuild one..) I have even less idea how it works in there than I did before I saw him work on it.
Good luck man! Really tho.. for $200, it's worth a learning experience. Though I doubt you'll have any trouble with it..
02-03-2012, 11:21 AM
#16
A trans is simple if you keep the parts that come out in order. Take something out put it on the left side of the table then work to the right. Keep assemblies together until you are ready to work on it. Then finish it and go to the next. Take pictures etc. I have never been into an 80, but have done th400's 350's glides, 60's etc. I will eventually do my 80 when the time comes. Good luck op.
02-03-2012, 02:55 PM
#17
A trans is simple if you keep the parts that come out in order. Take something out put it on the left side of the table then work to the right. Keep assemblies together until you are ready to work on it. Then finish it and go to the next. Take pictures etc. I have never been into an 80, but have done th400's 350's glides, 60's etc. I will eventually do my 80 when the time comes. Good luck op.
When you get stuck, post and the knowledge on this site will get you thru it.
Mike
02-03-2012, 11:00 PM
#18
So canceled class + wife hanging out with a friend tonight = me tearing down the 4L80E. Like promised, I took pics of the whole process. I must say though, for $200 I got this thing at a steal. Everything looks great and the clutches look like they were barely used. I haven't gone into the direct drum yet to see what kinda sprag I have. It was much more simple than I thought it would be. The main thing is to stay organized and label things as you go. Anyways, on to the pics/procedure for dis assembly.
First of all I highly recommend this manual. The pics and diagrams made taking this thing apart a breeze.
First I removed the extension case
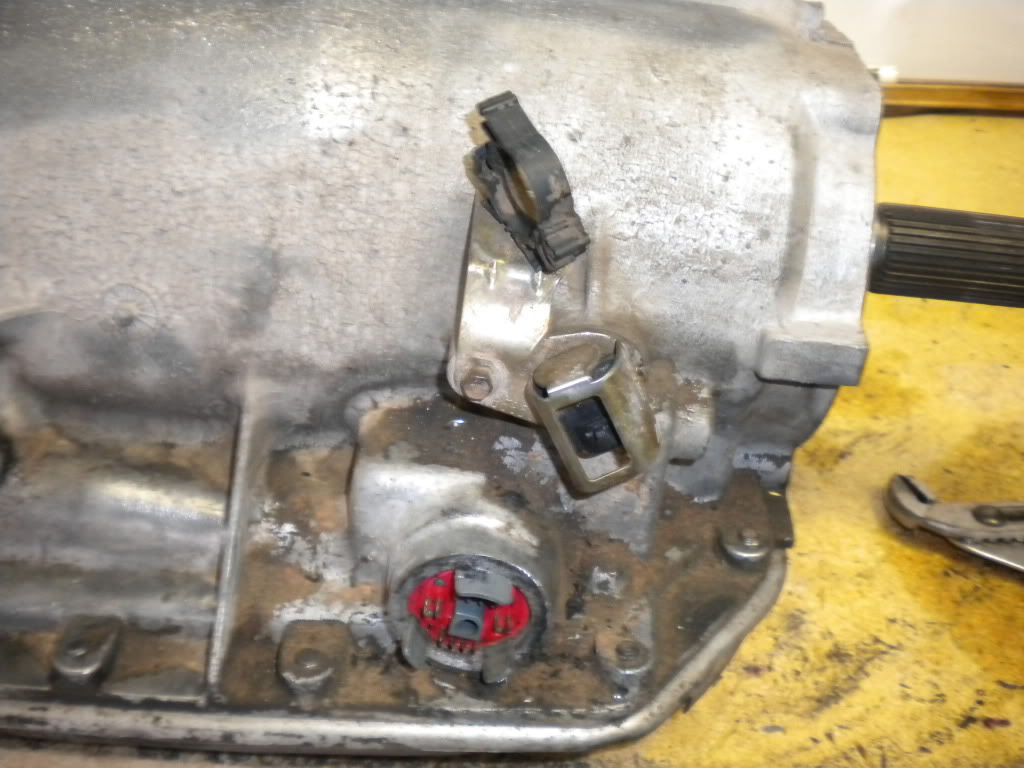
Then I removed the VSS sensors

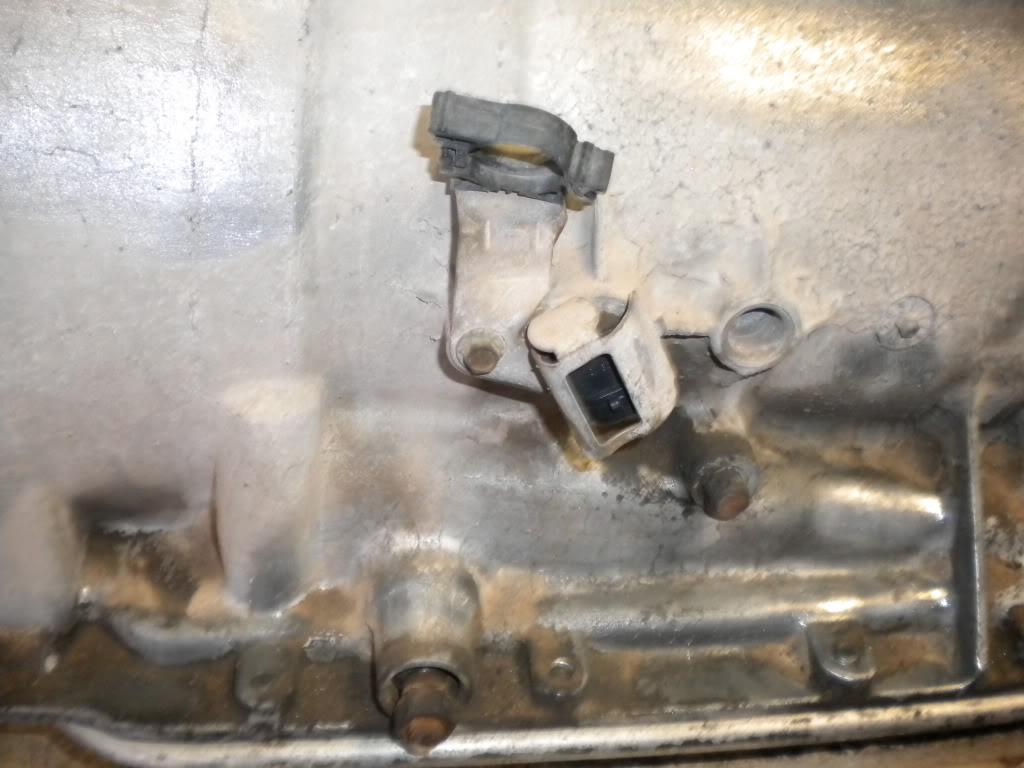
Then I removed the pan
Then the filter
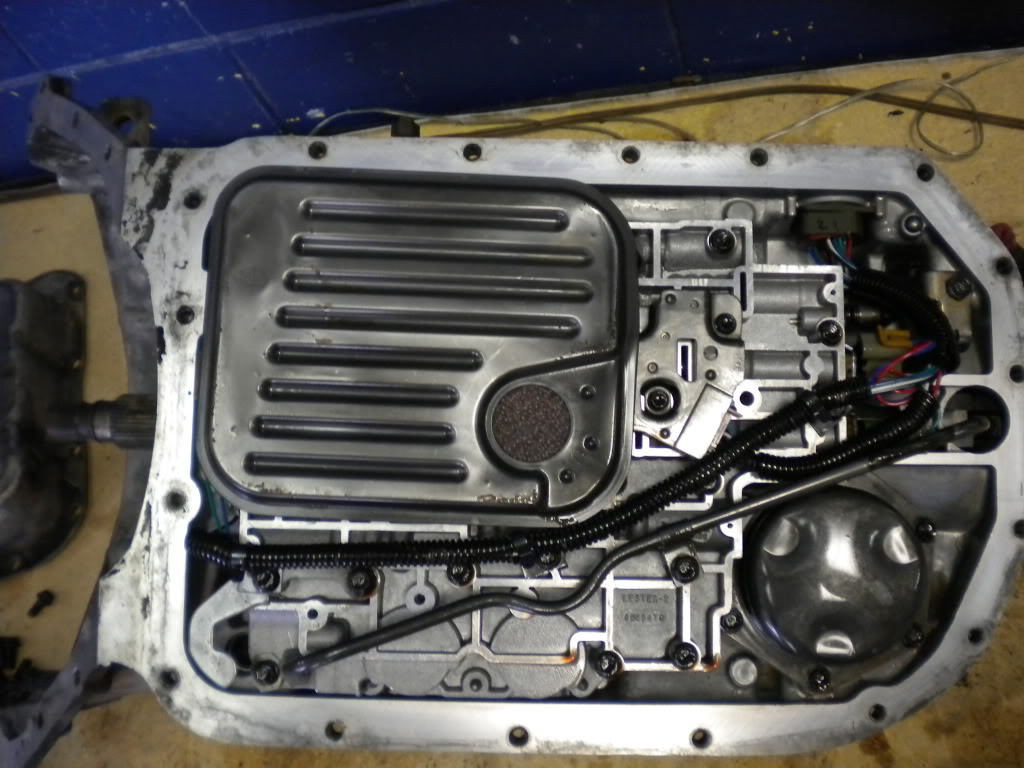
Then I removed the wiring harness
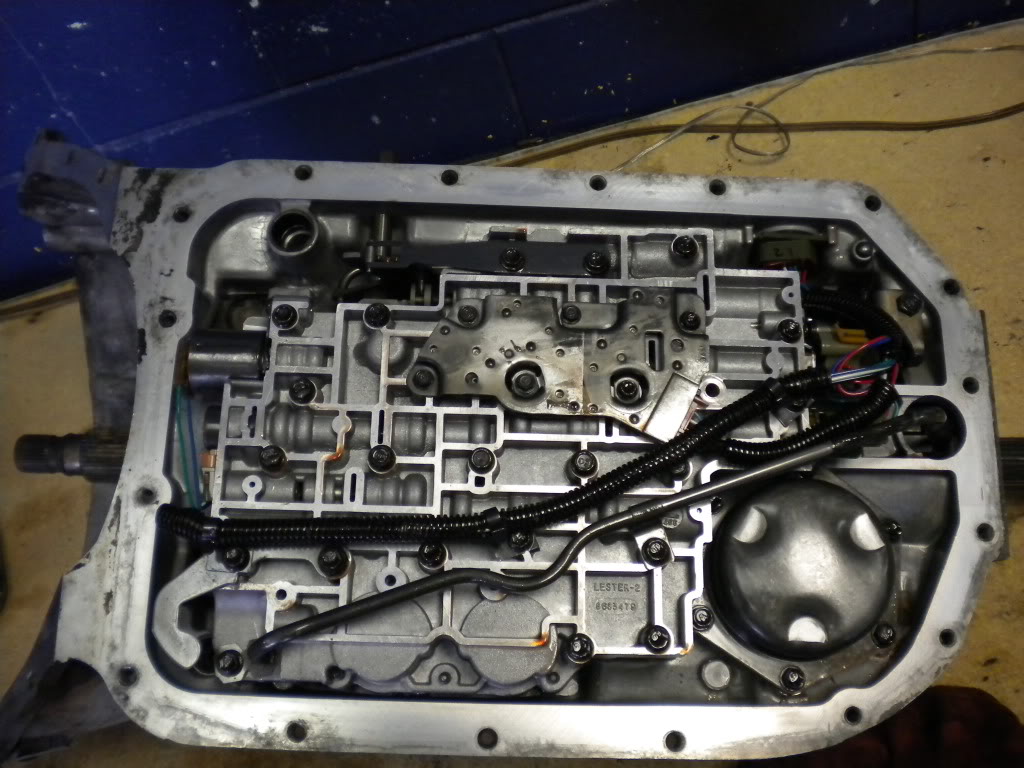
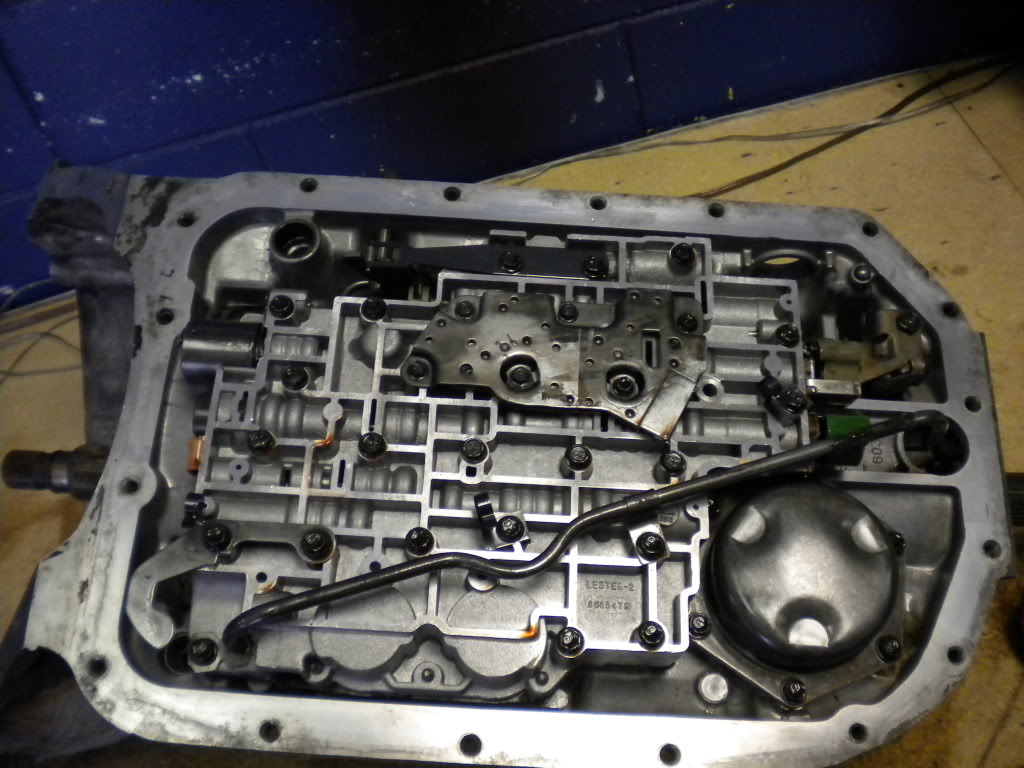
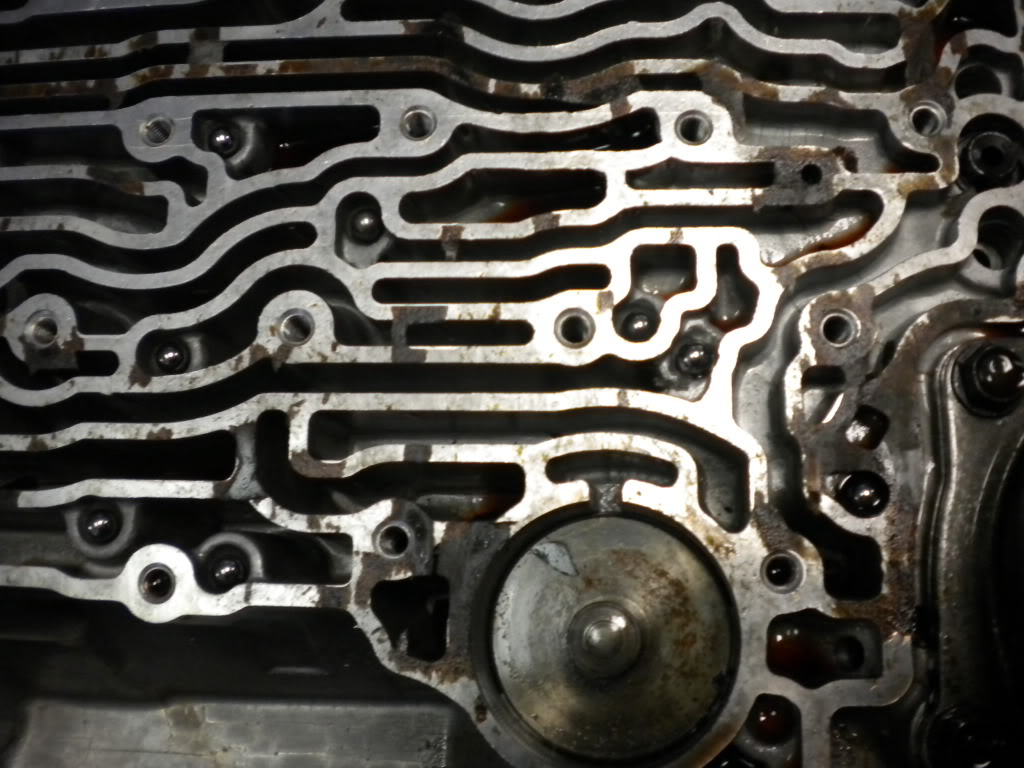
Then I removed the pressure switch manifold that's on the valve body
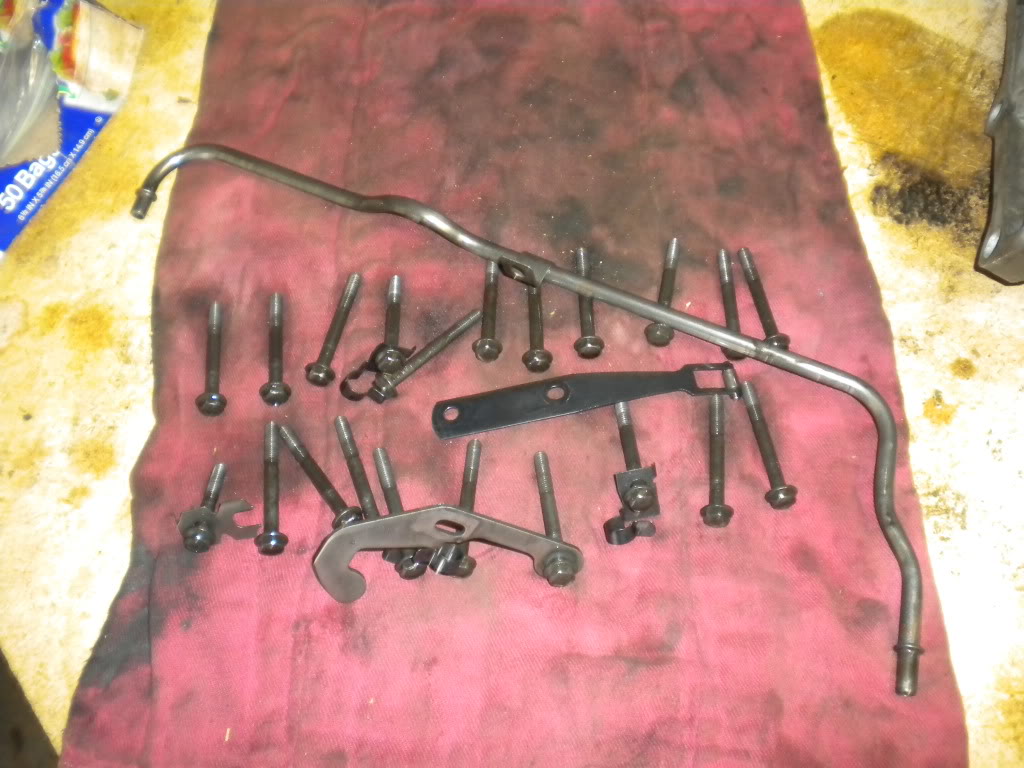
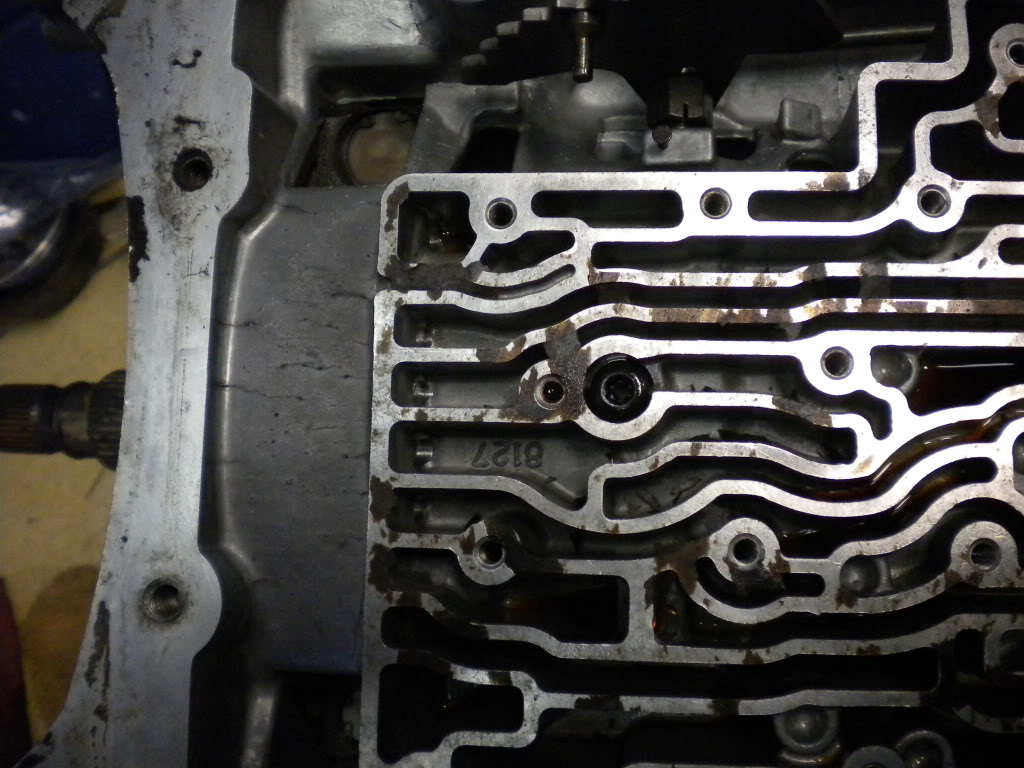
Then I removed all the valve body bolts (21 of them), along with the oil stop, manual lever detent spring, lube pipe, and wiring clips.
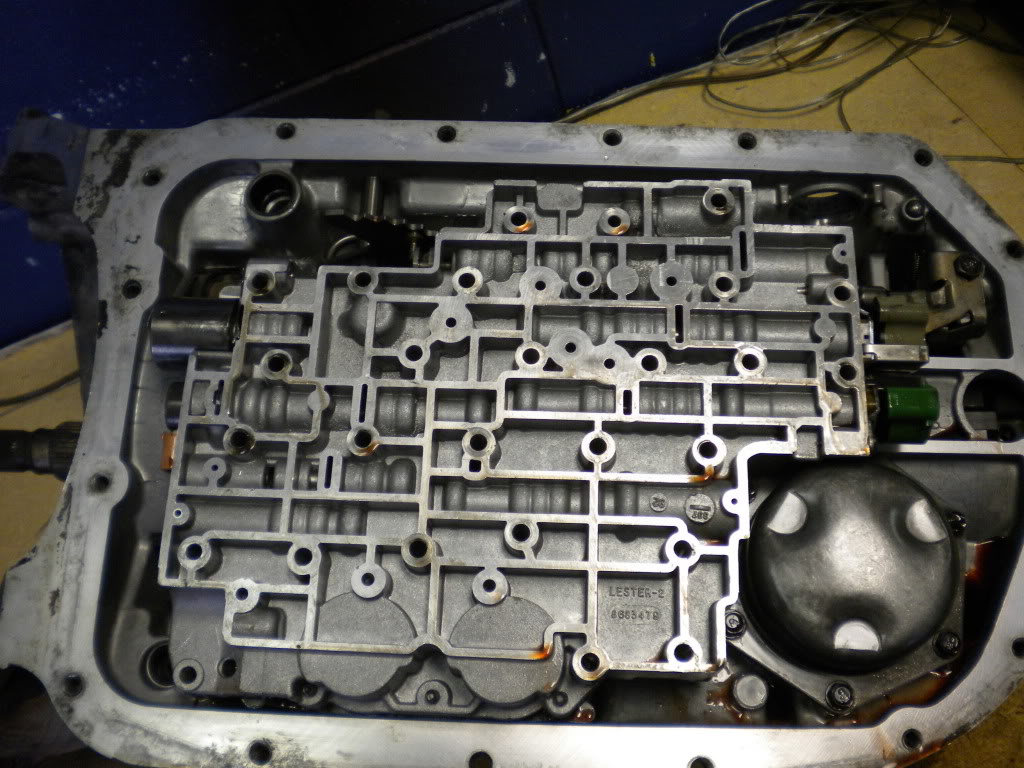
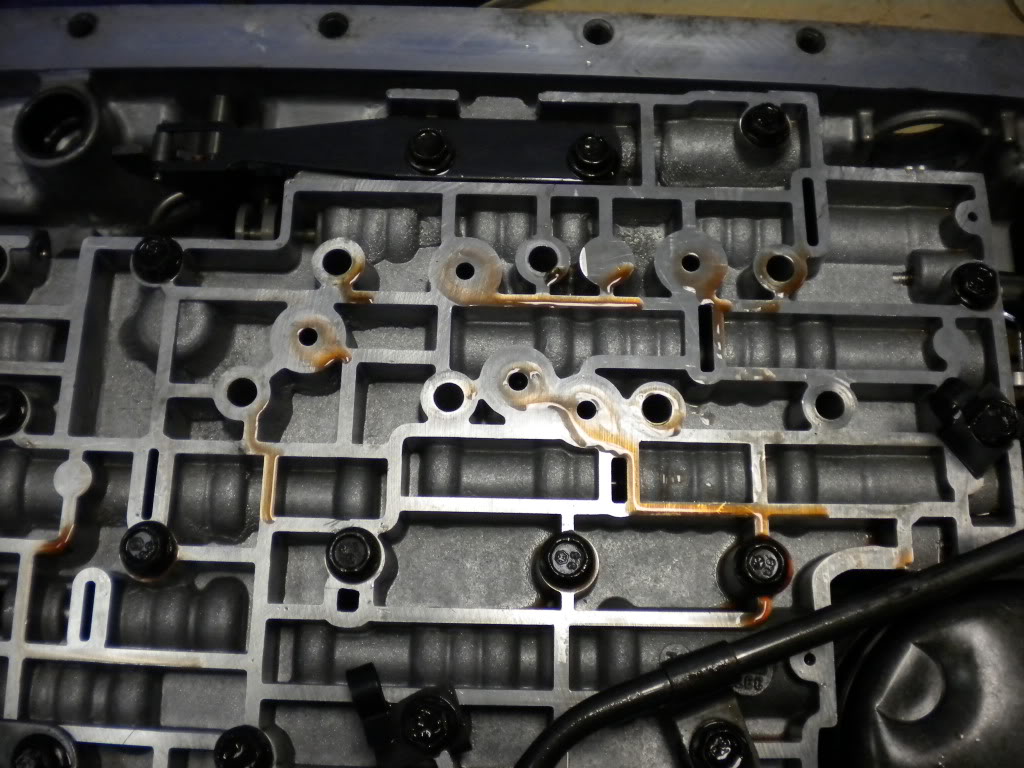
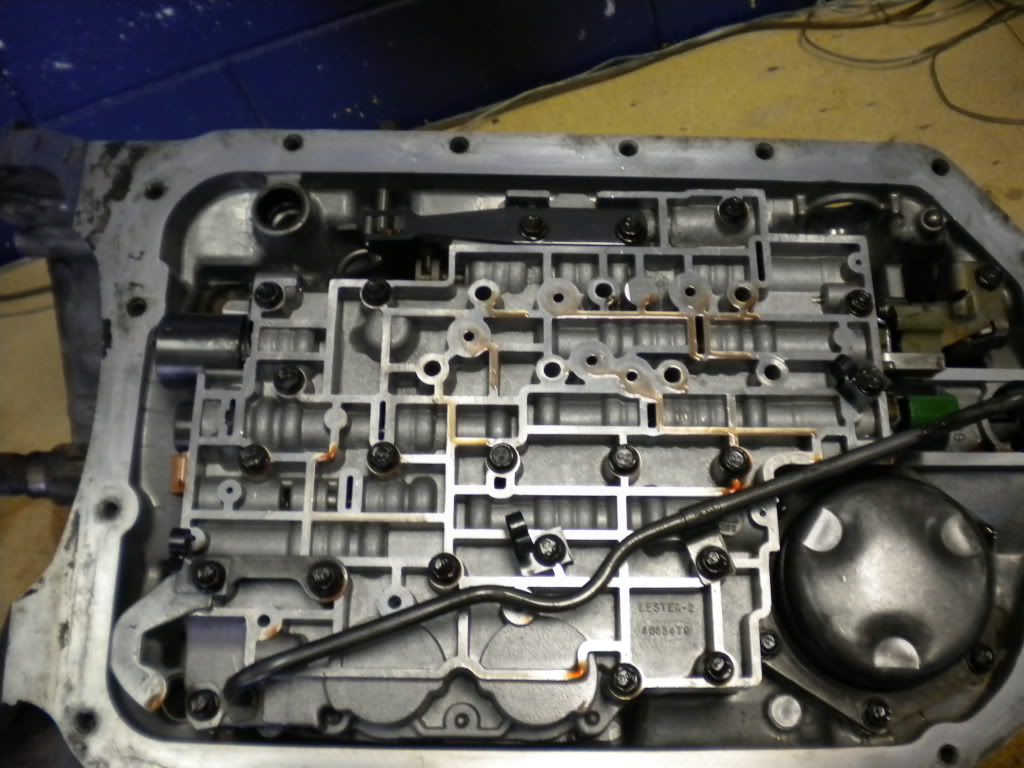
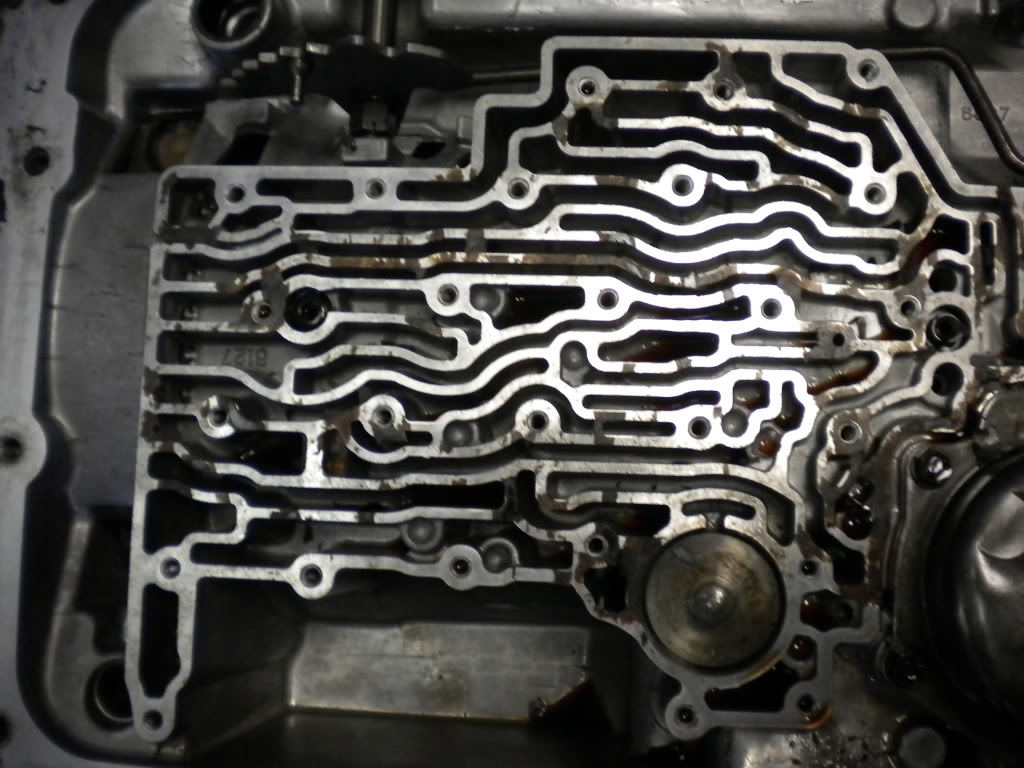
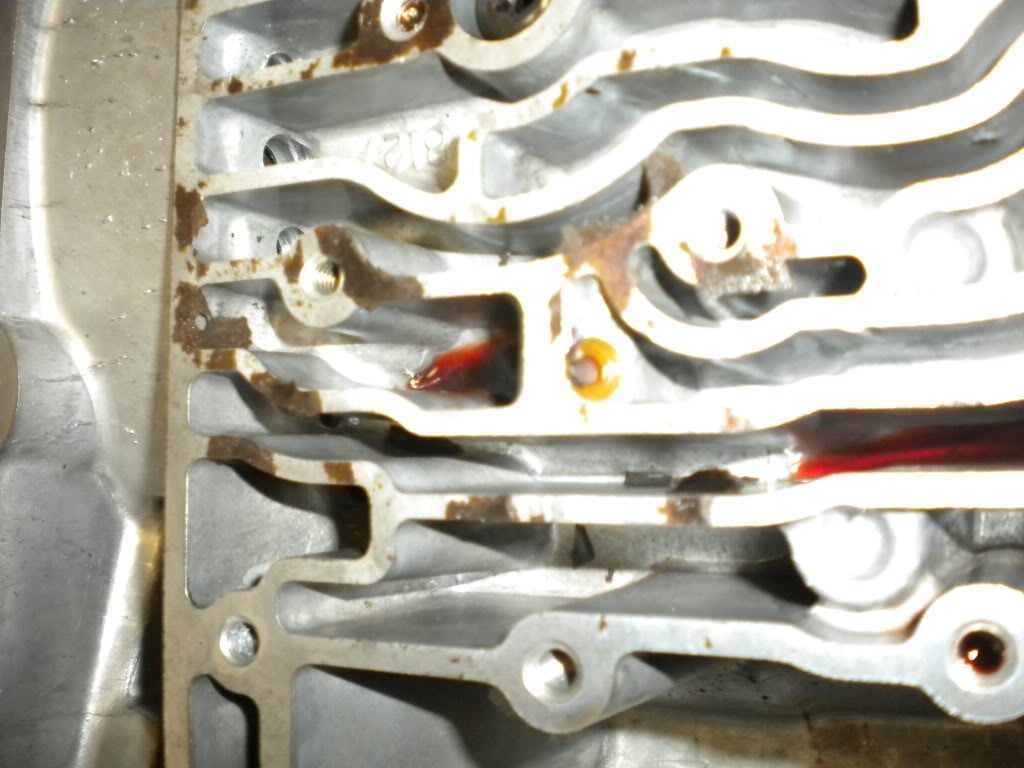
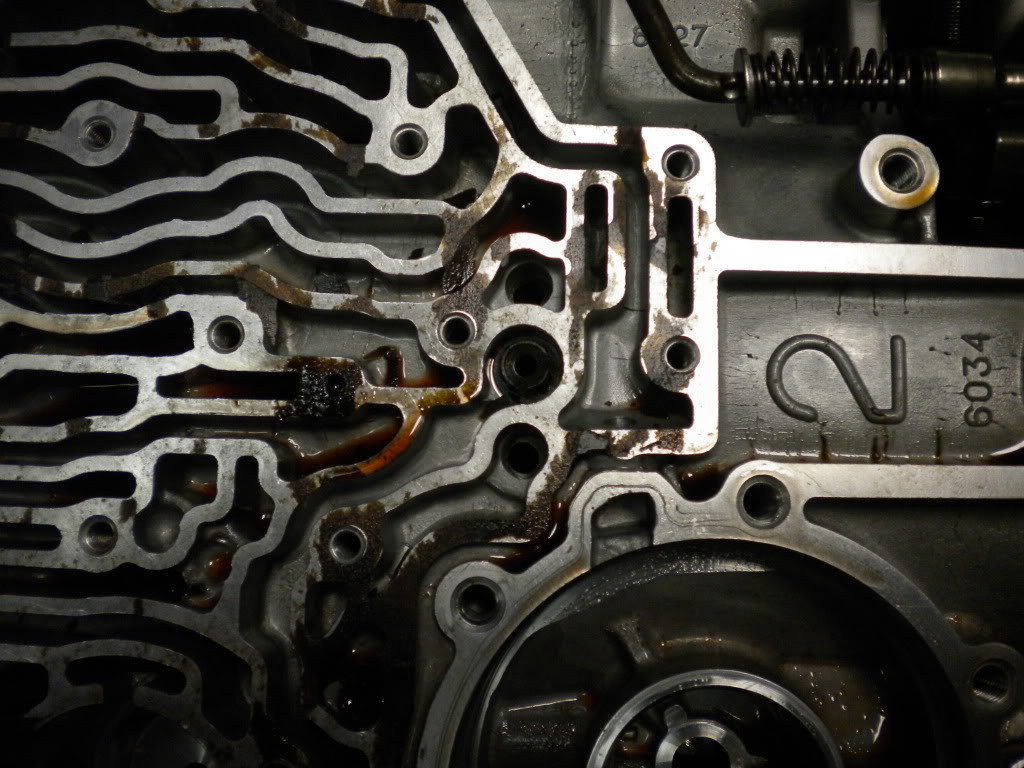
Then I removed the valve body and the gasket. This is where some patience may help. My gasket was really brittle and I ended up having to take out the trusty razor blade to scrape most of it off. I'll have to clean the rest of it up later on when I clean the case.
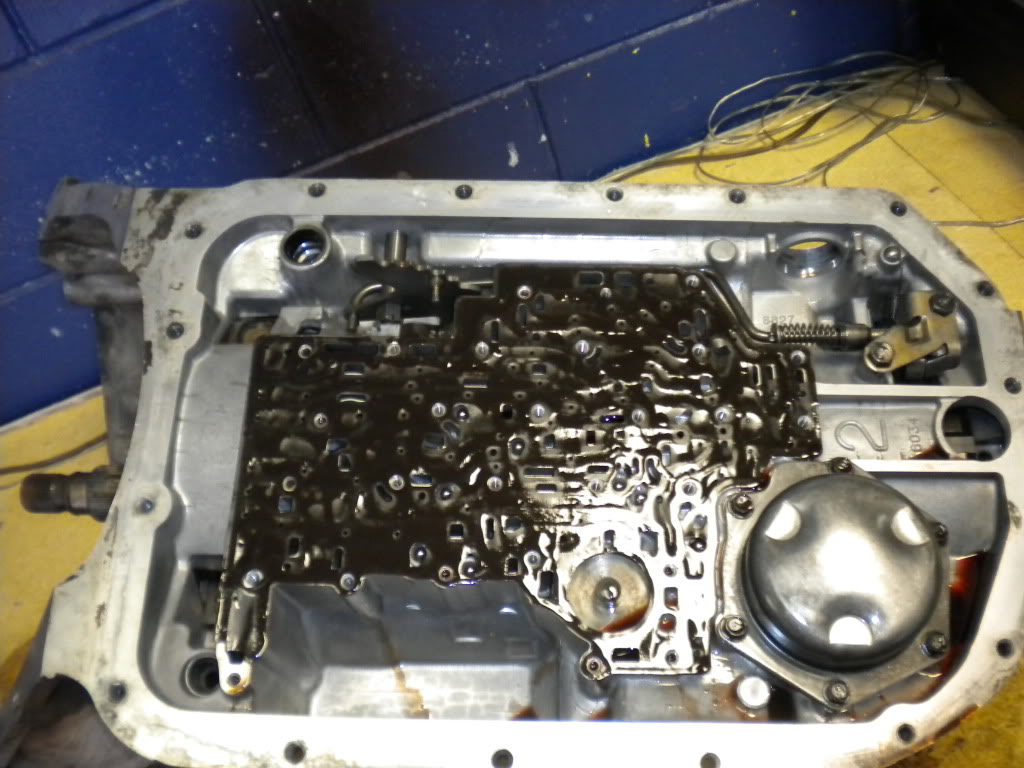
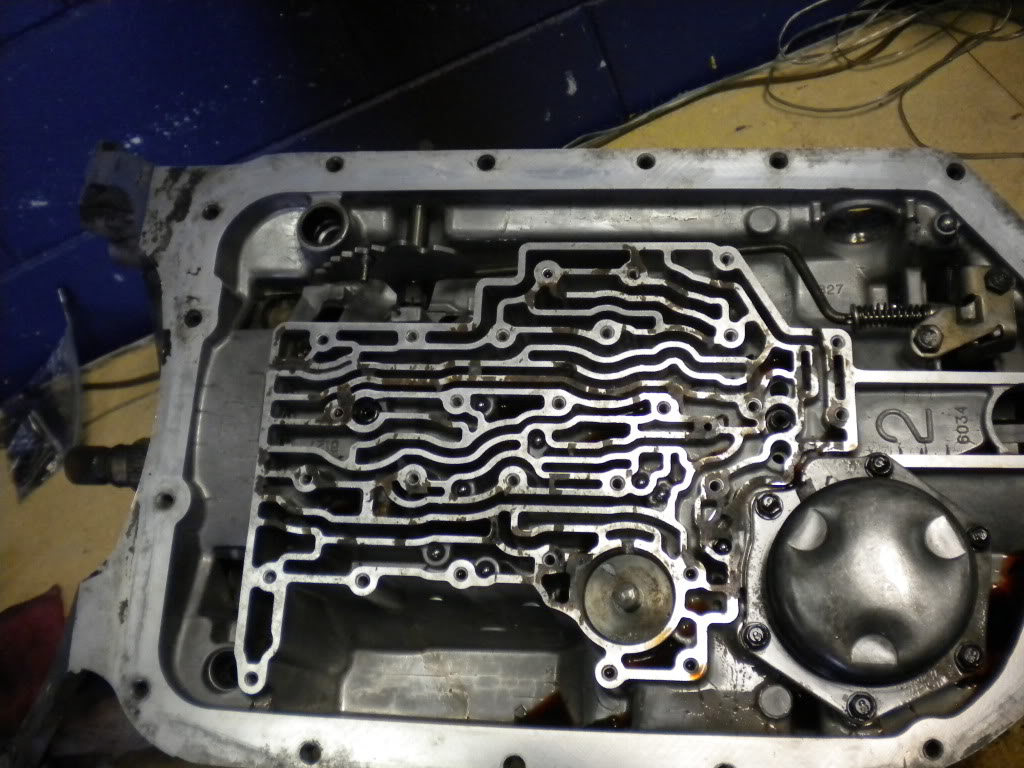
Next up was to take out the check *****, there's 8 of them and it's really obvious where they go.
First of all I highly recommend this manual. The pics and diagrams made taking this thing apart a breeze.
First I removed the extension case
Then I removed the VSS sensors
Then I removed the pan
Then the filter
Then I removed the wiring harness
Then I removed the pressure switch manifold that's on the valve body
Then I removed all the valve body bolts (21 of them), along with the oil stop, manual lever detent spring, lube pipe, and wiring clips.
Then I removed the valve body and the gasket. This is where some patience may help. My gasket was really brittle and I ended up having to take out the trusty razor blade to scrape most of it off. I'll have to clean the rest of it up later on when I clean the case.
Next up was to take out the check *****, there's 8 of them and it's really obvious where they go.
02-03-2012, 11:01 PM
#19
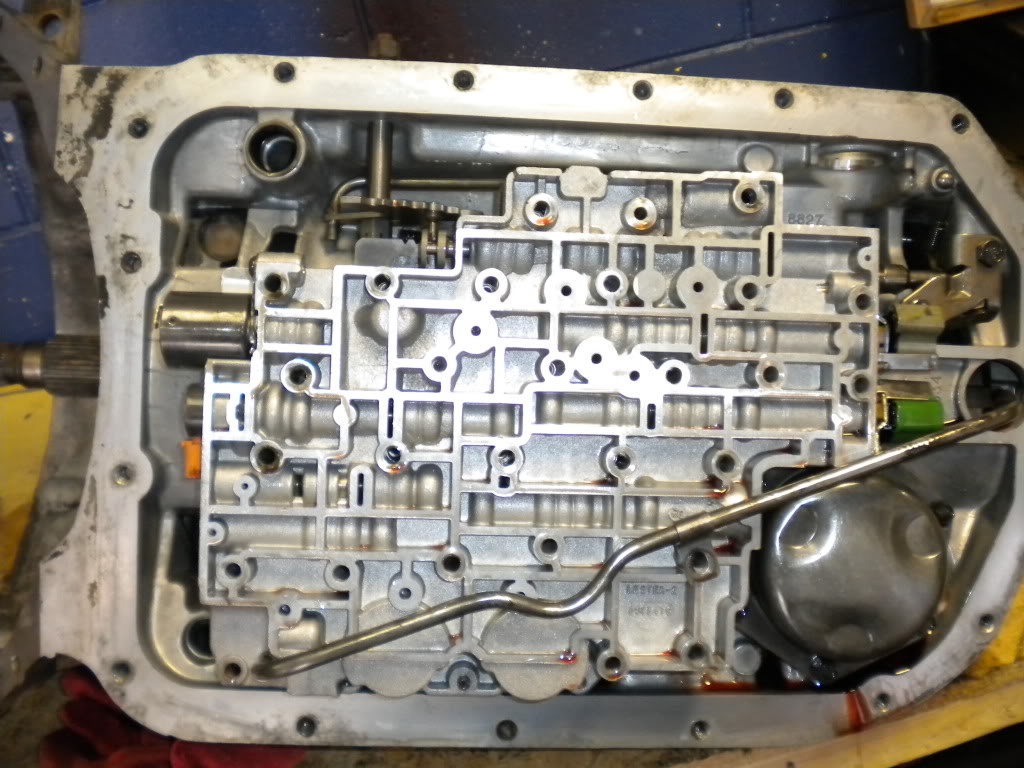
Next up I removed the TCC/PWM solenoid screen and the intermediate servo assembly. I simply pulled the screen out with some small needle nose pliers. And the servo is simply pulled out.
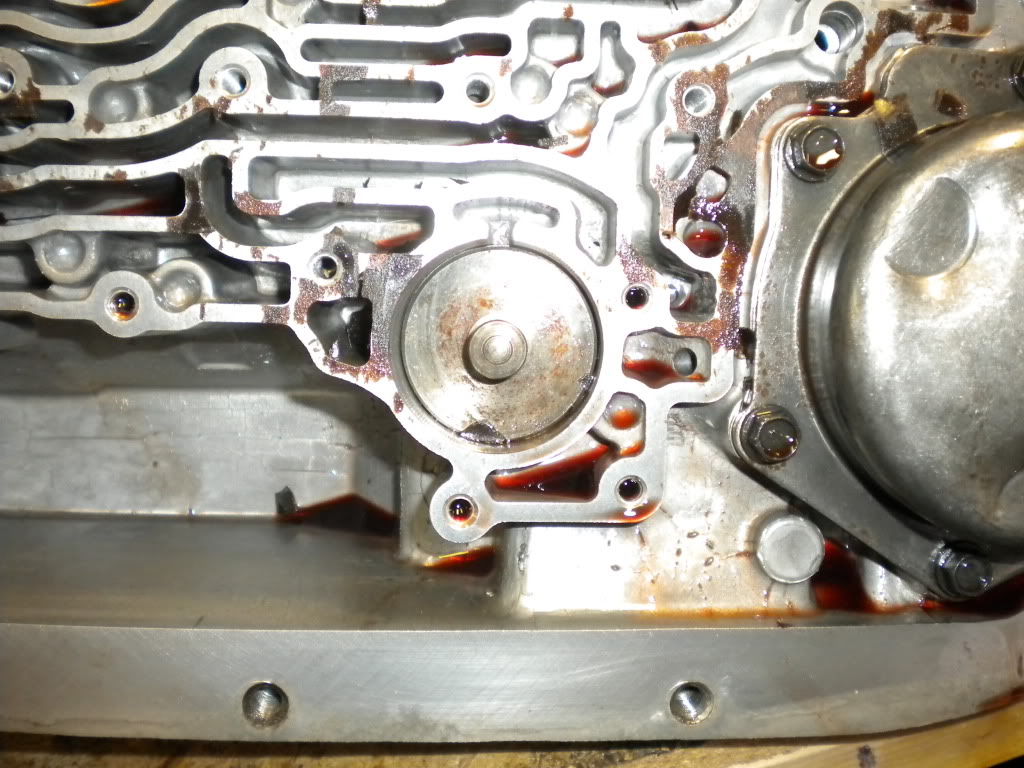

Next was the reverse servo assembly
Then I removed the parking pawl bracket
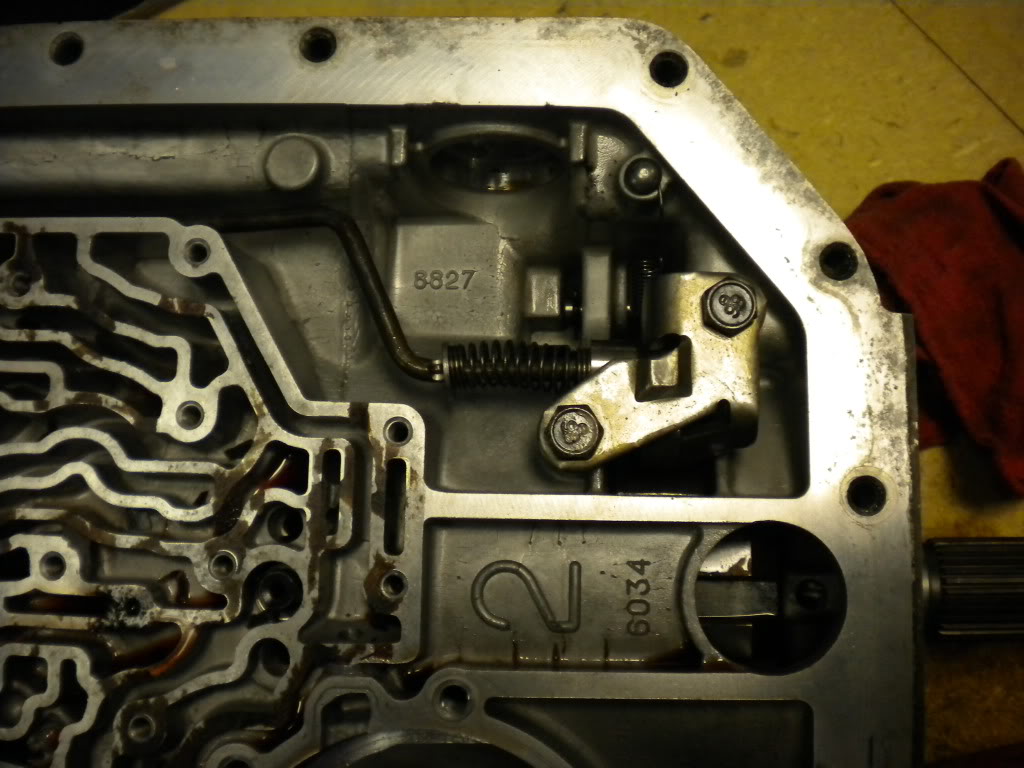

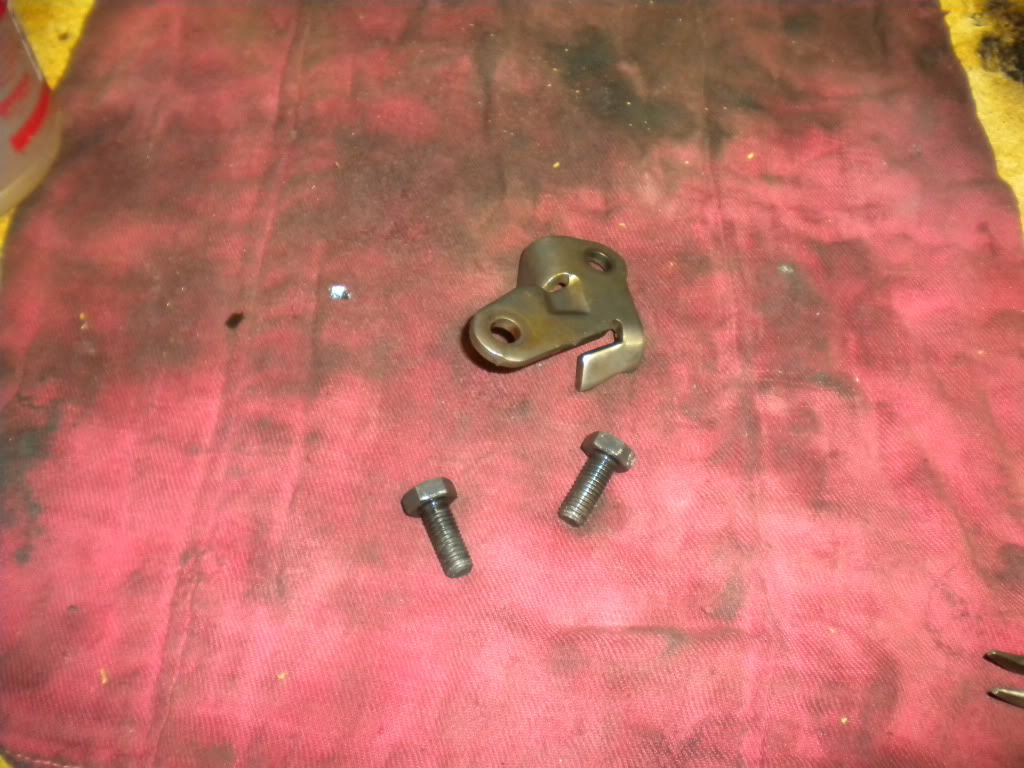
Finally, to finish out the valve body area, I removed the 4th clutch housing bolt (40 torx bit) and the center support bolt (3/8" 12 point).
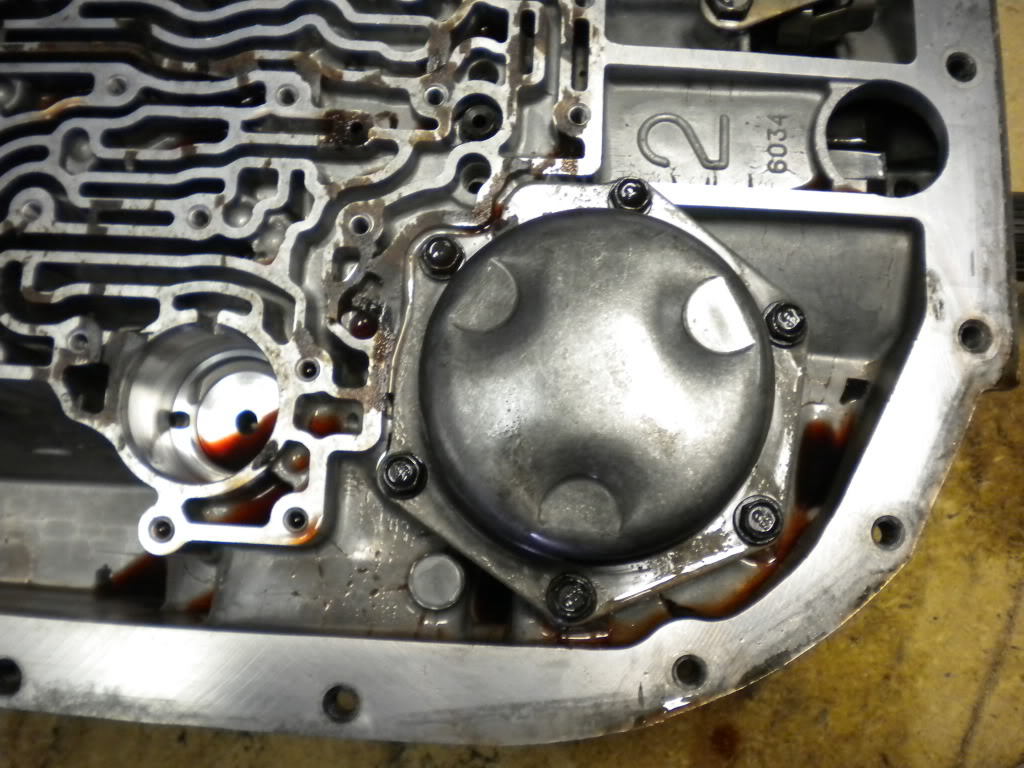
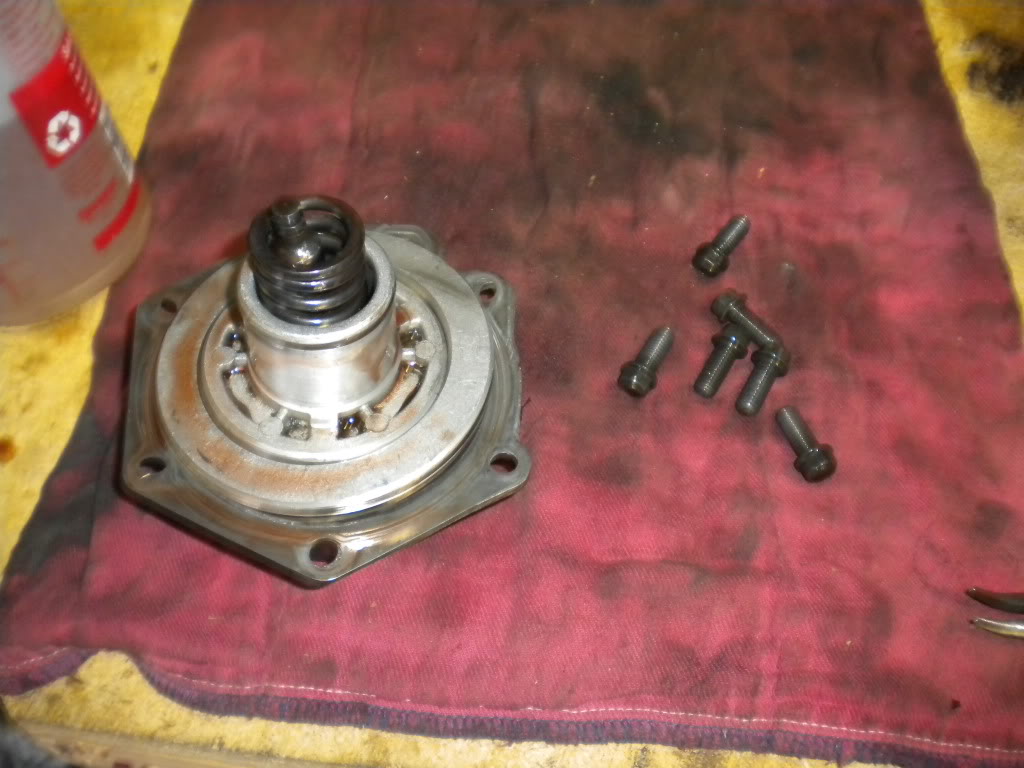
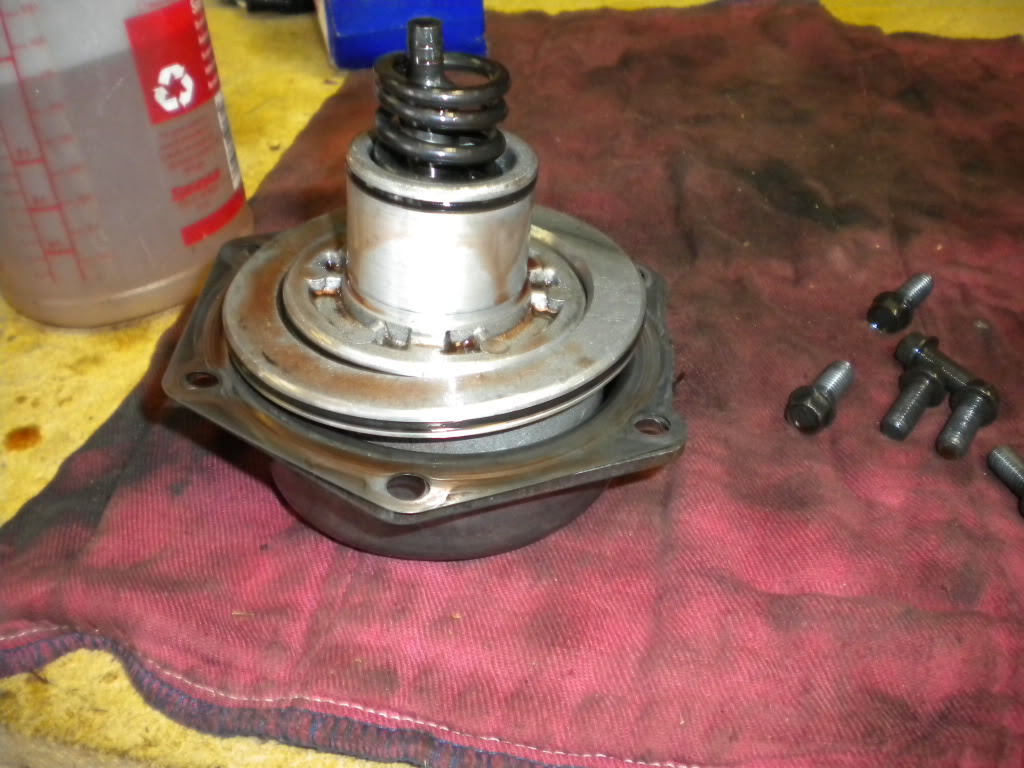
Now on to removing the "guts" of the tranny. Next up I removed the O ring from the turbine shaft and the pump bolts
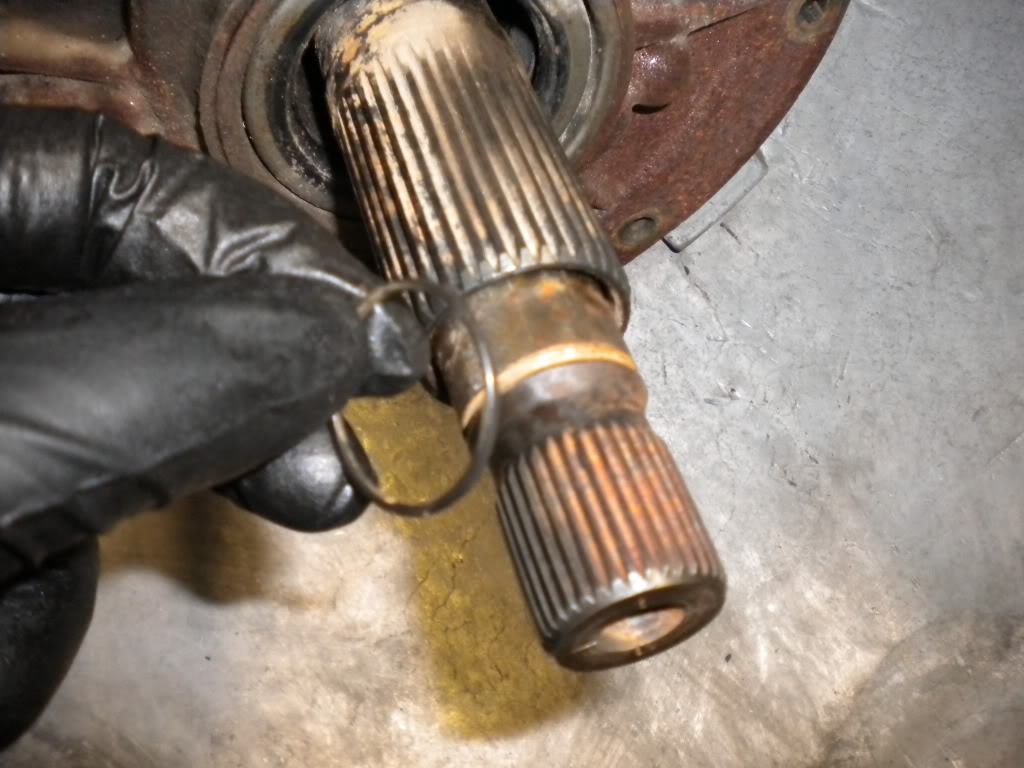
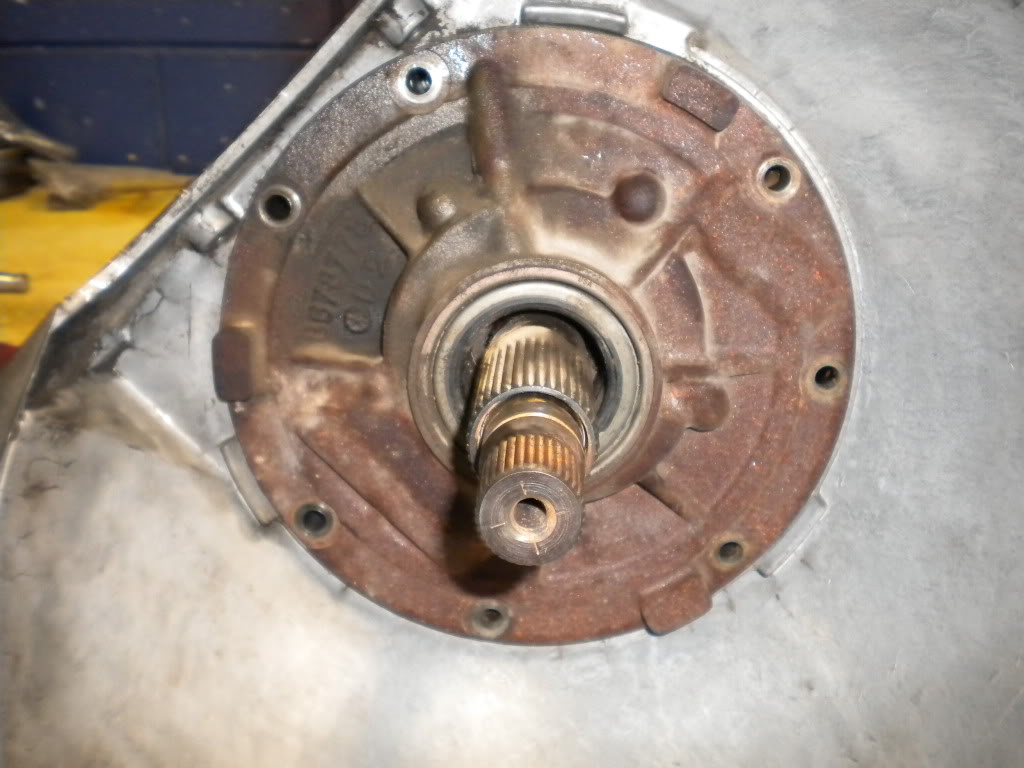
Then I pulled out the pump. I used two medium size pry bars at opposite ends to give it a little help out of the casing. Once it was free, I pulled it out by hand. Be sure not to pull the turbine shaft. Make sure you get the thrust washer, and throw out the gasket.
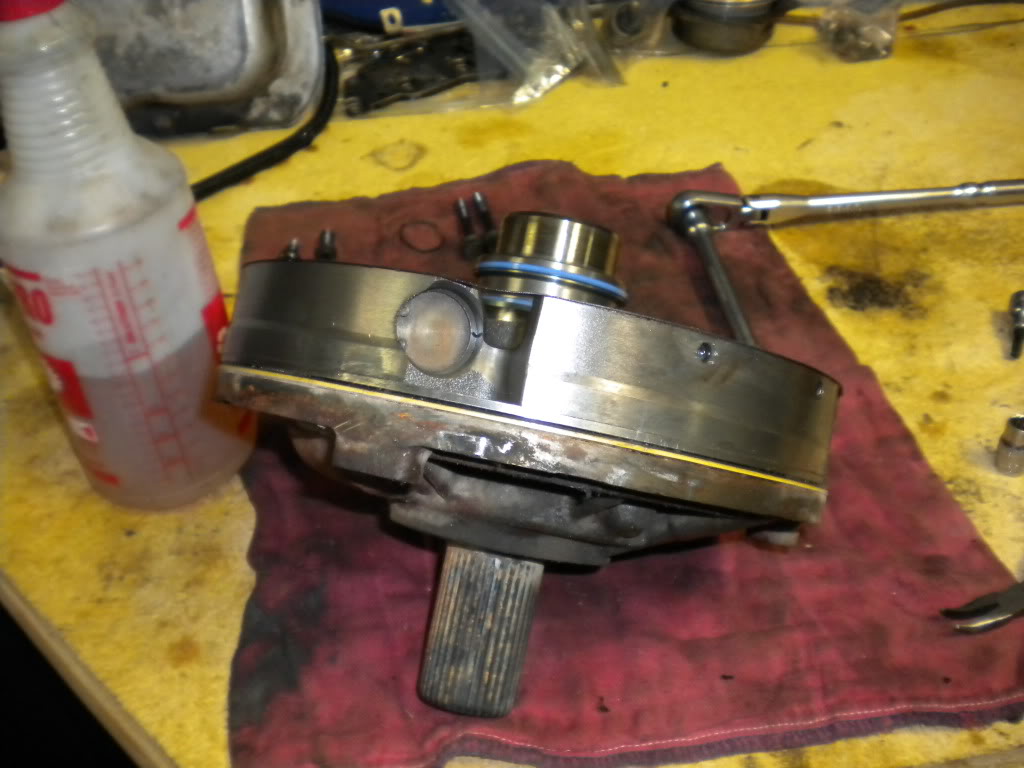
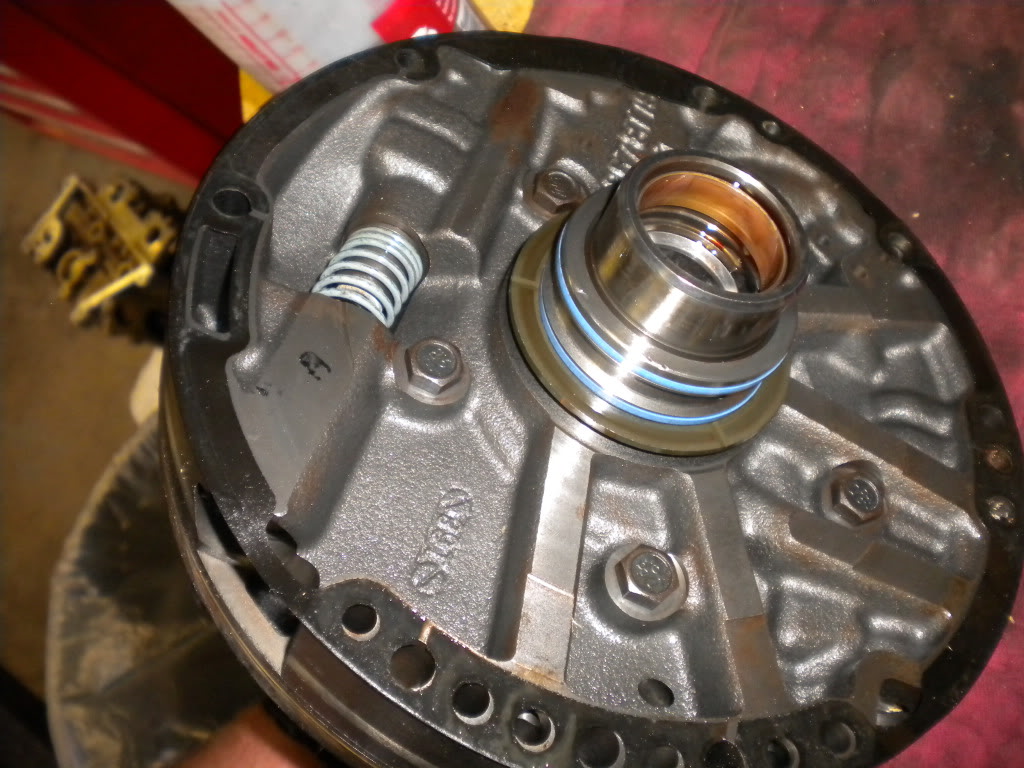
Next I pulled out the overdrive carrier/turbine shaft/overrun clutch housing assembly. There's a thrust bearing behind it as well


Then I pulled out the 4th clutch housing/assembly
Next was the reverse servo assembly
Then I removed the parking pawl bracket
Finally, to finish out the valve body area, I removed the 4th clutch housing bolt (40 torx bit) and the center support bolt (3/8" 12 point).
Now on to removing the "guts" of the tranny. Next up I removed the O ring from the turbine shaft and the pump bolts
Then I pulled out the pump. I used two medium size pry bars at opposite ends to give it a little help out of the casing. Once it was free, I pulled it out by hand. Be sure not to pull the turbine shaft. Make sure you get the thrust washer, and throw out the gasket.
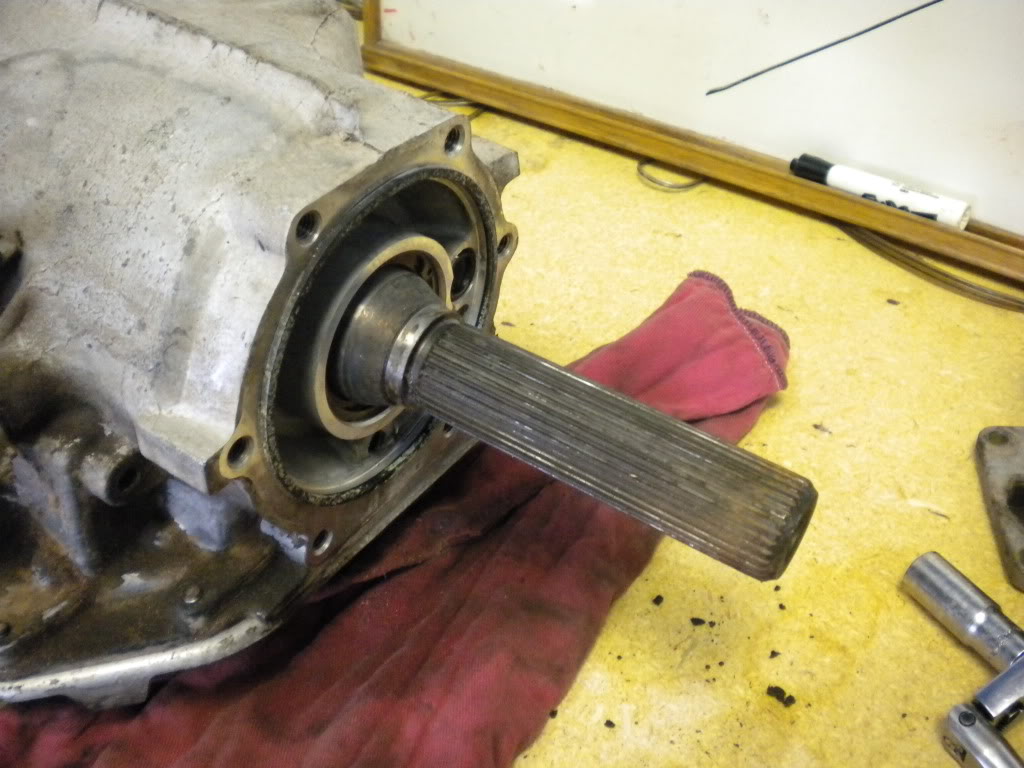
Next I pulled out the overdrive carrier/turbine shaft/overrun clutch housing assembly. There's a thrust bearing behind it as well
Then I pulled out the 4th clutch housing/assembly
02-03-2012, 11:02 PM
#20
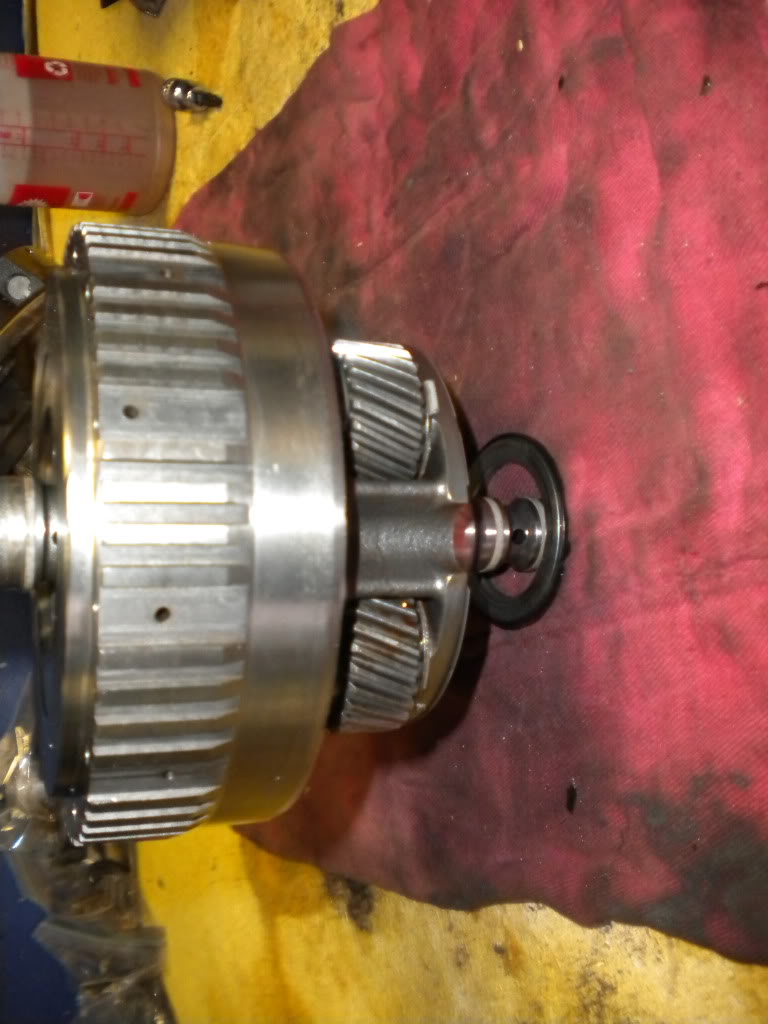
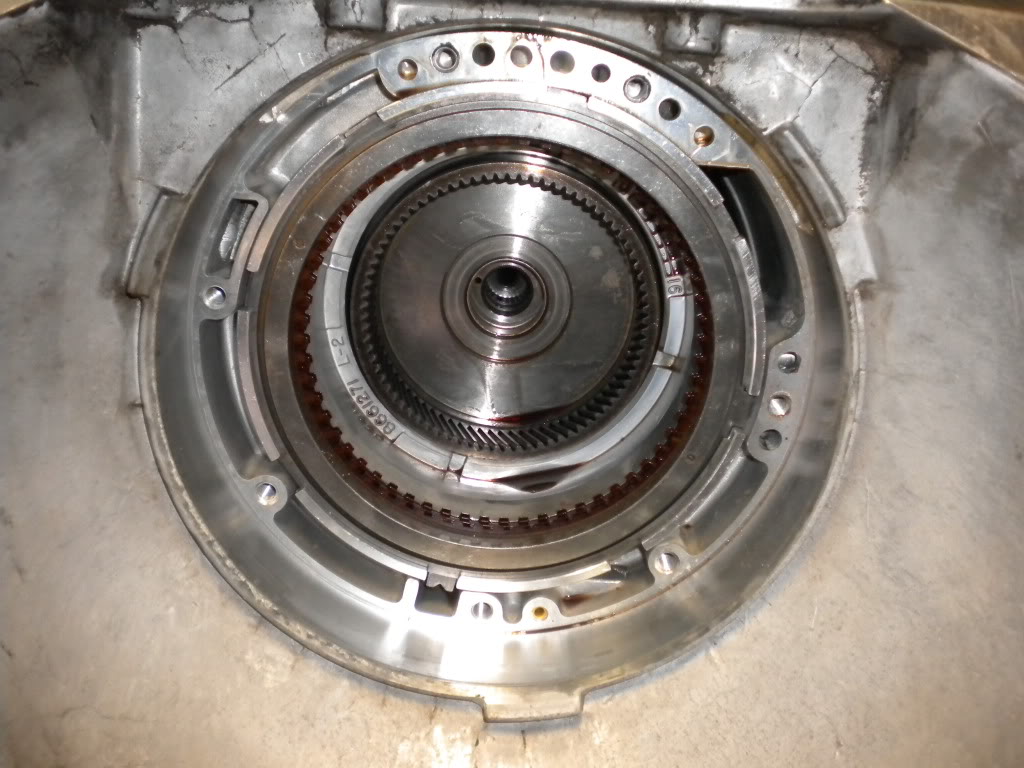
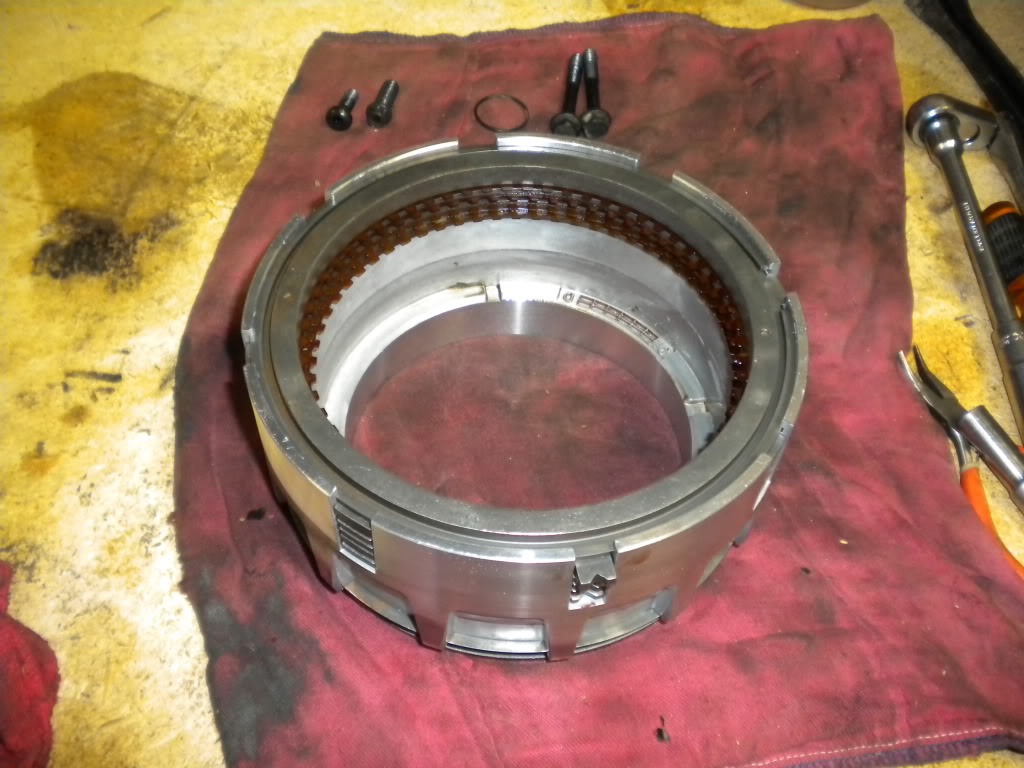
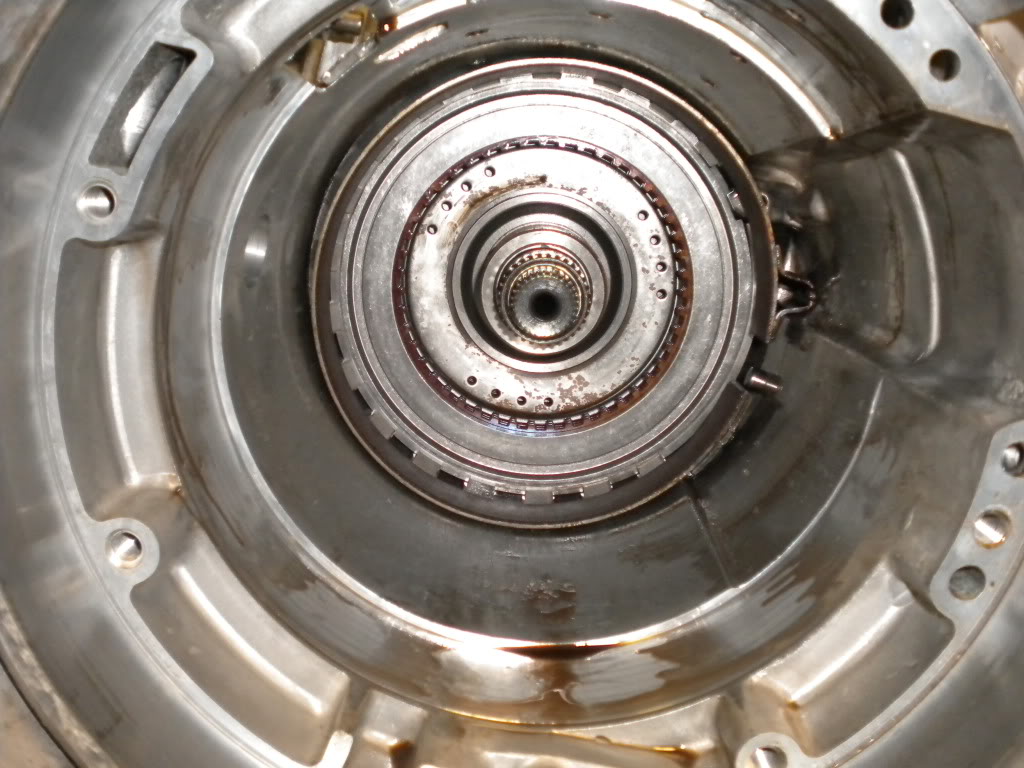
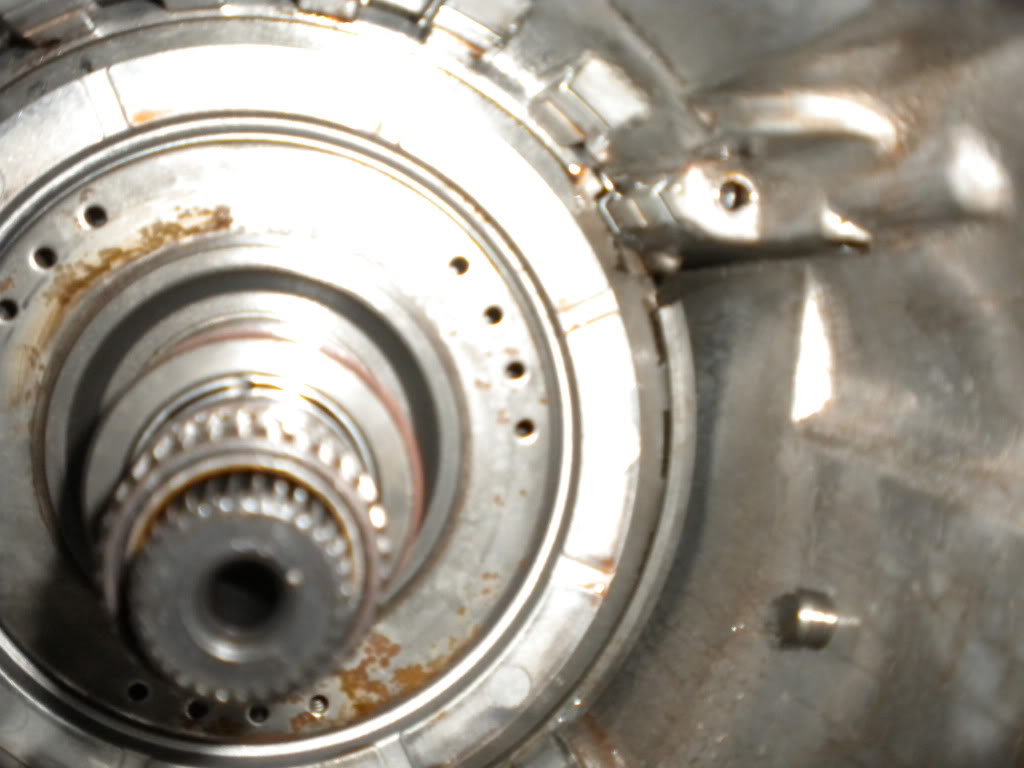
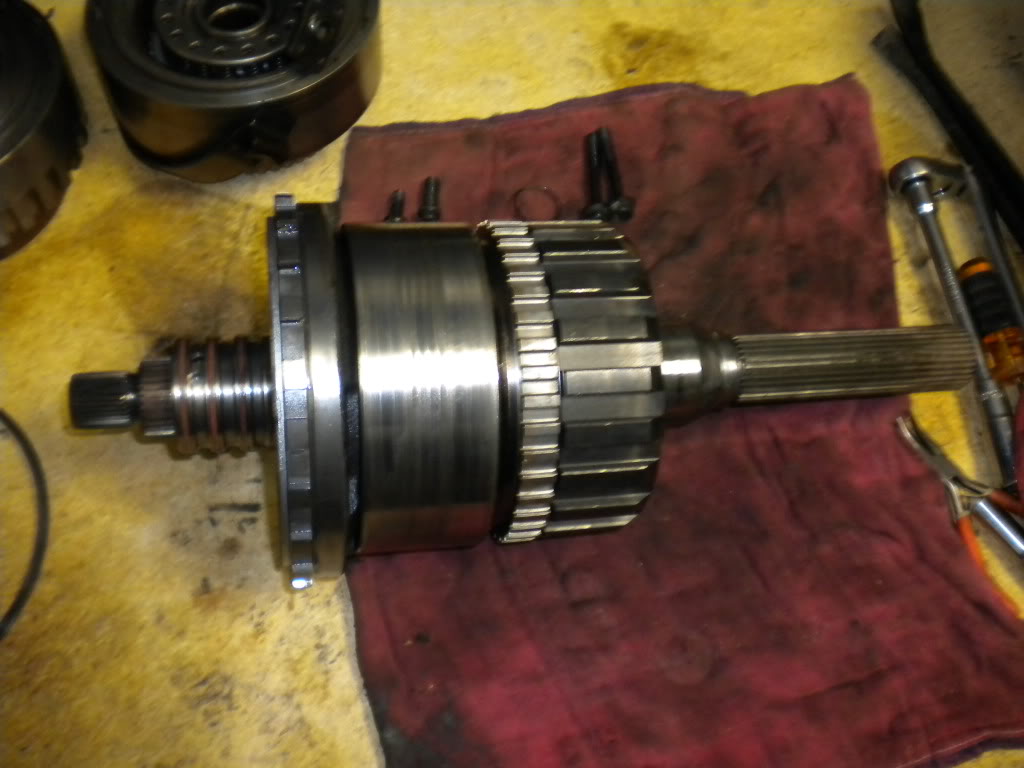
Next up was pulling the forward clutch housing
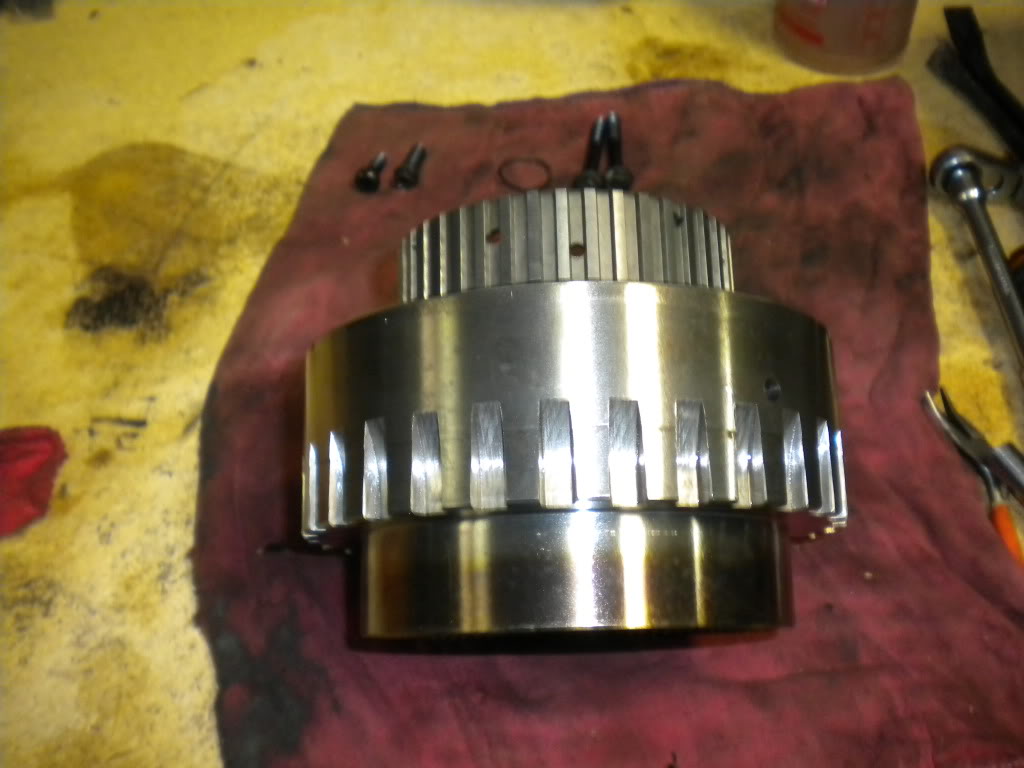
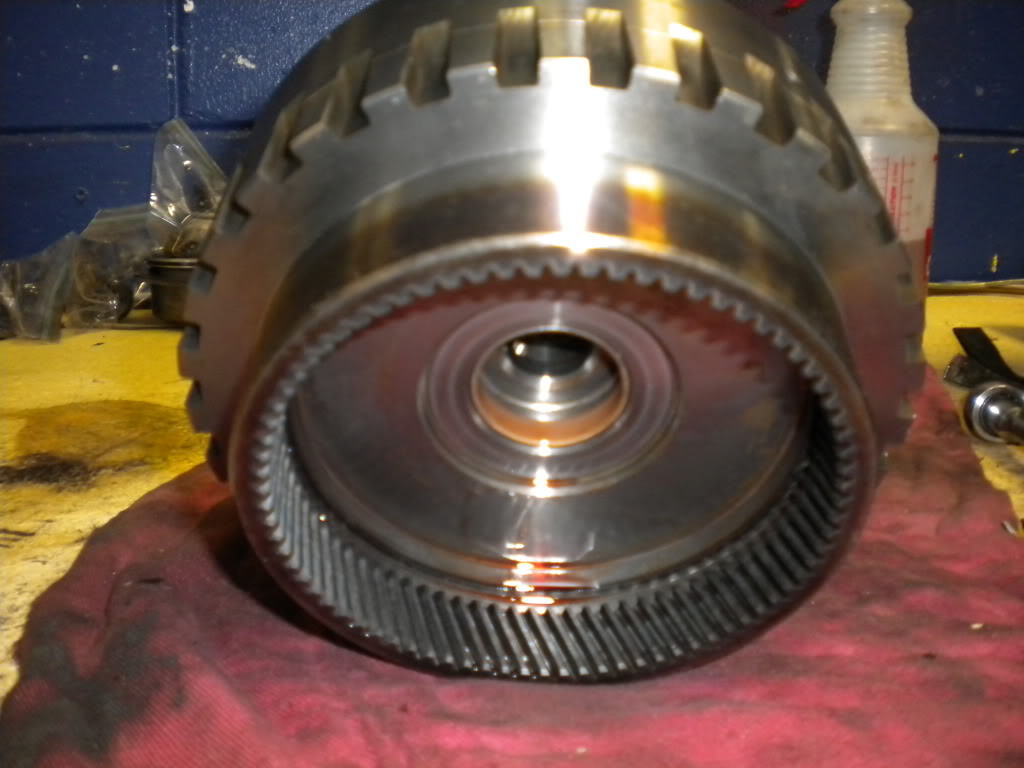
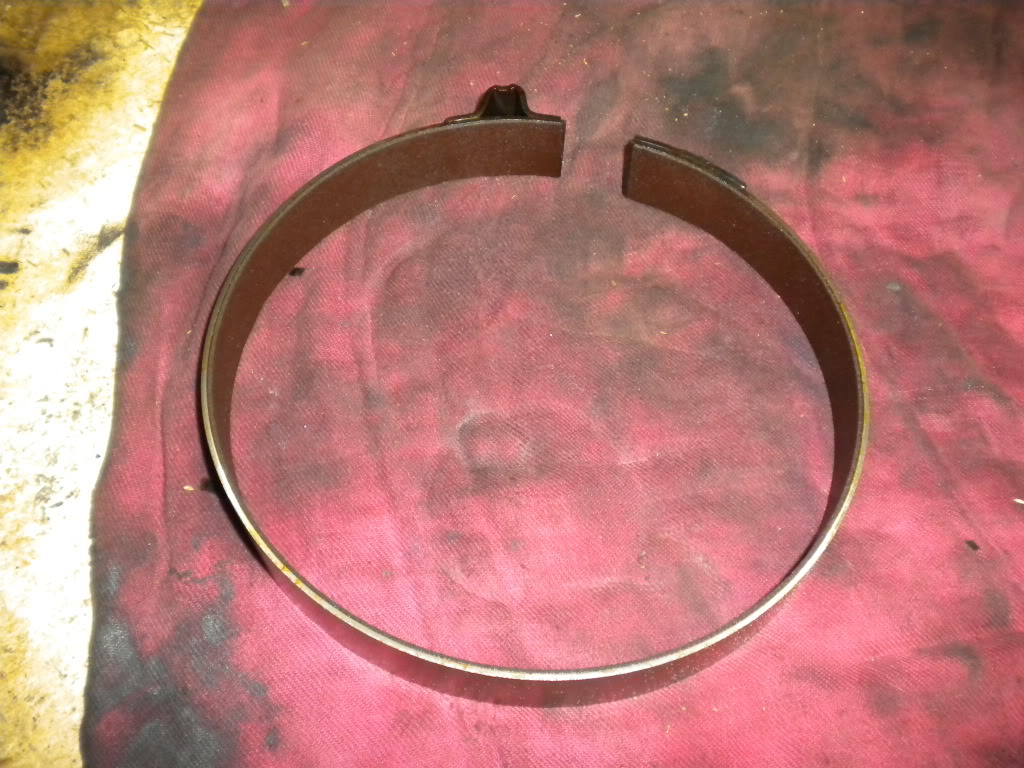
Then I pulled the direct clutch housing and the intermediate band
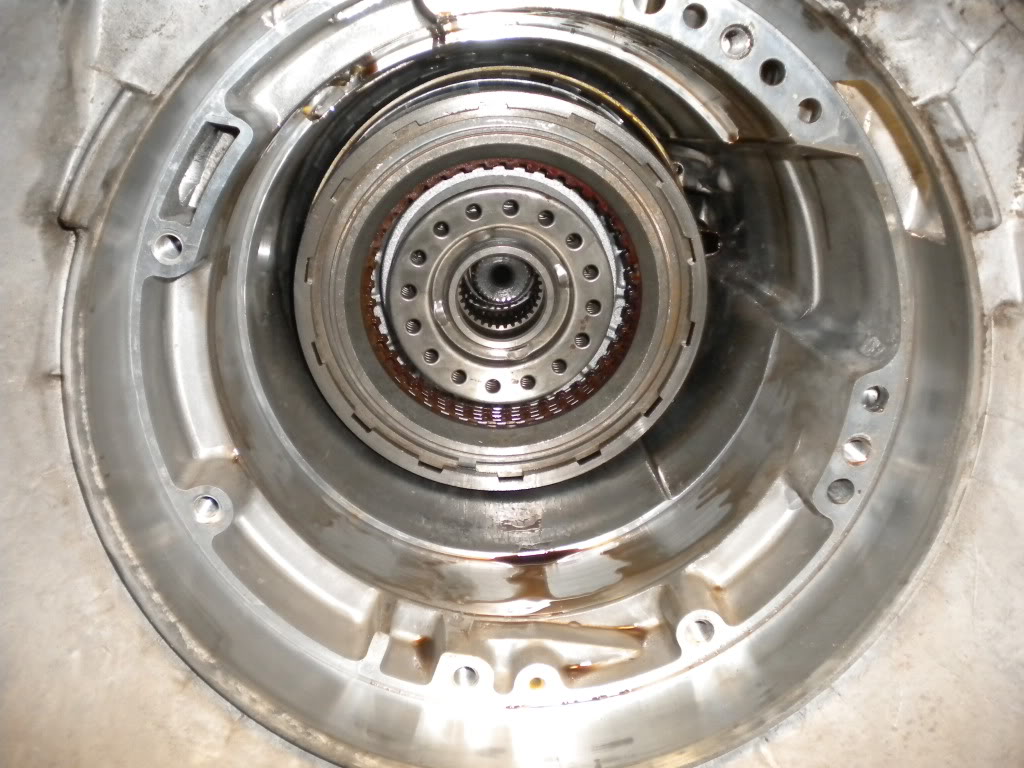
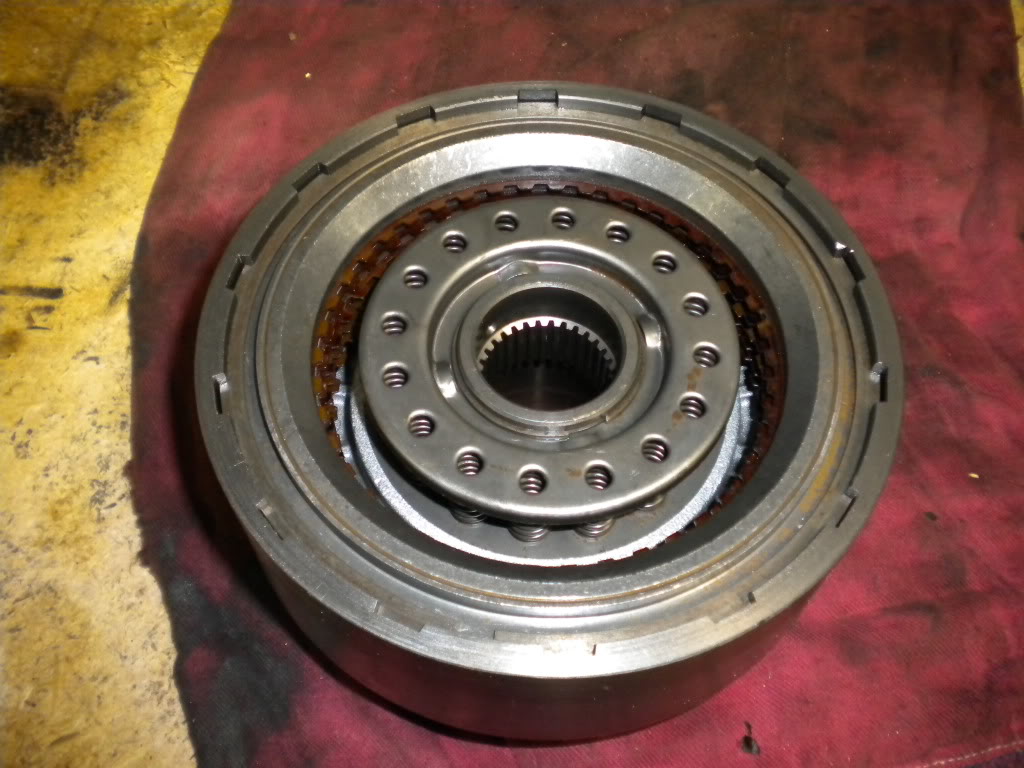
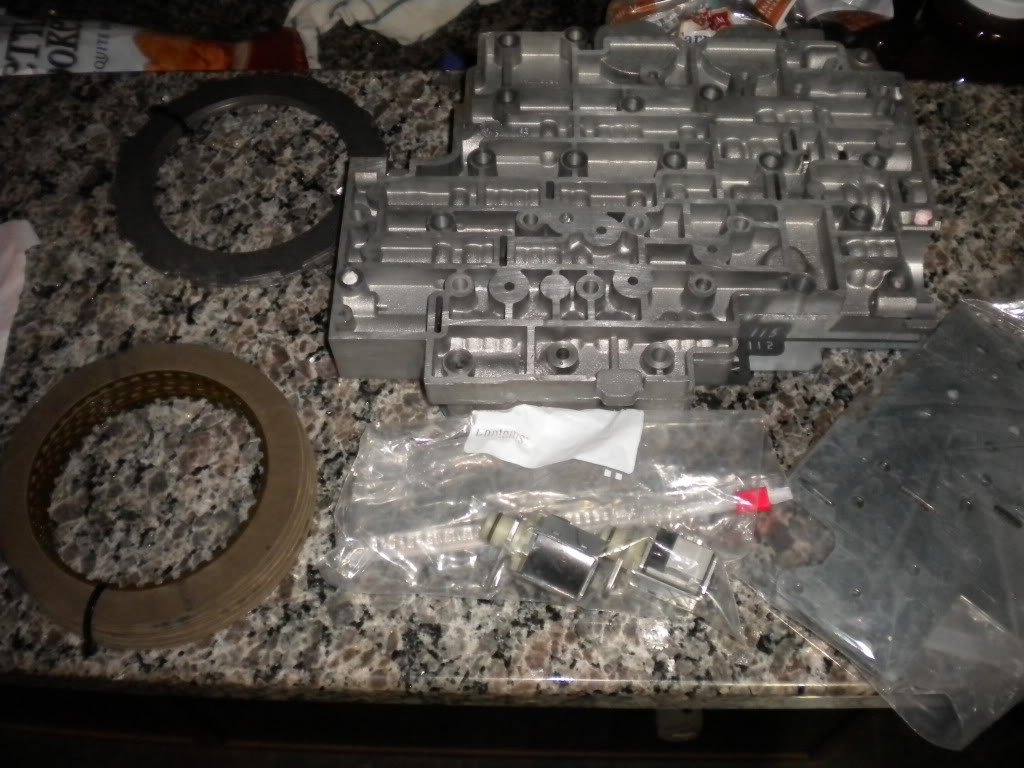
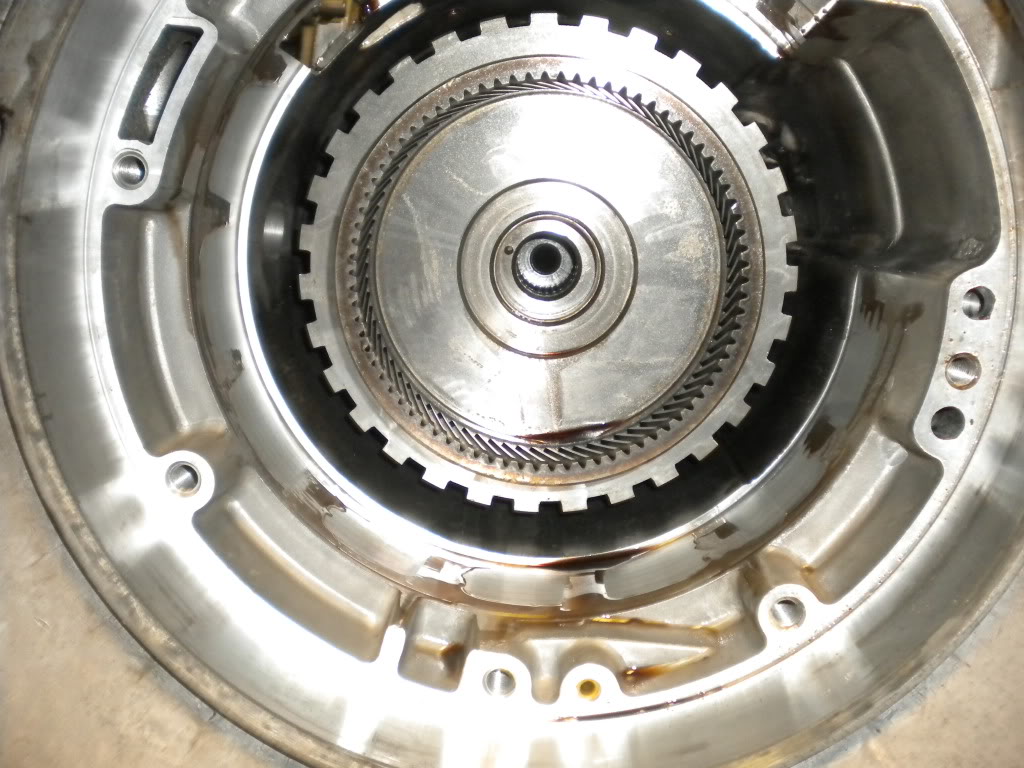
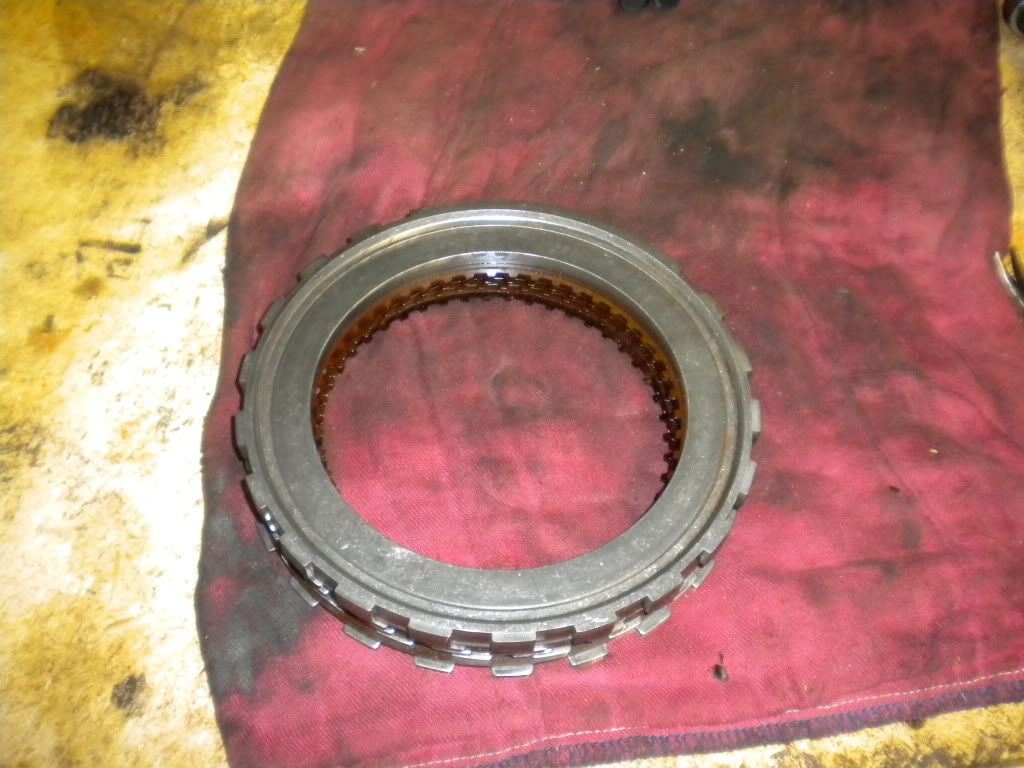
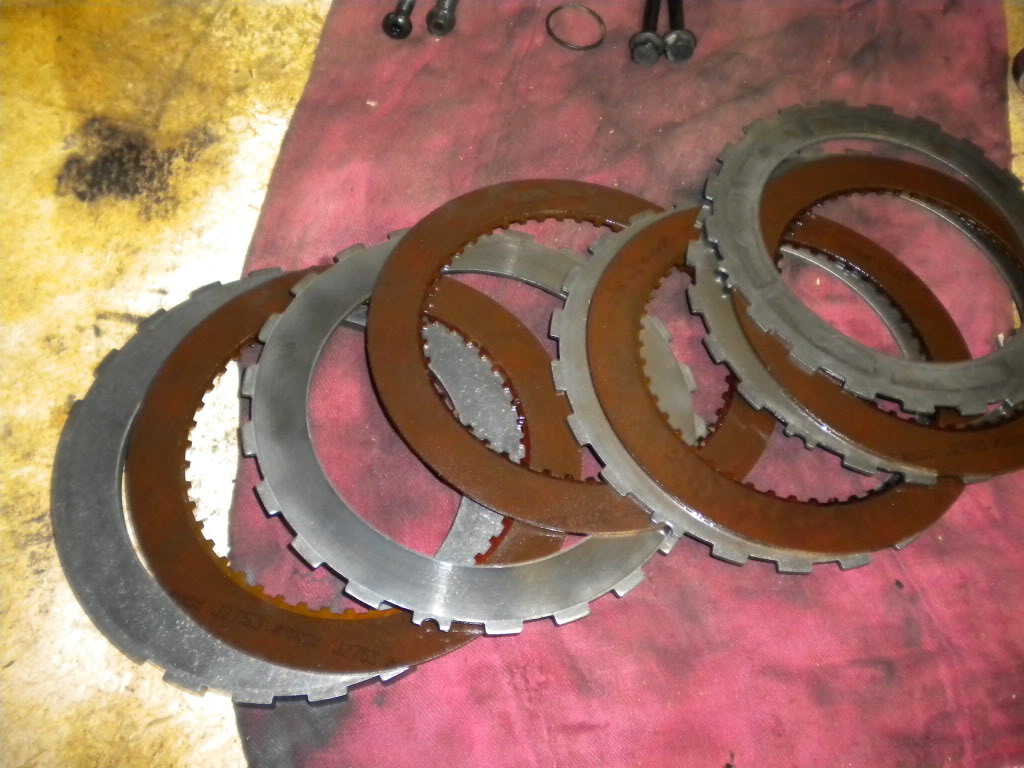
Next up I removed the intermediate clutches. I had to remove the snap ring by using a long flat head screwdriver, and simply pulled out the clutches.
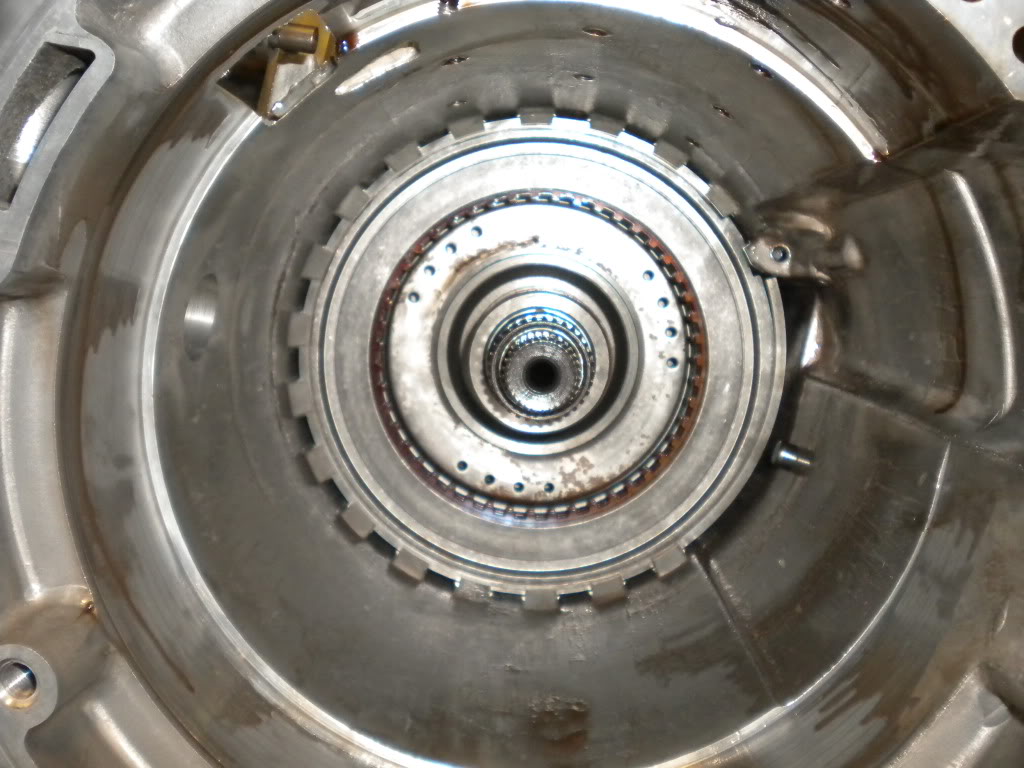
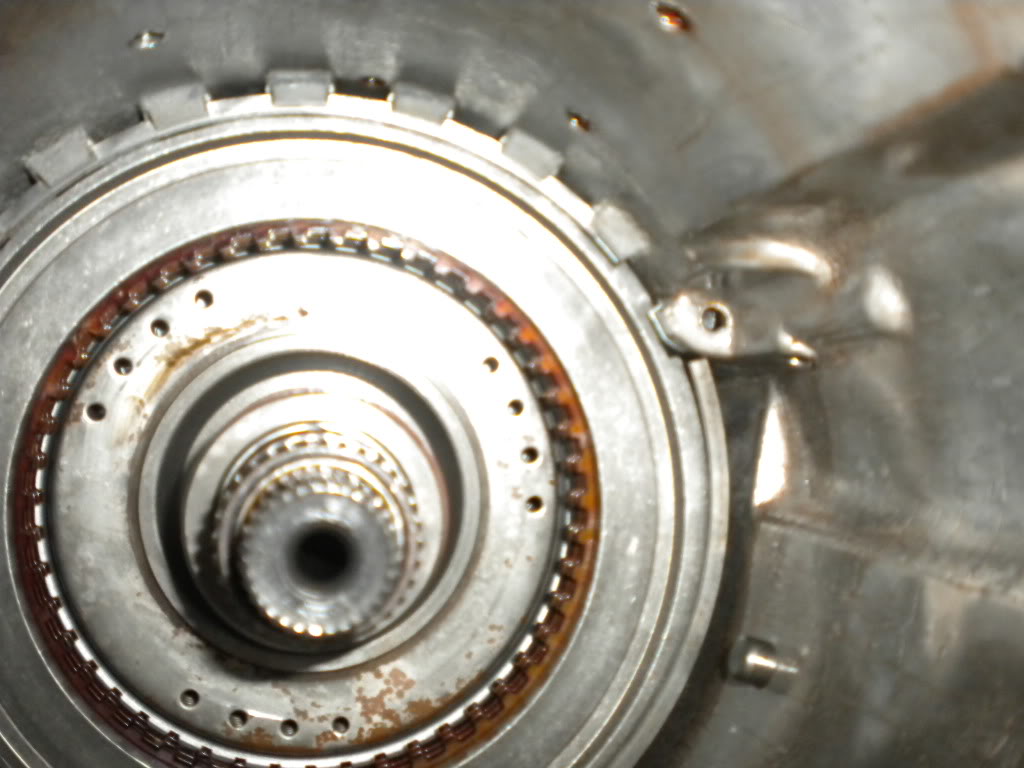
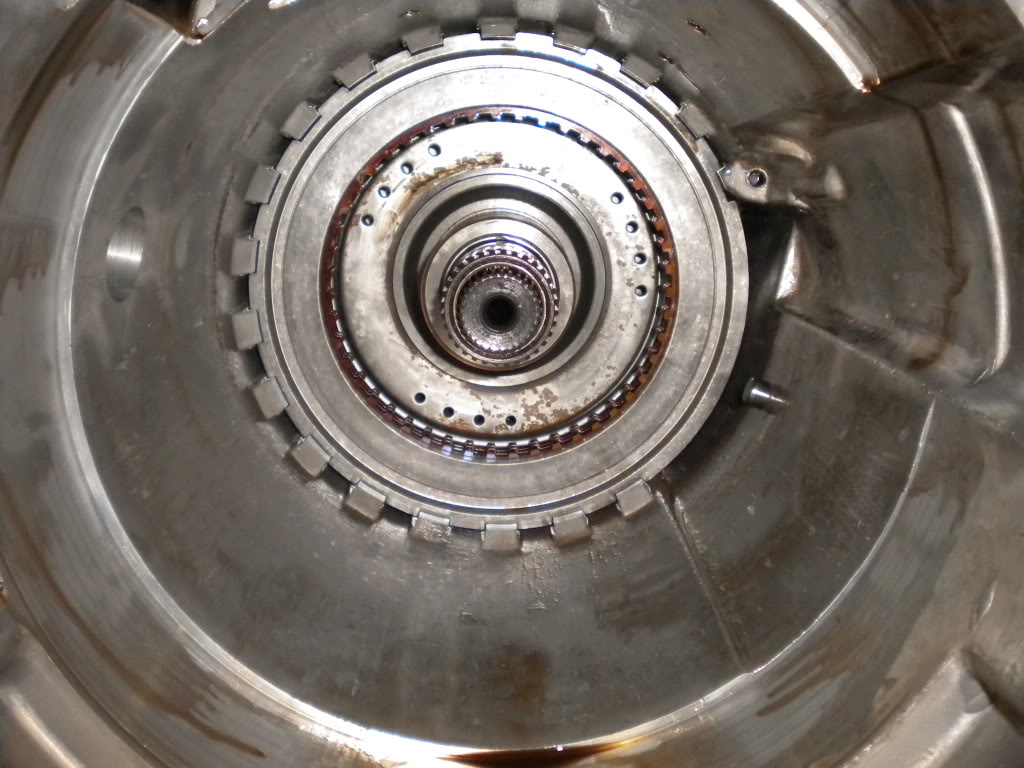
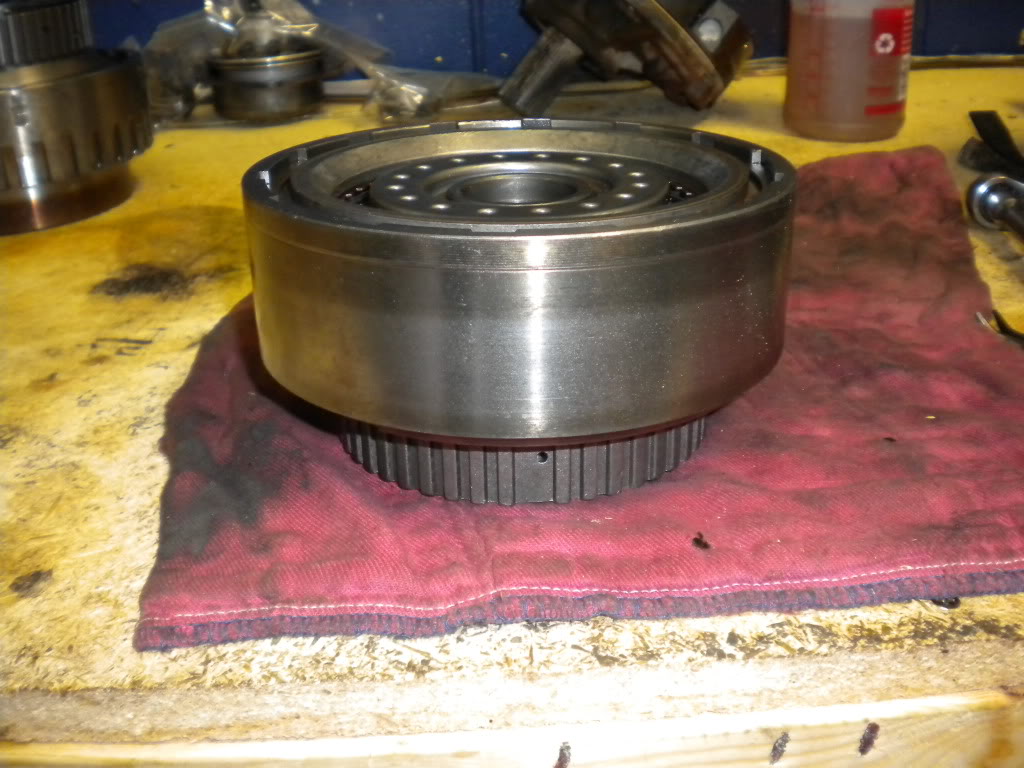
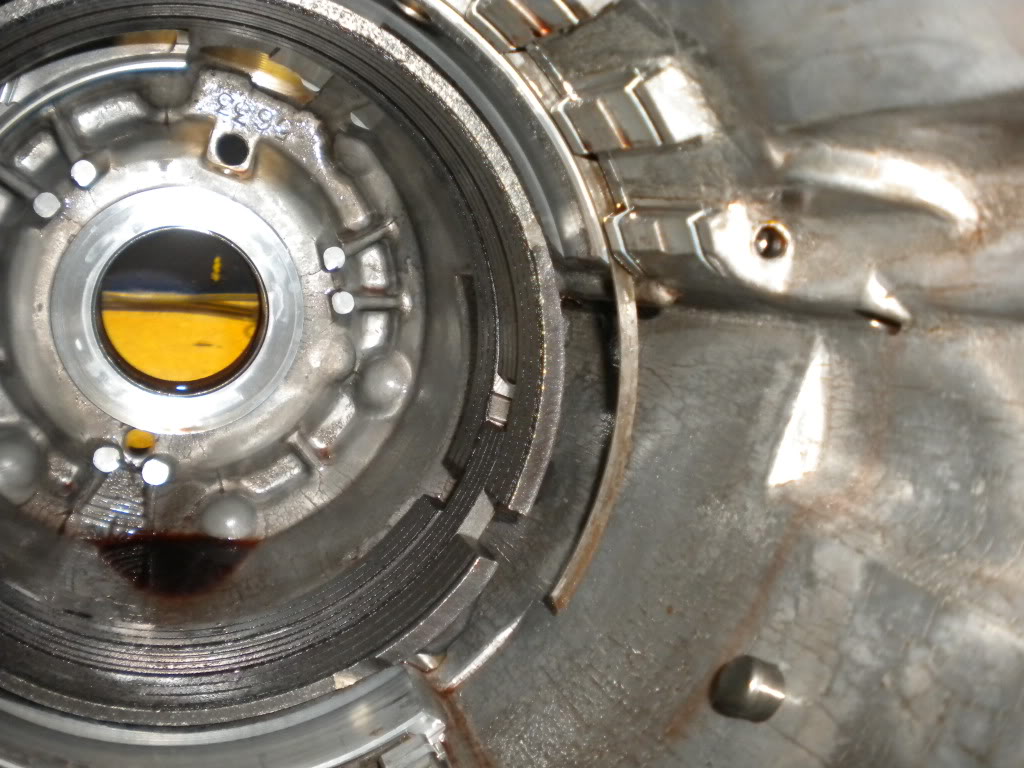
Then it was on to the center support assembly/gear train unit. Again, I used a long flat head to get the snap ring out. then I had to pull it out by only pulling on the very tip of the splined shaft with one hand while supporting it with the other. If you pull it out by grabbing farther back, the assembly won't come out whole. There's also a thrust washer at the back of this assembly.
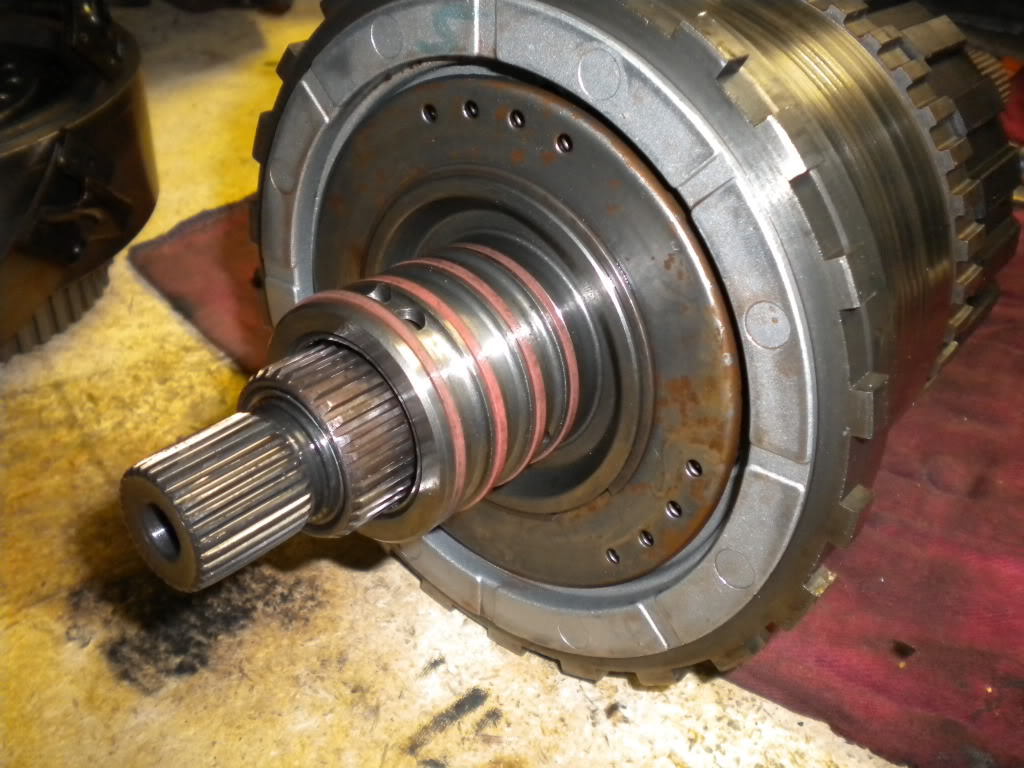
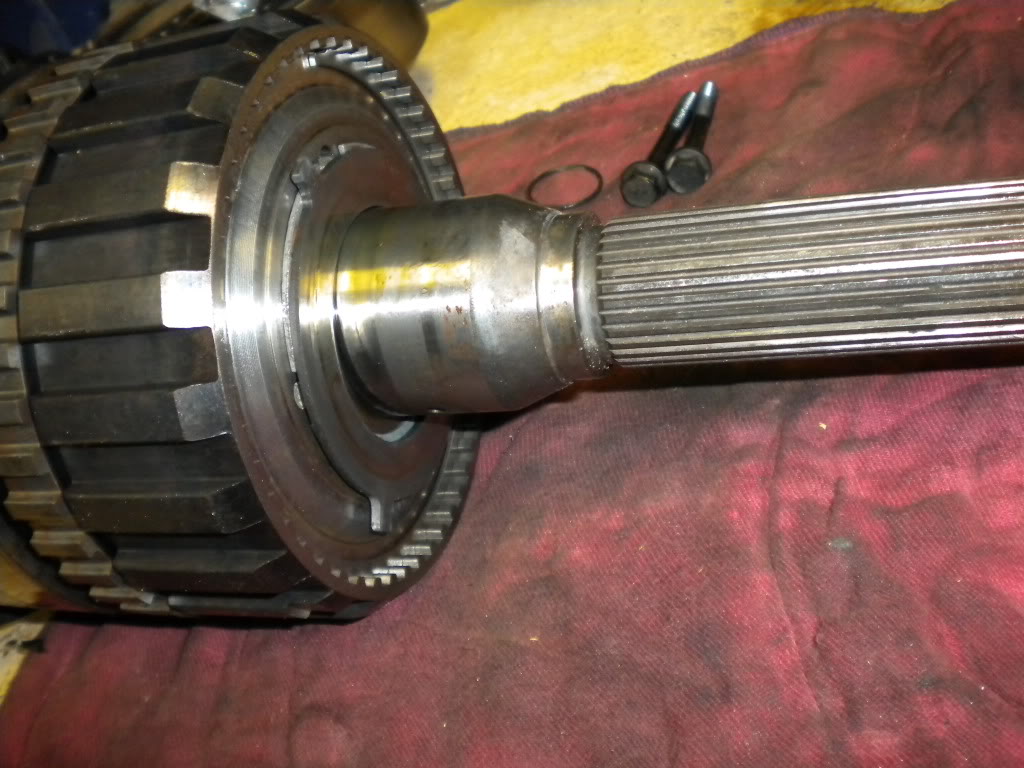
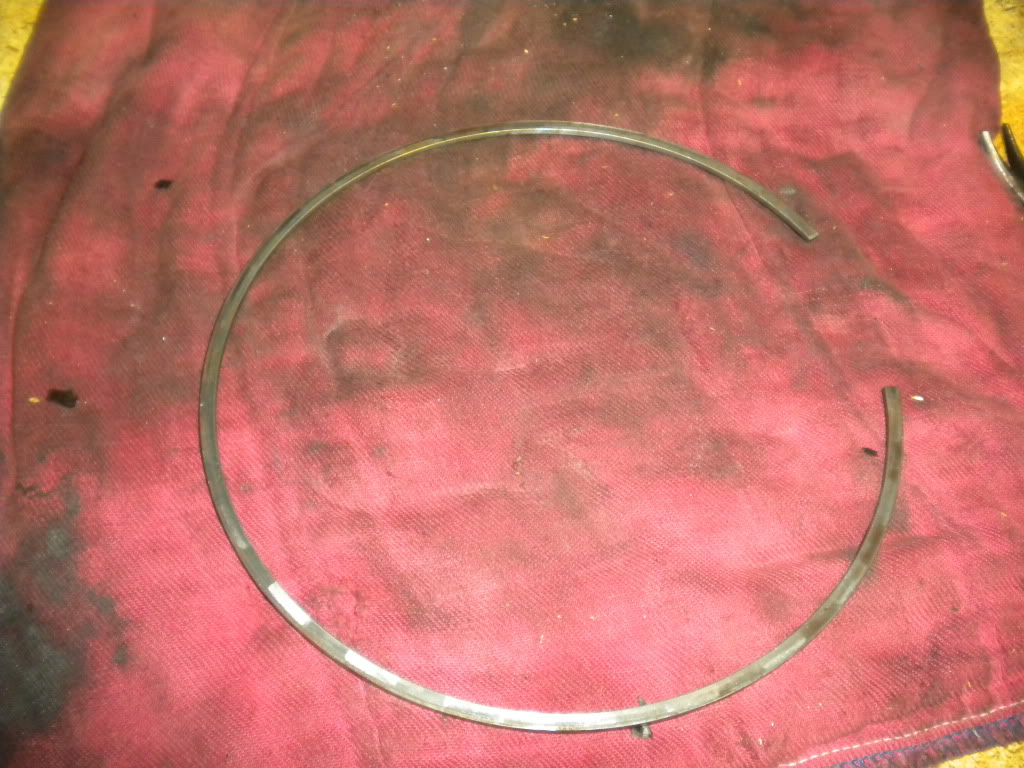
Next up there is a case spacer that needs to be removed. It's just like the snap rings, but sitting in there a little looser.
Then I pulled the direct clutch housing and the intermediate band
Next up I removed the intermediate clutches. I had to remove the snap ring by using a long flat head screwdriver, and simply pulled out the clutches.
Then it was on to the center support assembly/gear train unit. Again, I used a long flat head to get the snap ring out. then I had to pull it out by only pulling on the very tip of the splined shaft with one hand while supporting it with the other. If you pull it out by grabbing farther back, the assembly won't come out whole. There's also a thrust washer at the back of this assembly.
Next up there is a case spacer that needs to be removed. It's just like the snap rings, but sitting in there a little looser.