
Cam only, winter upgrades. Bitch in on a diet
 05-18-2011, 02:25 PM
#461


Got ya. Put yours up for sale, see if it sells 
This motor I have for sale was built with the intent of pushing a 3200 lb car to sub 9.50, n/a fwiw... run a little nitrous on it to get the car working and a handle on the tuneup, freshen it up, and open the ring gap up for a bigger hit and if you aren't well into the 8 second range doing that, something is wrong! If you have a light car, say 2900, I think with a sheet metal intake this motor could probably go 9.20, n/a as well, fwiw.
Shoot me a PM when you have the car apart...
 05-21-2011, 03:37 PM
#462
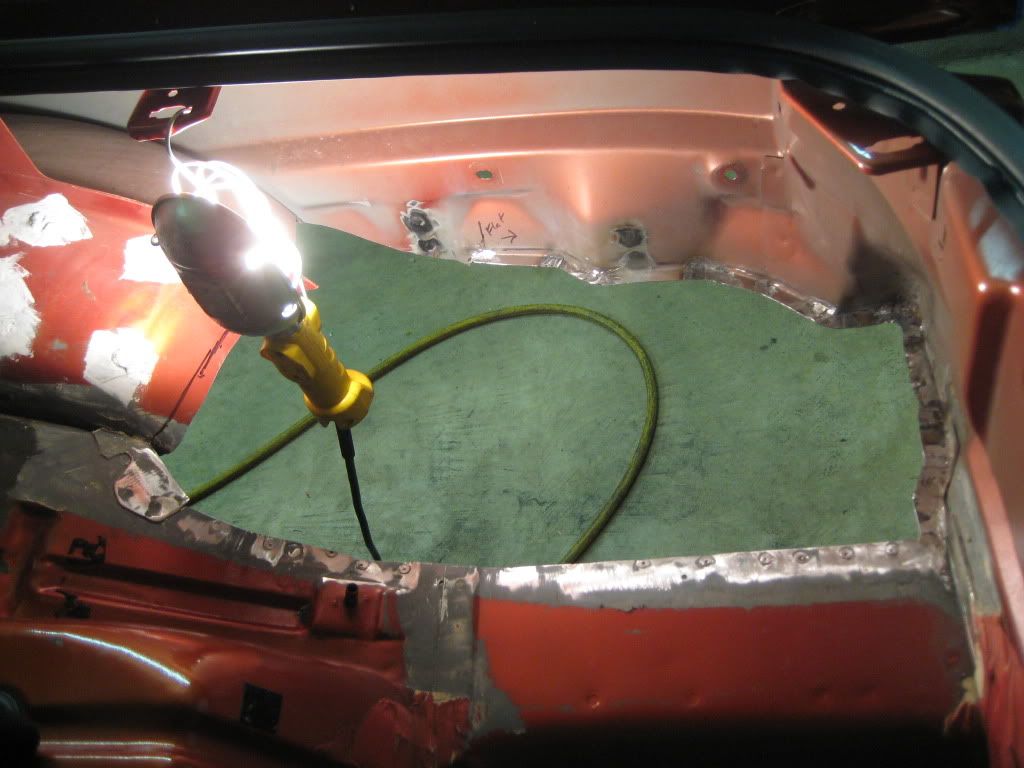
got a little more done a few days ago, half the lip is done. I think this is gona work  Bent the stock metal, I'm glad I left it longer, and filled in some of the outside bends with the antenna brace metal. Just bought some sawzall blades and a spool of thin .025 wire. I dont really know about doing this, Ive never done body type stuff. So its cool to learn this stuff, It stiffens right up with the lip too.
Bent the stock metal, I'm glad I left it longer, and filled in some of the outside bends with the antenna brace metal. Just bought some sawzall blades and a spool of thin .025 wire. I dont really know about doing this, Ive never done body type stuff. So its cool to learn this stuff, It stiffens right up with the lip too. Last edited by studderin; 05-21-2011 at 09:39 PM.


 05-28-2011, 02:25 PM
#469
Nice work!
btw, The neatest and fastest way to remove seam sealer is with a putty knife and a propane torch. Get a thick putty knife, about 1.5"-2" wide, but 3/32-1/8" thick. Grind a steep bevel to sharpen the blade on a belt sander. Then heat the blade with a torch and slide it along the seam. You can remove about 12-18" in a shot if you get it hot enough. Did an entire car in about 2 hrs, not working hard...
btw, The neatest and fastest way to remove seam sealer is with a putty knife and a propane torch. Get a thick putty knife, about 1.5"-2" wide, but 3/32-1/8" thick. Grind a steep bevel to sharpen the blade on a belt sander. Then heat the blade with a torch and slide it along the seam. You can remove about 12-18" in a shot if you get it hot enough. Did an entire car in about 2 hrs, not working hard...
05-28-2011, 02:55 PM
#470
Nice work!
btw, The neatest and fastest way to remove seam sealer is with a putty knife and a propane torch. Get a thick putty knife, about 1.5"-2" wide, but 3/32-1/8" thick. Grind a steep bevel to sharpen the blade on a belt sander. Then heat the blade with a torch and slide it along the seam. You can remove about 12-18" in a shot if you get it hot enough. Did an entire car in about 2 hrs, not working hard...
btw, The neatest and fastest way to remove seam sealer is with a putty knife and a propane torch. Get a thick putty knife, about 1.5"-2" wide, but 3/32-1/8" thick. Grind a steep bevel to sharpen the blade on a belt sander. Then heat the blade with a torch and slide it along the seam. You can remove about 12-18" in a shot if you get it hot enough. Did an entire car in about 2 hrs, not working hard...
what total weight is it worth, i though i removed some before and it was superlight like foam almost...
Chris
05-28-2011, 03:00 PM
#471
TECH Resident
iTrader: (18)
Join Date: Oct 2004
Location: Chicago, IL
Posts: 791
Likes: 0
Received 0 Likes
on
0 Posts

chris- id usually applied over most of the body welds, in the trunk area (t-top well) its very visable if you pull the rear carpet out and look along where the frame rails meet the sheet metal there is the "caulk" looking stuff that is usually painted the same color as the metal. Thats what they're referring to. I dunno exact weights but i scraped enough out to probably fill close to a 5 gallon bucket between the seam sealer and sound deadening pads in the trunk.
05-28-2011, 03:08 PM
#472
ya been cutting it out with a scraper. It dose seam light as its foamy. But sweeping it up and keeping it in a bucket, so I'll see what it weights. Got most of the lip welded up in the front, (the wheel wells) its alot harder then the back was for sure. Not as easy of a shape. But I remebed to remove the paint before I shaped the lip, so it welds 100% better and super clean.
still looking for front street tires for the 15x3.5 rims
Nankang CX668 Tire/s 165/80-15
jolster got a set of these on his car last week, sent me some pics and the dont look that much shorter then his 26" DS2, but thouse have the big crown, then are way more sqare
http://cgi.ebay.com/ebaymotors/ws/eB...51846029380322
Last edited by studderin; 05-28-2011 at 03:13 PM.
05-28-2011, 06:07 PM
#476
Launching!

Join Date: Aug 2003
Posts: 248
Likes: 0
Received 0 Likes
on
0 Posts
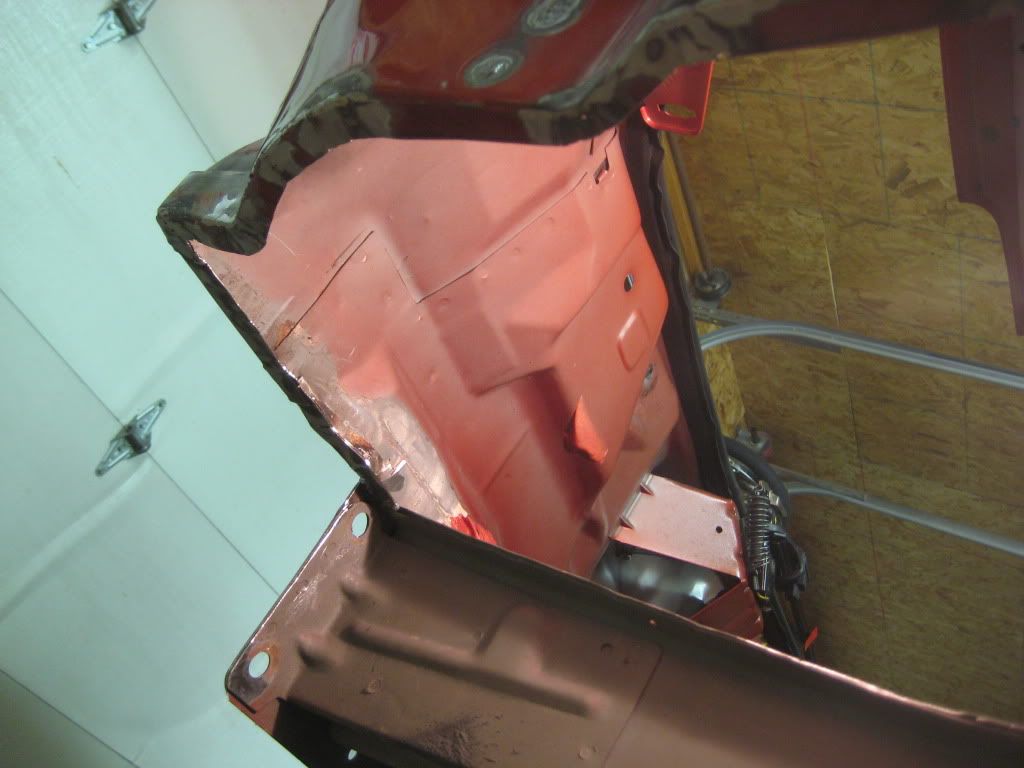
If that is your car, did you put anything between the frame rails before you cut all that out? If not, you may have some issues, I bet the front end sagged in when you cut out the support. (This is the reason I am leaving all mine intact until it's on the jig at the chassis shop, so it doesn't get twisted while it's sitting in the garage)
great project thread btw, it looks great and sorry to be off topic on ya.....
05-28-2011, 07:17 PM
#478

Nice work!
btw, The neatest and fastest way to remove seam sealer is with a putty knife and a propane torch. Get a thick putty knife, about 1.5"-2" wide, but 3/32-1/8" thick. Grind a steep bevel to sharpen the blade on a belt sander. Then heat the blade with a torch and slide it along the seam. You can remove about 12-18" in a shot if you get it hot enough. Did an entire car in about 2 hrs, not working hard...
btw, The neatest and fastest way to remove seam sealer is with a putty knife and a propane torch. Get a thick putty knife, about 1.5"-2" wide, but 3/32-1/8" thick. Grind a steep bevel to sharpen the blade on a belt sander. Then heat the blade with a torch and slide it along the seam. You can remove about 12-18" in a shot if you get it hot enough. Did an entire car in about 2 hrs, not working hard...
I have heard that the use of dry ice works very well. I have not tried it but heard it was one of the better methods. Freezes it and a light hit of a hammer and it shatters?? Be curious to know if it really works.
05-31-2011, 12:53 AM
#479
what a pain in the *** this is, but I guess I have some sheet metal skills now. Its a bitch to weld sheet metal in there, you can't even fit your head in there close, without a welding helmet on. The front outisde corner had to box it a little and hide a little triangle of metal upright, to keep the 3rd side bolt for the bumper cover. Looks like **** now untill I grind it down, i don't care it will look mint painted.
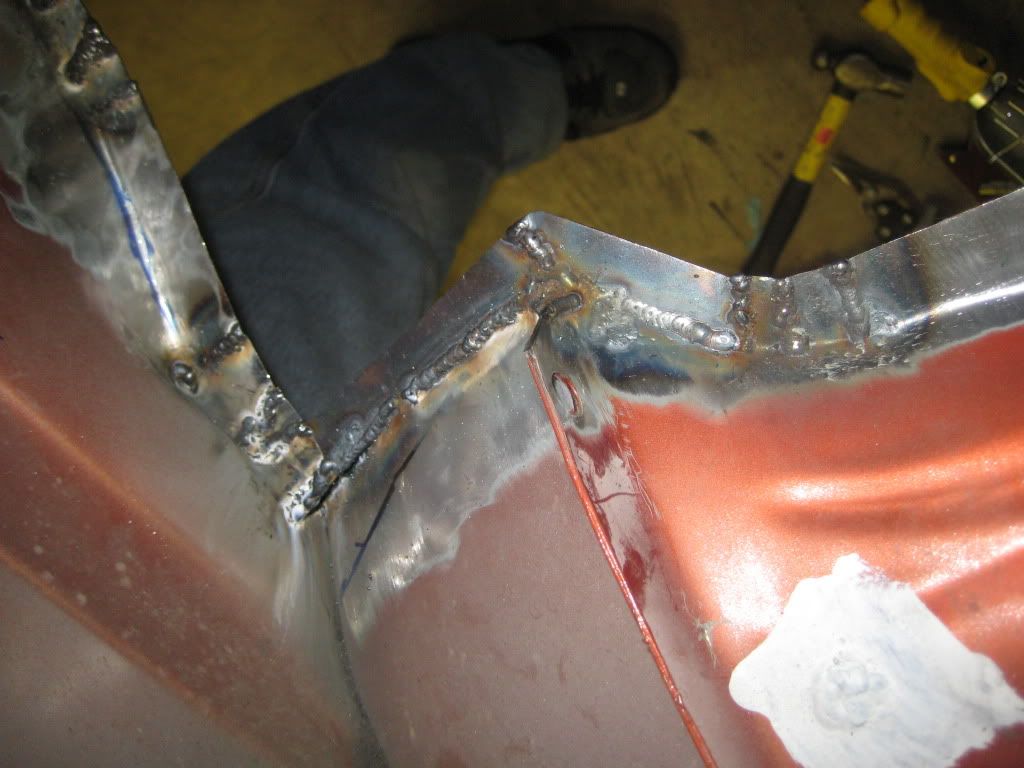

**** missed a weld on the over 90* lip corner. haha
**** missed a weld on the over 90* lip corner. haha
Last edited by studderin; 05-31-2011 at 01:00 AM.
06-01-2011, 04:24 PM
#480
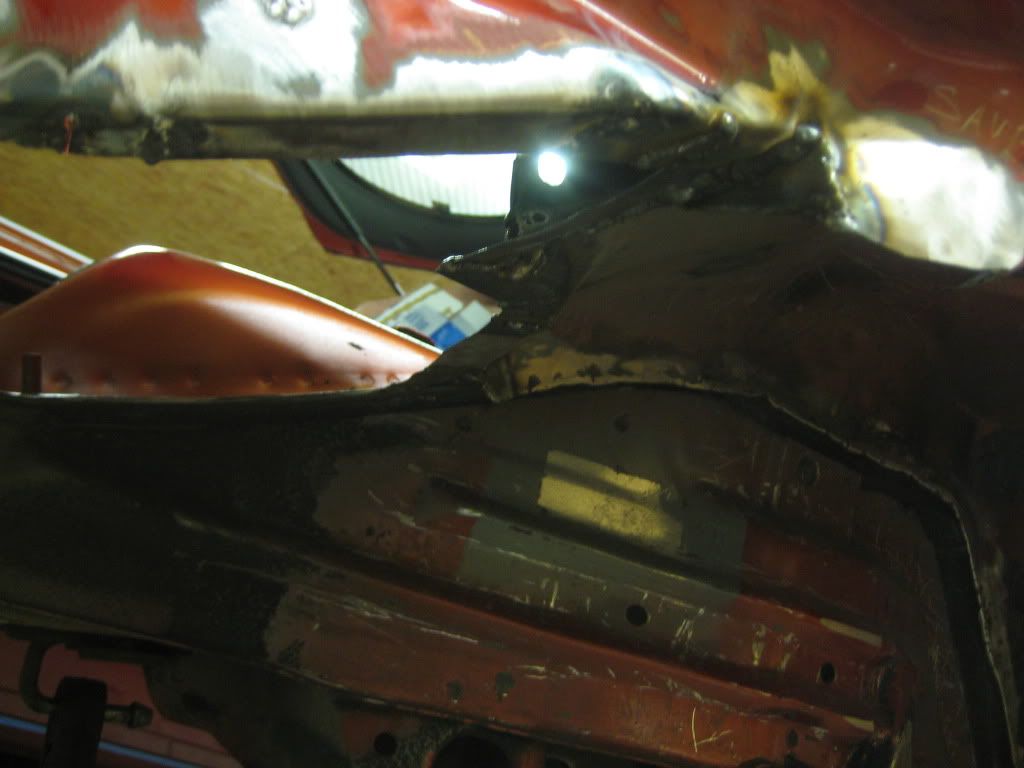
rough cut the driver side well out. strait across the frame rail, I think it was 6#'s? But in front of the centerline of the wheel well you can raise that up another 2-3 inches and be just under the 3 side bumper cover bolts. Its really thin there, about 2inches to a point so just gona fill that with the .030 metal. or maybe even pinch it right together and weld it up.
I'm up to 5.2#s in the foam sealer in the back end, and one wheel well.
Looking for some light sealer to use on the new panels? just a little to use under the lip to keep smoke out. Something like the factory foam stuff. I dont want to use something dense like silicon or urethane. Anyone got any leads?