
Cam only, winter upgrades. Bitch in on a diet
 06-01-2011, 10:15 PM
#481

hmm going to have to look into this then...haven't removed any yet...**** if I get 10lbs I will be happy...I have about 60lbs I can remove pretty easy for this fall weather, plus my new found power should be interesting...


 06-11-2011, 09:56 PM
#485
TECH Senior Member
iTrader: (10)
Join Date: May 2005
Location: Bossier city,LA barksdale AFB
Posts: 5,355
Likes: 0
Received 2 Likes
on
2 Posts

LOL started taking out some weight in my car LOL took Jack,spare And rear seat belts out. LOL how much weight do ya think that is? Oh also put in grant steering wheel.
06-12-2011, 07:32 AM
#486
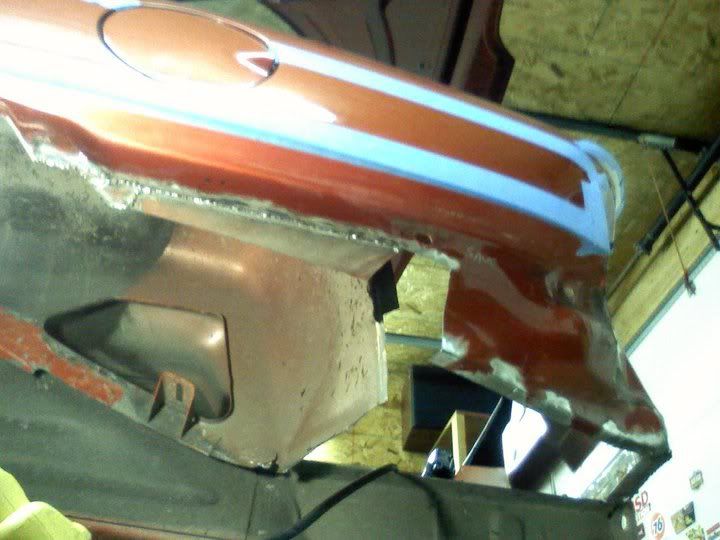
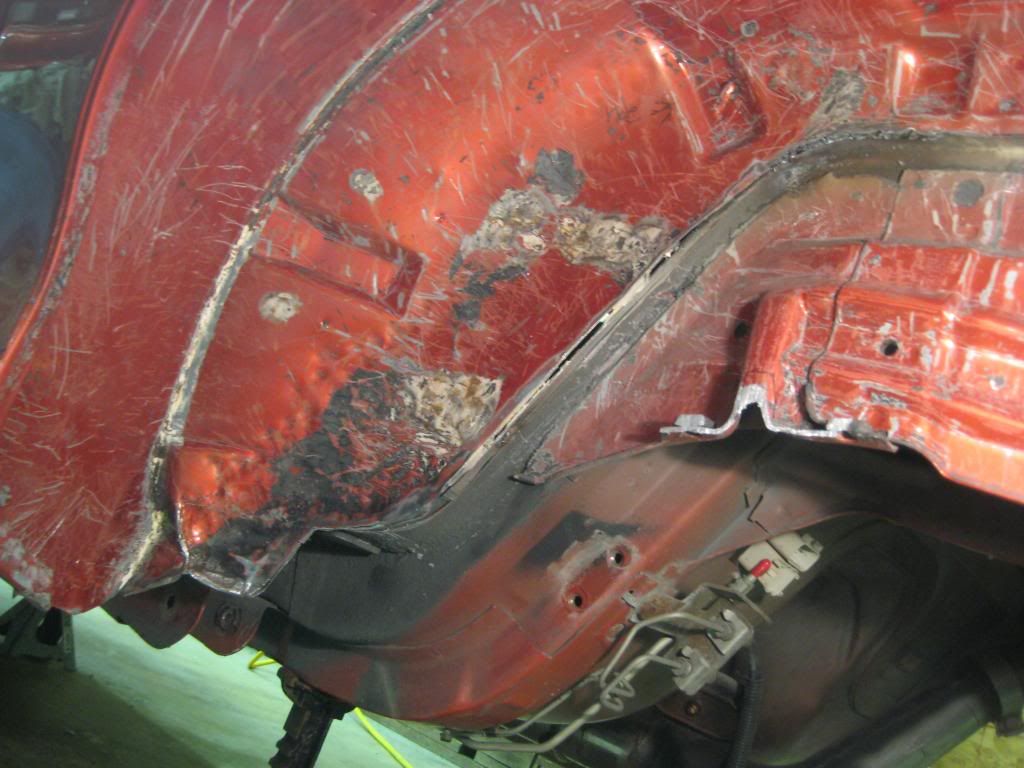
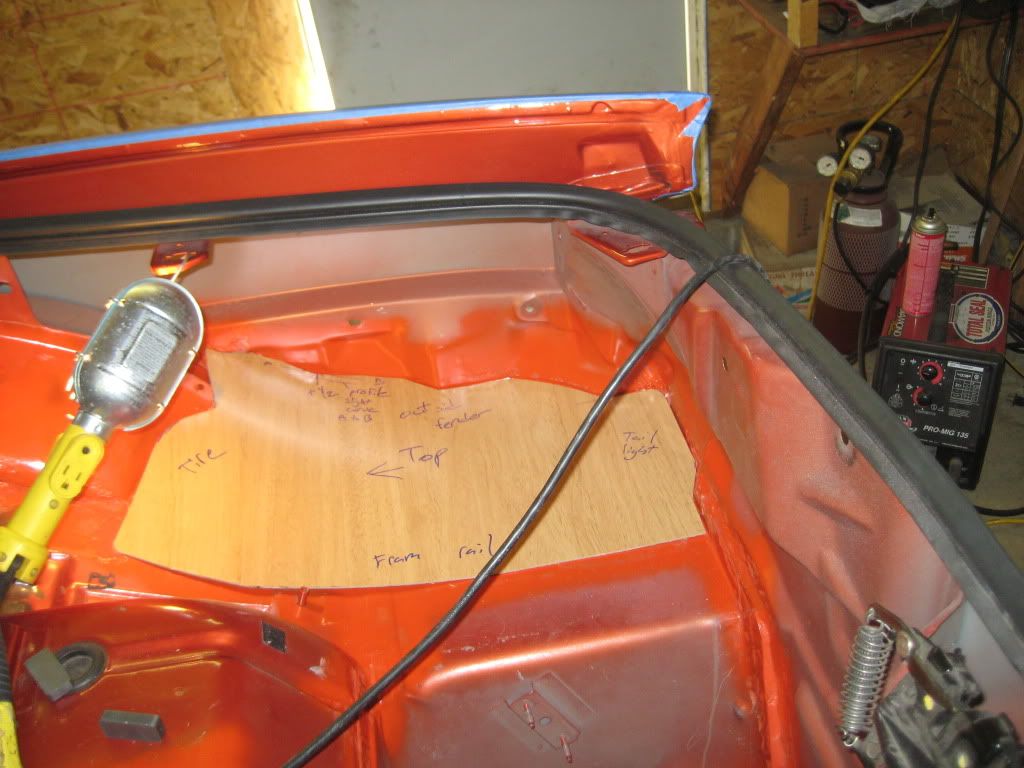
driver side is done, had my camera so took some pics this time, I'll try and do a set by step on this. Cut it out like I said. I used some non flexible metal rules/ strait edges. 12 18, 24inch you strait edge across the frame rail to the outside metal, and get a line as much as you can to get a flat plane. I made about a .600. 700 lip. So then marked a few spots about 700-.750 under the line, thats the plane. Then drilled some little 3/32s holes at that level. So you can work on the outside off some reference line . Also need some flexible rulers, 6inch and a 18 I have that really thin, to flex to the outside shape to get some lines to cut between the holes. Mostly used my sawzall to cut, you need some skill with how to free hand, and control it not safely. haha
You need some good blades, don;'t try to do all this with 2-3 of the same old blade you have. If you make cuts goods its a lot easier.18tpi, and I found some super fine 24tip. some Long, some med, and a few a cut the blade to just a little stuby as long as the saw moves. The torch blades are thicker and don't flex, cut very strait. and have a square end.

the normal metal blades are thinner so they flex a little, you still can't really make a turn cut. But sometimes if you have a cut going and the saw gets in the way of the car, to keep going. You can angle the saw the blade will flex but still cut strait for a while. And the pointer end you can tip the saw back so the end of the blade isn't hitting something on the other side. (you can angle cut the blade yourself too)

hole saw cutter like normal,
good tin snips, you can cut the single layer metal, its only about .030. I think thats 22ga. You need a red, and green handle, a right and left tin snip. And that big flat metal bender pliers thing? I forgot the same?
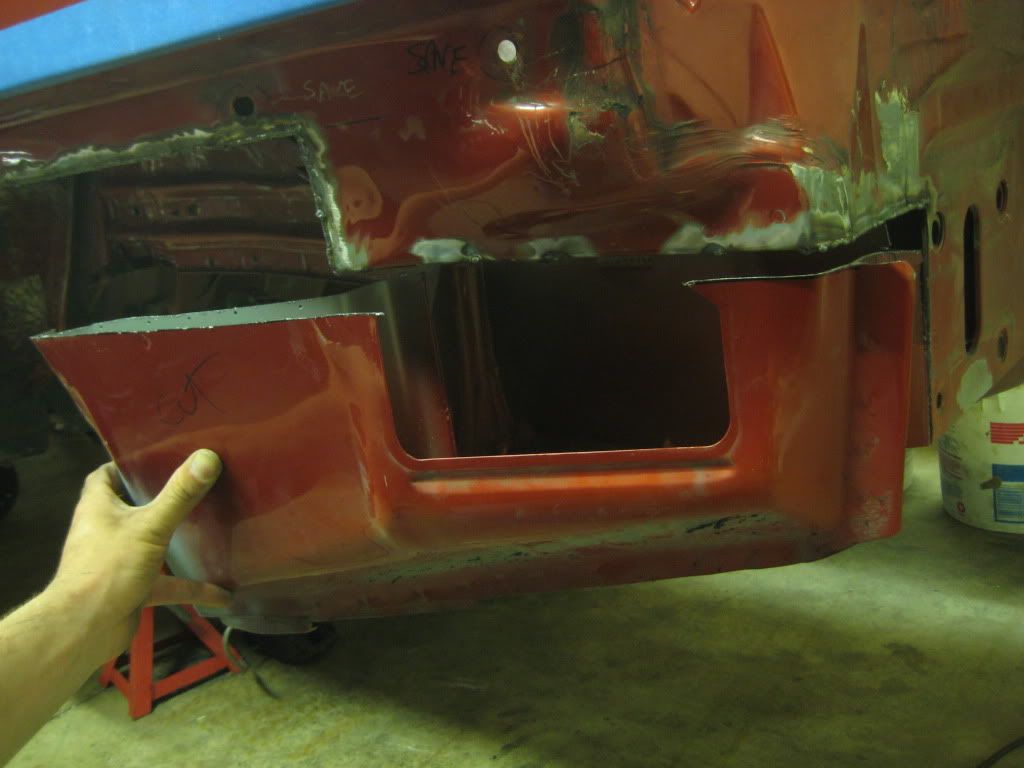
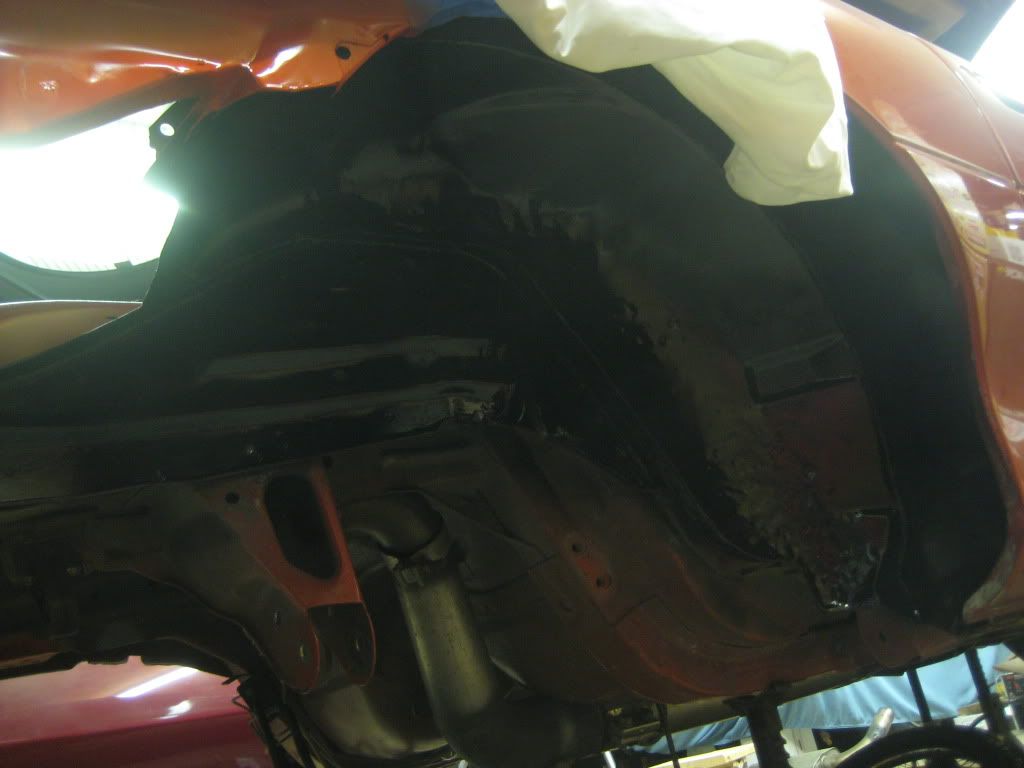
Got the driver side done, this was trickier. You can work yourself into a corner and no be able to close it up. Its tight in there so took some time, used the outer tub metal. Left it long, and bent it on the car with 2 plates of alum, so I only had to weld up the outside edge. You can weld a piece in but they you will be inside the wheel well looking out, Using the stock metal I think worked out good, only had to add a few small spots on this whole job. That one larger metal fill in piece I did one piece and it came out great.
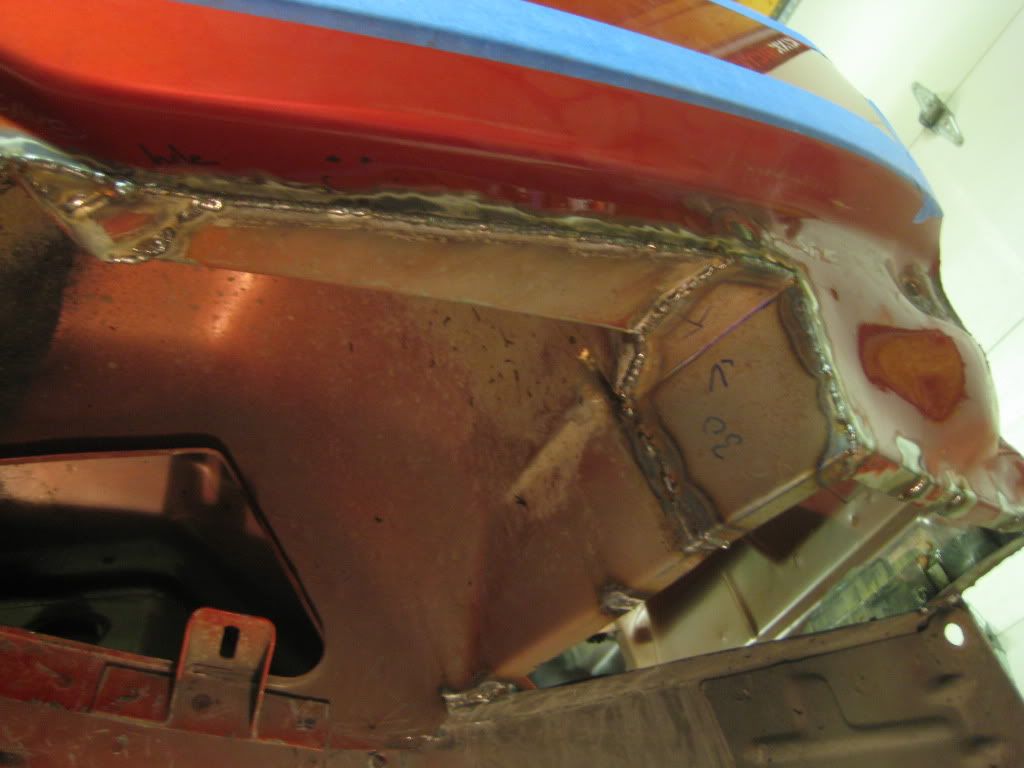
template is done for that side, and grond the welds down.

Should have bought another 12pack and I'd have more cardboard to make the bigger passenger side panel
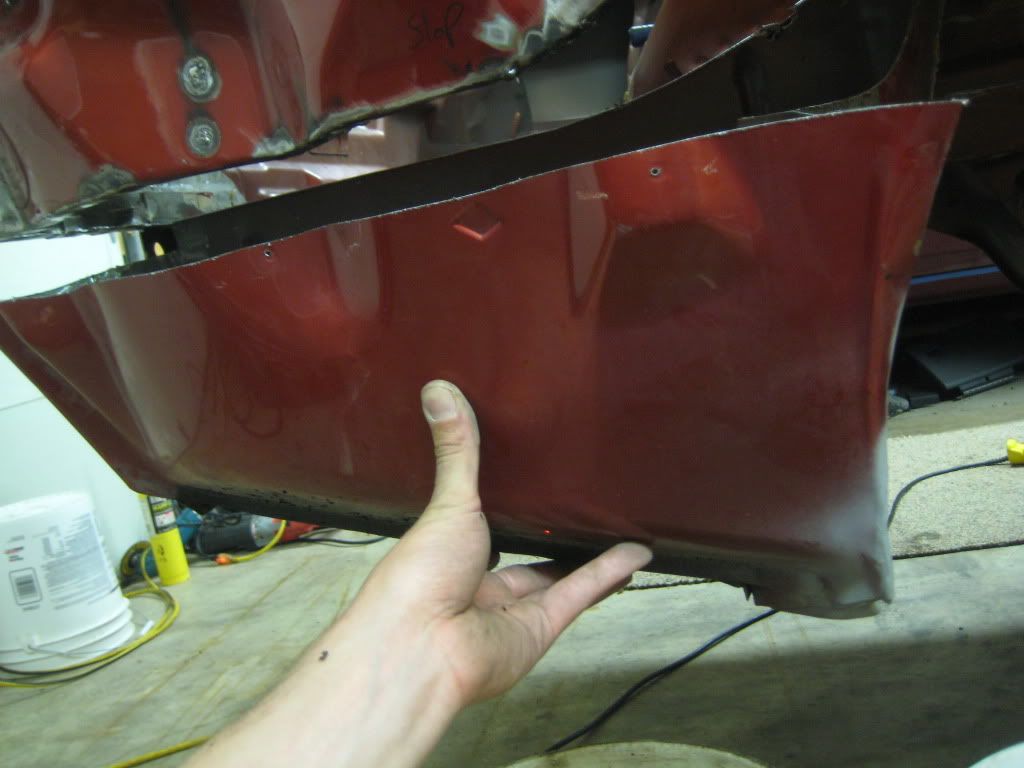
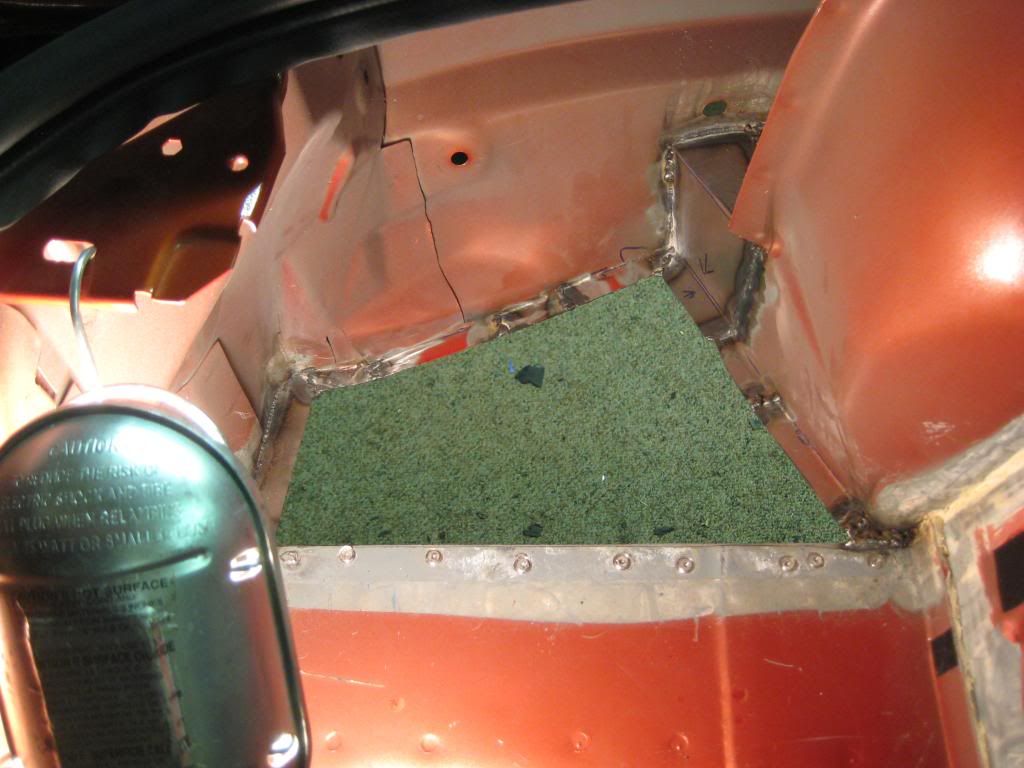
trimmed up that side wheel well too. I saved all the metal form this on it was only about 1pound but lets you do the BFH mod a lot better with the innder tub cut out. Saved the tab for the filler neck, and the back plasitc wheel well cover thing.
looks like this cut back
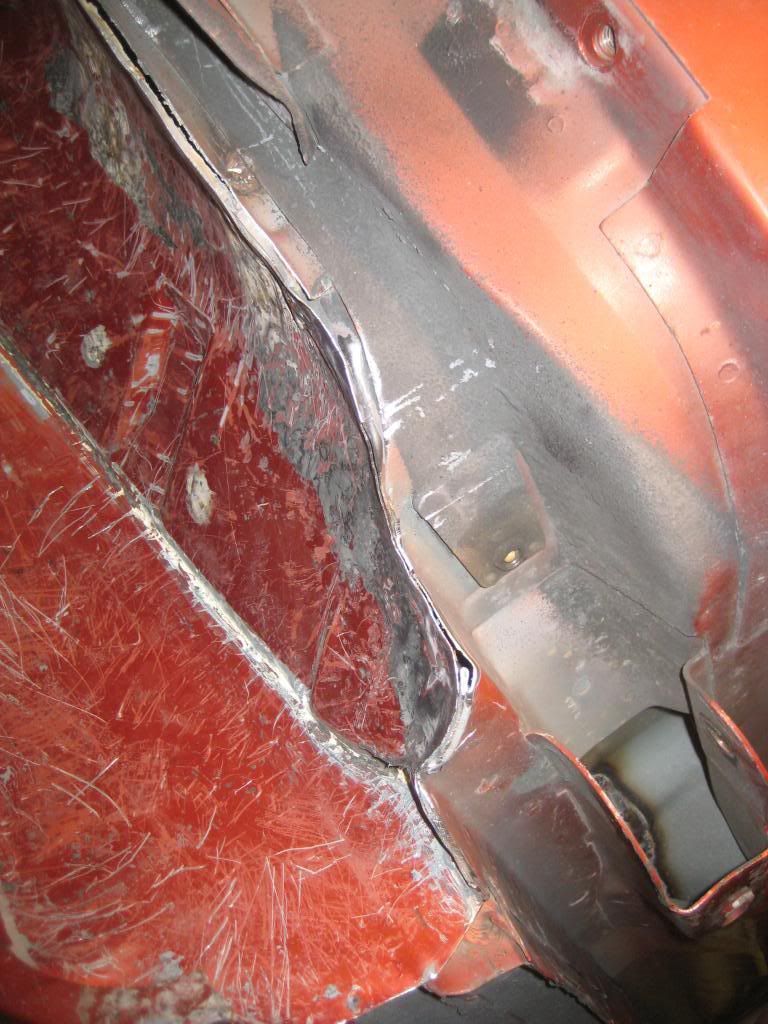
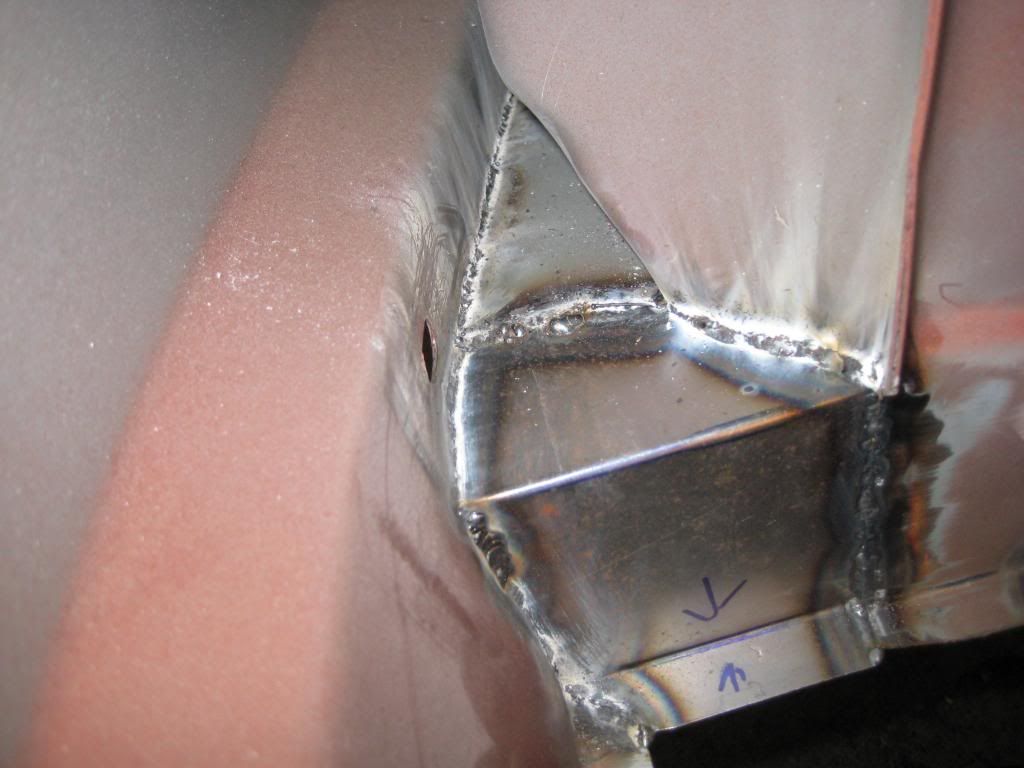
welded up, getting better at this, you have to prep this so its really clean. easier said then done

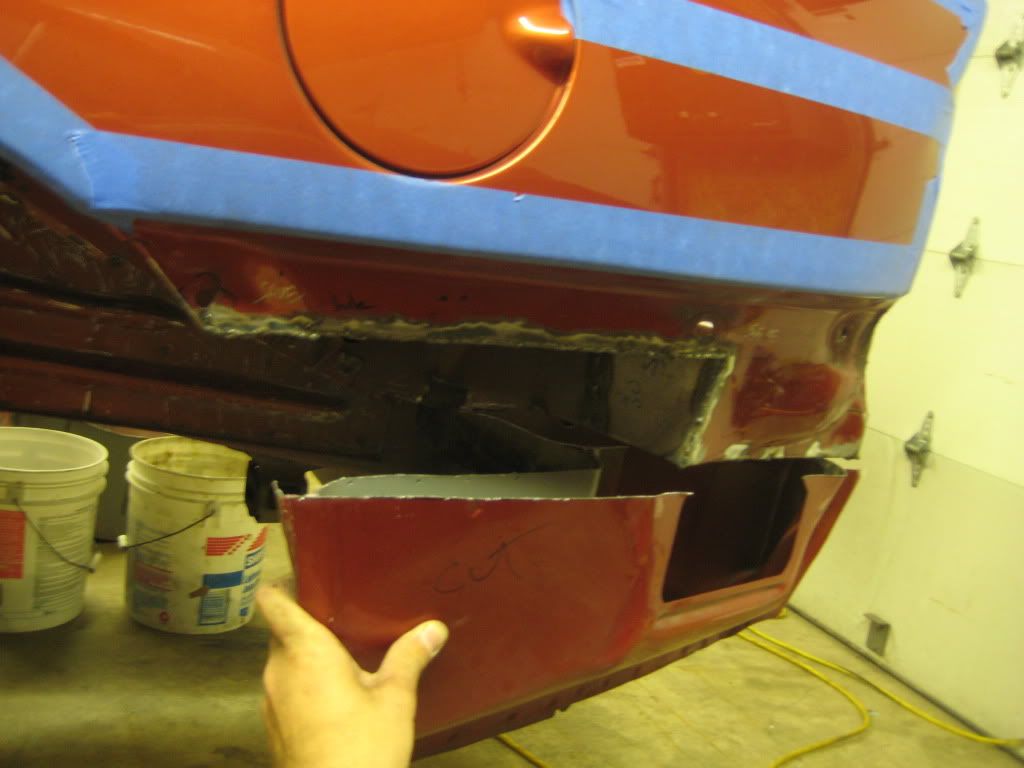
Gone just use 2 lightweight alum bars for the corner bumper holes, Just paint, and put the panels in and should be done back there.
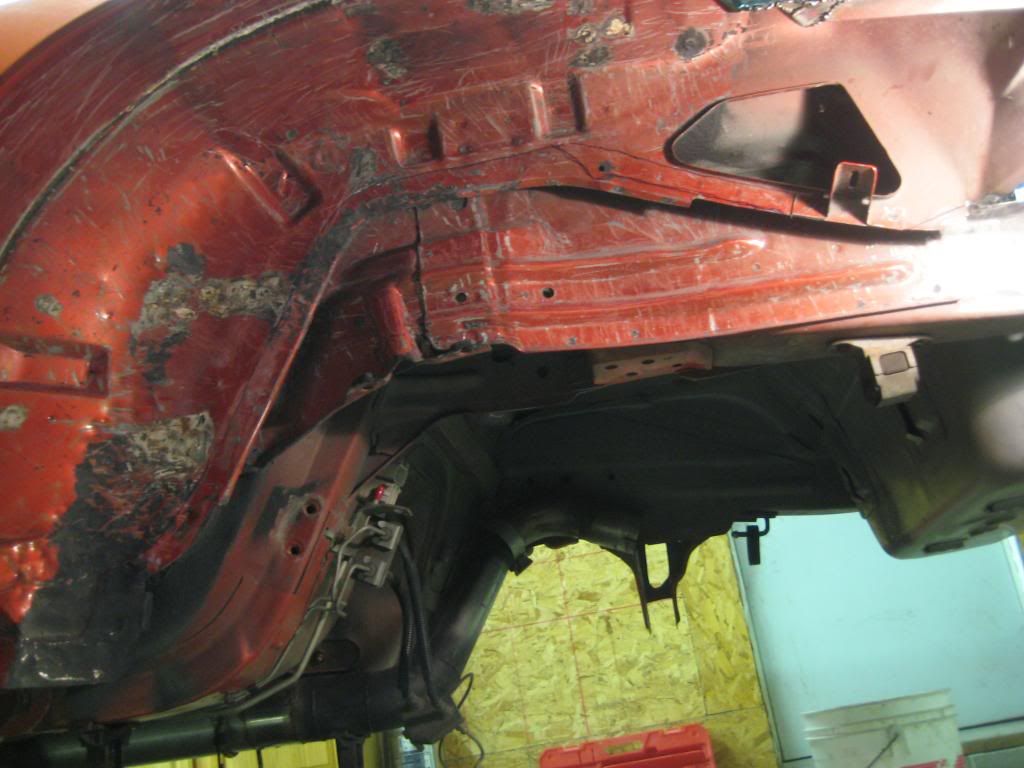
final weight removed from the 2 rear wells, and the inner wheel tub lip is 20.6#'s
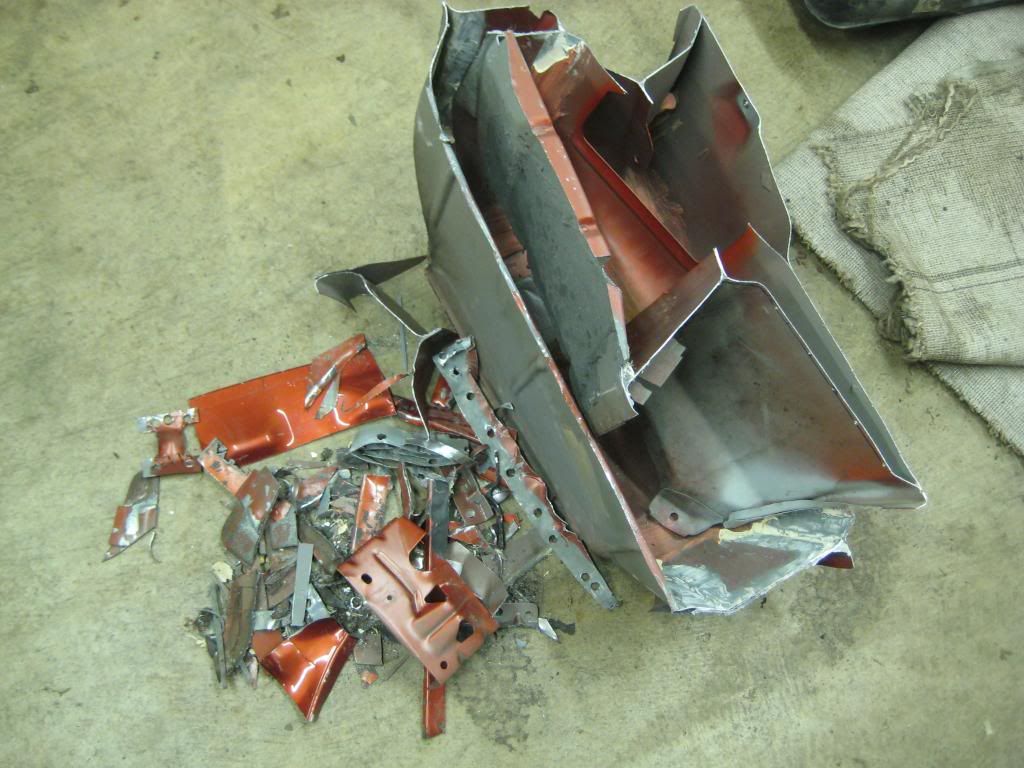
The under coating from the driver side wheel well filled the bucket with seam sealer almost half full now. Still a ton under the car and inside, this is just the back so far.
. Also need some flexible rulers, 6inch and a 18 I have that really thin, to flex to the outside shape to get some lines to cut between the holes. Mostly used my sawzall to cut, you need some skill with how to free hand, and control it not safely. haha You need some good blades, don;'t try to do all this with 2-3 of the same old blade you have. If you make cuts goods its a lot easier.18tpi, and I found some super fine 24tip. some Long, some med, and a few a cut the blade to just a little stuby as long as the saw moves. The torch blades are thicker and don't flex, cut very strait. and have a square end.
the normal metal blades are thinner so they flex a little, you still can't really make a turn cut. But sometimes if you have a cut going and the saw gets in the way of the car, to keep going. You can angle the saw the blade will flex but still cut strait for a while. And the pointer end you can tip the saw back so the end of the blade isn't hitting something on the other side. (you can angle cut the blade yourself too)
hole saw cutter like normal,
good tin snips, you can cut the single layer metal, its only about .030. I think thats 22ga. You need a red, and green handle, a right and left tin snip. And that big flat metal bender pliers thing? I forgot the same?
Got the driver side done, this was trickier. You can work yourself into a corner and no be able to close it up. Its tight in there so took some time, used the outer tub metal. Left it long, and bent it on the car with 2 plates of alum, so I only had to weld up the outside edge. You can weld a piece in but they you will be inside the wheel well looking out, Using the stock metal I think worked out good, only had to add a few small spots on this whole job. That one larger metal fill in piece I did one piece and it came out great.
template is done for that side, and grond the welds down.
Should have bought another 12pack and I'd have more cardboard to make the bigger passenger side panel
trimmed up that side wheel well too. I saved all the metal form this on it was only about 1pound
but lets you do the BFH mod a lot better with the innder tub cut out. Saved the tab for the filler neck, and the back plasitc wheel well cover thing.looks like this cut back
welded up, getting better at this, you have to prep this so its really clean. easier said then done
Gone just use 2 lightweight alum bars for the corner bumper holes, Just paint, and put the panels in and should be done back there.
final weight removed from the 2 rear wells, and the inner wheel tub lip is 20.6#'s
The under coating from the driver side wheel well filled the bucket with seam sealer almost half full now. Still a ton under the car and inside, this is just the back so far.

 06-12-2011, 11:45 PM
#492
ya bro! put that bitch in on a diet!
this should lose no streetability, rocks will be louder. I'll see how bad it is. But it not going to be as loud as driving around with no carpet. Ive done that a few times and its really loud, that why I run the speedinc that weights 10-15 pounds more then none, or the light towel junk that shreds up if you drive the car alot.
But I don't run a spare tire anyway, and the other side dose nothing on LS1 cars (LT1 had EVAP there) All the carpet and panels back in I run, it look stock. I guess I can't fit my hidden nitrous. haha.
20.6 is cool, this cost less then $50 but a bunch of time. (well gota see what my buddy wants for alum of CF panels) The lightweight hatch is 27, rear brakes 25? I took 2-3 off the s60 also, 5-8 is the sealer/undercoating....TRZ ARB I'm thinking maybe too 75-80 off the rear. I thing there another 3-5 on the things in the middle underneath Im gona check out. Got some paint on it tonight, SOM is a bitch to match, there 5-6 shades on the car. this is some engine chevy red/orange. kinda matches no one will see this haha

this should lose no streetability, rocks will be louder. I'll see how bad it is. But it not going to be as loud as driving around with no carpet.
Ive done that a few times and its really loud, that why I run the speedinc that weights 10-15 pounds more then none, or the light towel junk that shreds up if you drive the car alot.But I don't run a spare tire anyway, and the other side dose nothing on LS1 cars (LT1 had EVAP there) All the carpet and panels back in I run, it look stock. I guess I can't fit my hidden nitrous. haha.
20.6 is cool, this cost less then $50 but a bunch of time. (well gota see what my buddy wants for alum of CF panels) The lightweight hatch is 27, rear brakes 25? I took 2-3 off the s60 also, 5-8 is the sealer/undercoating....TRZ ARB I'm thinking maybe too 75-80 off the rear. I thing there another 3-5 on the things in the middle underneath Im gona check out. Got some paint on it tonight, SOM is a bitch to match, there 5-6 shades on the car. this is some engine chevy red/orange. kinda matches no one will see this haha
Last edited by studderin; 06-13-2011 at 12:08 AM.

 06-15-2011, 11:19 PM
#497
got more **** done tonight, found about 15#s free stuff
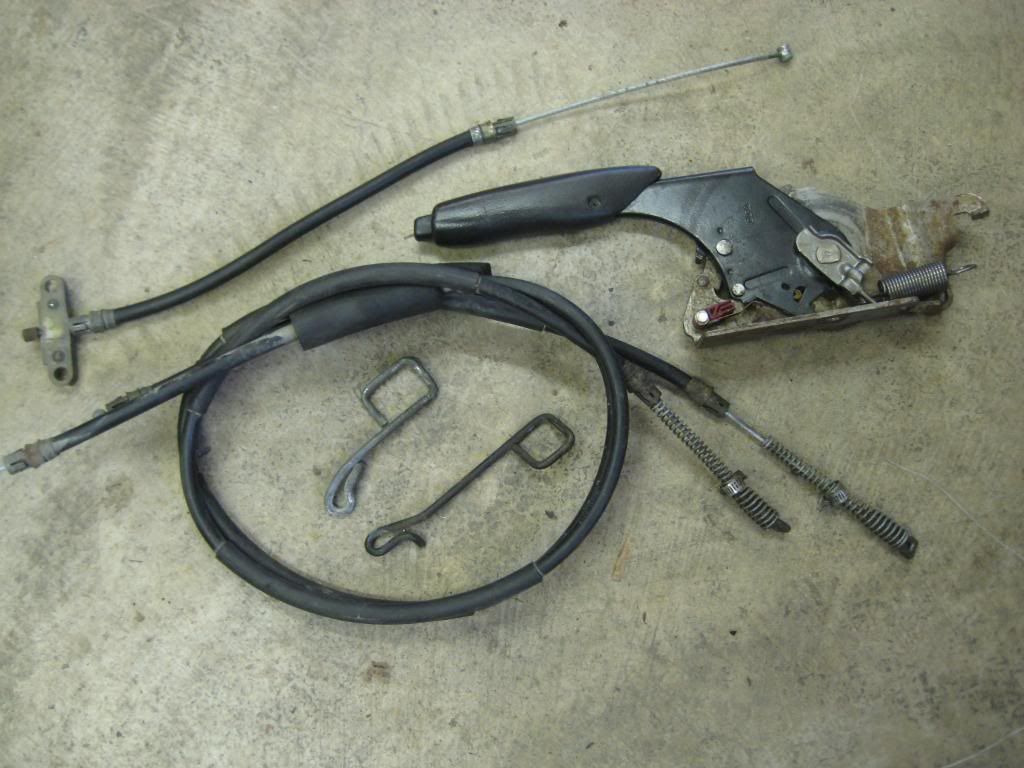
Ebrake stuff, to the brakes. 7.2#s
Still have the cable splitter plate under the floor. Not sure how I';m gonna like not having the Ebrake if I want to put it back on. I guess once the car is running I can use the linelock for a backing brake? Not on a super steep hill or anything the car could roll fast. Anyone do that?
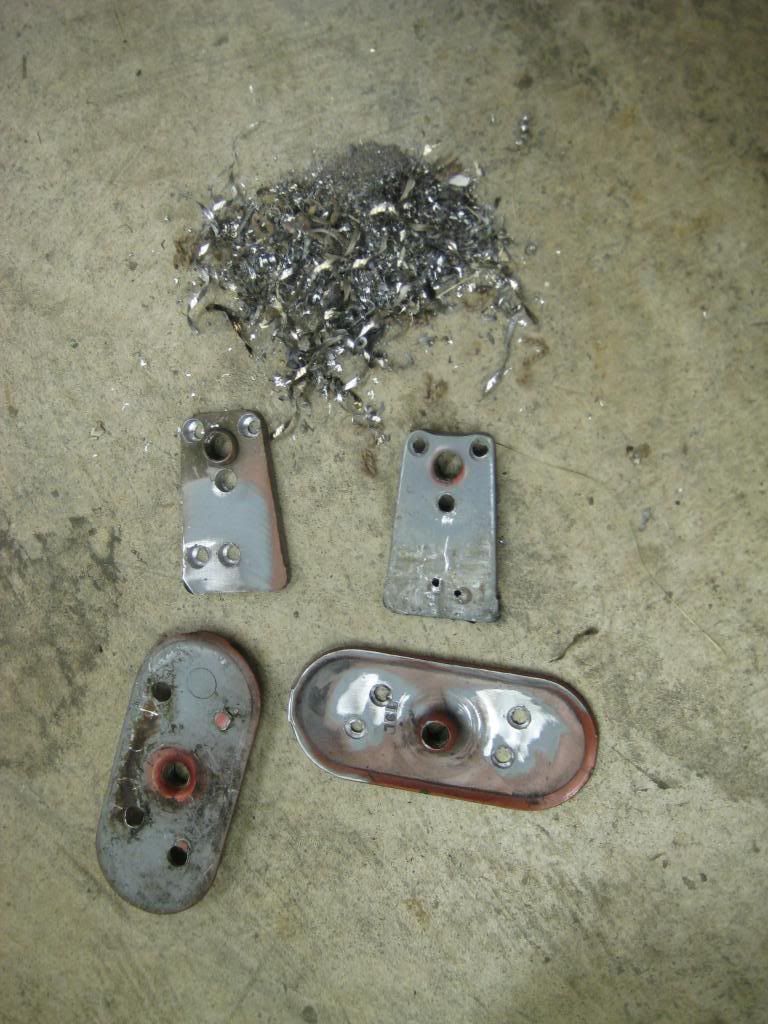
Drilled off the rear seatbelt mounts. 1.8#s There some thick plates.
Kinda a bitch to drill the inside ones off, The floor pan is really thin from being stretched so much on the big hump there attached to. Had to weld up a few of the spot welds, NBD. But GM mounts them over a bigger hole for the seat belt bolt to pass, so you have to deal with that, I've just gona use rubber plugs just like the stock ones. The inner holes are 1inch, and outers are 1/2. I already found nice looking plugs at ACE hardware today, they looks stock The outers are 1/4 thick and hard to see the spot welds, The 3 dents around the bolt hole and there 2 more on the long end, you can see if you sand the paint off, under the inside to find them. I just used the drill bit the metal is thick.
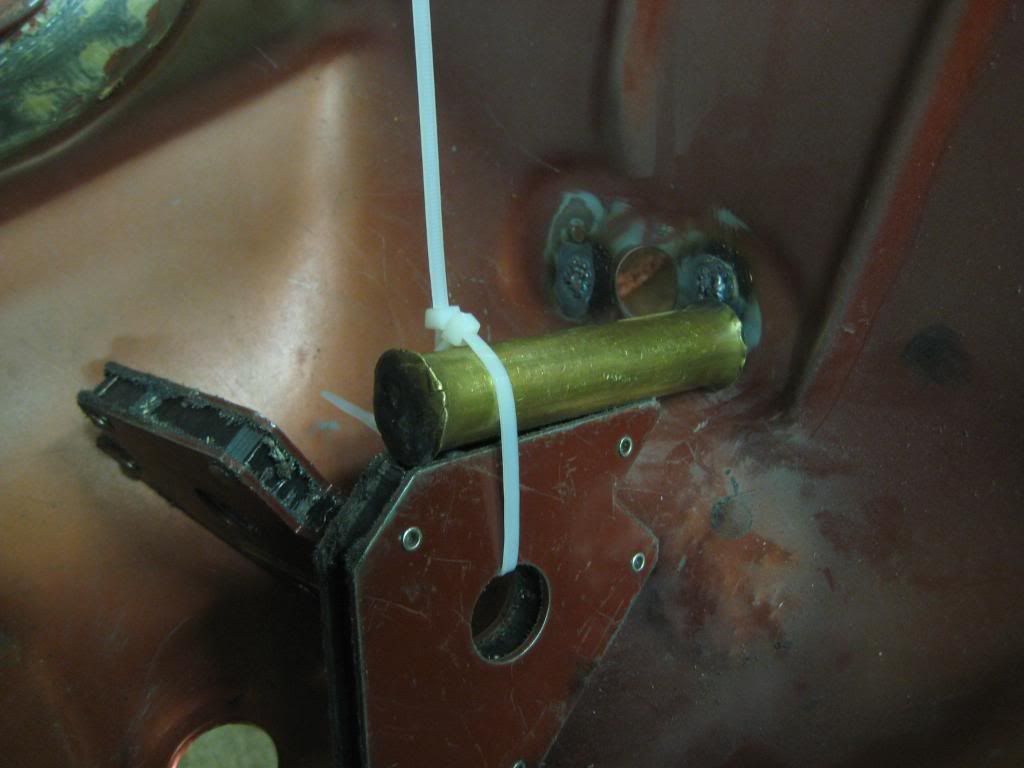
brass for a heat sink, and it doesn't now weld, so yoiu can use it as a stop for the wire. Its hard to see over the Ypipe.
got the seam sealer off the tunnel to hatch floor, alone the rockers, and some extra I have done on the wheel tubes. Scraped the undercoating off the rockers too. Up to 8.56#s in that bucket now


took some weight out of the hatch bracket too,
the rear end rubber line I bought might not be best. I think I looked it up for a 94 V6 car. But its a single rubber line with a metric end. Other end is a dis block, so its 3channel car (I want to remove one my my 2 rear brake lines.....4channle) The block the bolts to the rearend is normal double fair seats it looks like. Do thats nice to make lines for the rearend. But 2 rear brackets lines on a LS1 car have different sized threads. One is 13mm other 15mm? something like that. you can't switch the lines. And the line it fits is the line I want to remove.I'll get the PN later
Ebrake stuff, to the brakes. 7.2#s
Still have the cable splitter plate under the floor. Not sure how I';m gonna like not having the Ebrake if I want to put it back on. I guess once the car is running I can use the linelock for a backing brake? Not on a super steep hill or anything the car could roll fast. Anyone do that?
Drilled off the rear seatbelt mounts. 1.8#s There some thick plates.
Kinda a bitch to drill the inside ones off, The floor pan is really thin from being stretched so much on the big hump there attached to. Had to weld up a few of the spot welds, NBD. But GM mounts them over a bigger hole for the seat belt bolt to pass, so you have to deal with that, I've just gona use rubber plugs just like the stock ones. The inner holes are 1inch, and outers are 1/2. I already found nice looking plugs at ACE hardware today, they looks stock
The outers are 1/4 thick and hard to see the spot welds, The 3 dents around the bolt hole and there 2 more on the long end, you can see if you sand the paint off, under the inside to find them. I just used the drill bit the metal is thick.brass for a heat sink, and it doesn't now weld, so yoiu can use it as a stop for the wire. Its hard to see over the Ypipe.
got the seam sealer off the tunnel to hatch floor, alone the rockers, and some extra I have done on the wheel tubes. Scraped the undercoating off the rockers too. Up to 8.56#s in that bucket now
took some weight out of the hatch bracket too,
the rear end rubber line I bought might not be best. I think I looked it up for a 94 V6 car. But its a single rubber line with a metric end. Other end is a dis block, so its 3channel car (I want to remove one my my 2 rear brake lines.....4channle) The block the bolts to the rearend is normal double fair seats it looks like. Do thats nice to make lines for the rearend. But 2 rear brackets lines on a LS1 car have different sized threads. One is 13mm other 15mm? something like that. you can't switch the lines. And the line it fits is the line I want to remove.I'll get the PN later
Last edited by studderin; 06-15-2011 at 11:29 PM.
 06-16-2011, 09:51 AM
#500
TECH Senior Member
iTrader: (10)
Join Date: May 2005
Location: Bossier city,LA barksdale AFB
Posts: 5,355
Likes: 0
Received 2 Likes
on
2 Posts
yeah i havent hooked my ebrake up since i installed narrowed 9" that was like 8months ago. been parked all over hills you name it u just have to always make sure its in gear lol.
yeah like he said why not cut out the cargo area? i would if i was doing what your doing
yeah like he said why not cut out the cargo area? i would if i was doing what your doing