
Old School LSx 1967 Camaro
 12-12-2013, 09:37 AM
#1

I have a couple of build threads on other sites, but all of the LS swap info is buried deep in the thread. I have had a lot of people asking about specifics, so I thought this would be a good place to consolidate it all.
Here's the Pro-Touring build thread: http://www.pro-touring.com/threads/8...ETAL-67-Camaro
Here's the Team Camaro thread with every detail: http://www.camaros.net/forums/showthread.php?t=173910
I'm going to copy and paste a lot of this from other threads, so don't get excited when it looks like it's all coming together very quickly. The majority of this swap was performed between Jan '13-July '13. The Camaro has been up and running since mid summer.
I bought the '67 Camaro already painted, but it had a stock suspension, 10 bolt rear, 15" wheels, drum brakes, a tired 80's 350 truck engine, etc. I spent the first year or so upgrading just about everything on the car.
Here's a list of what I have done over the past 2 years including the LS Swap:
-2004 Cadillac Escalade 6.0l (364 ci) LQ9 engine
-Total Engine Airflow Stage 2 ported LS2 heads
-Comp Cams 231/235 .617/.621 108LSA
-Edelbrock Vic Jr. LS1 intake
-Accufab 4150 4 barrel throttle body
-Edelbrock Coil Covers
-BeCool radiator
-2004 Pontiac GTO 6 speed T56 transmission
-Monster Stage 2 clutch
-McLeod Hydraulic adjustable clutch master cylinder
-Wilwood Tandem brake master cylinder
-1967 Camaro 12 bolt posi w/3.31's
-SpeedTech Upper & Lower tubular control arms
-Hotchkis 1.5" multileafs
-Bilstein shocks
-Hotchkis front & rear sway bar
-Hotchkis subframe connectors
-Wilwood 12" drilled/slotted rotors w/6 piston & 4 piston calipers
-18x8 & 18x9 Foose Legend wheels
-Nitto NT555 245/40/18 & 275//40/18 tires
-Custom New Vintage USA gauges
-Scat ProCar Rally seats
-Morris Classic Concepts 3 point seat belts
-Screamin' Performance kick panels
-Alpine 6.5" and 6x9" speakers
-2 Infinity 12" subs
-3 Alpine Amps
-RetroElectro RS headlight kit
-Optima Yellow Top battery relocated to trunk...
Last edited by 67rally; 12-13-2013 at 11:16 AM.
 12-12-2013, 09:41 AM
#2
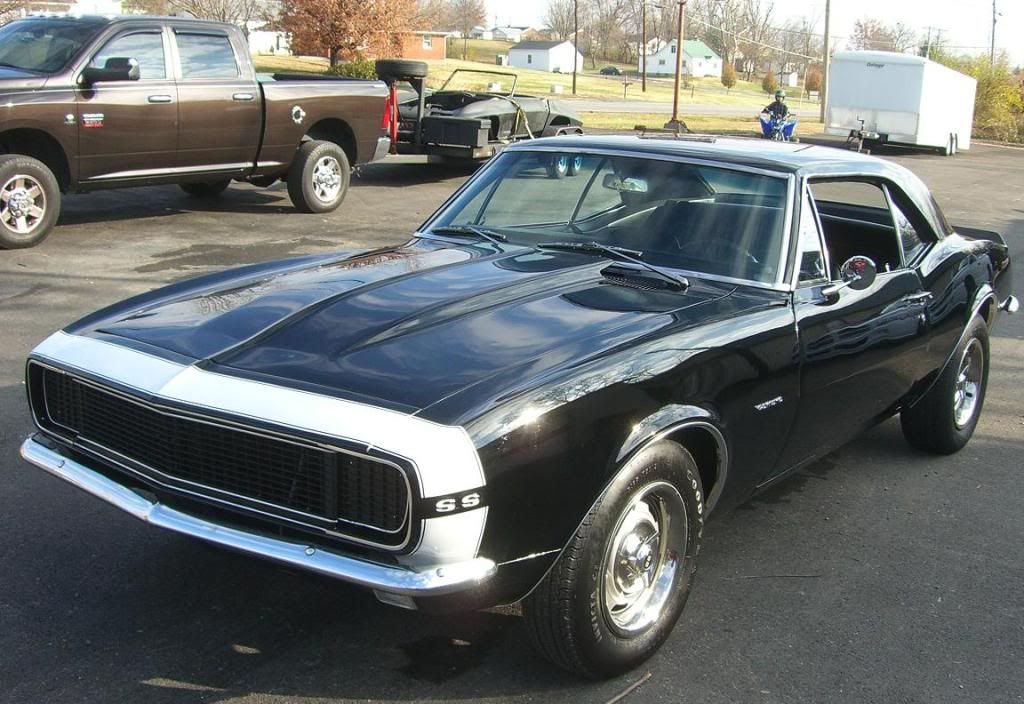
Here's how it looked the day I bought it:
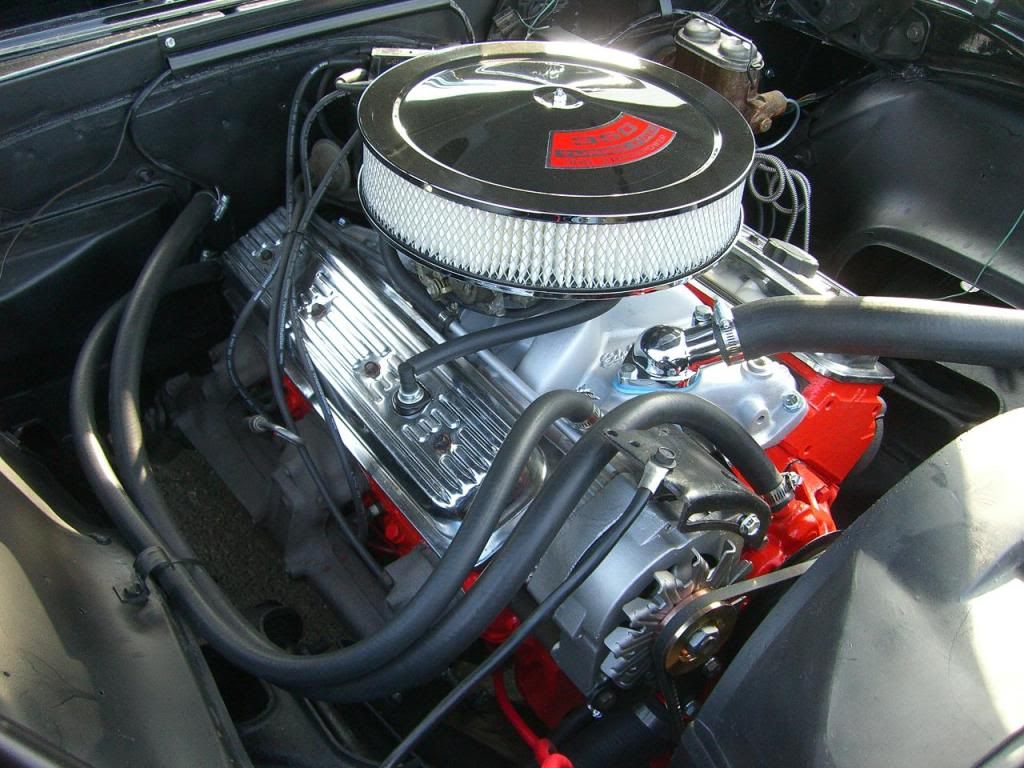
And here's the freshly painted turd of an engine:
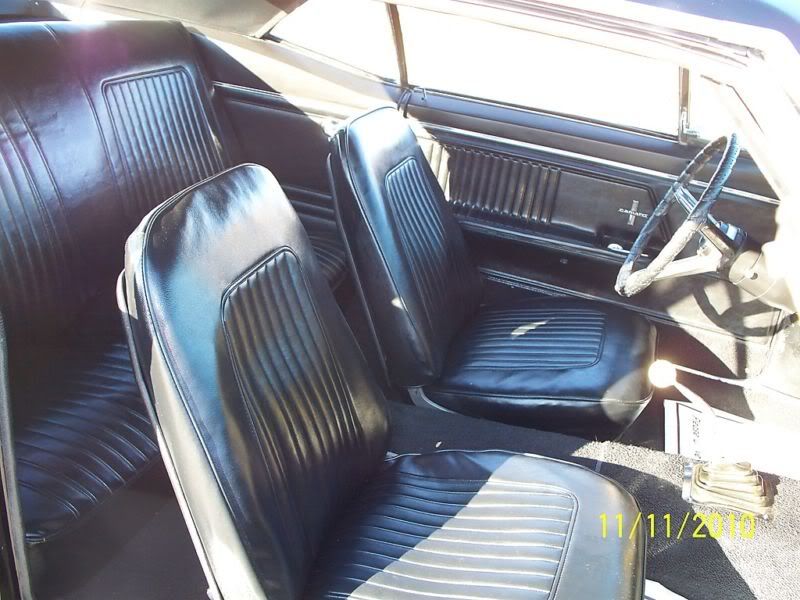
And the interior:
If someone tells you it has just been rebuilt and puts fresh paint on it, that doesn't mean that it's true. I did an H/C/I on the old 350, and found sludge in the heads, and eventually spun a rod bearing on a test and tune.
My first thought was to stroke it out to a 383 and be happy with it, but I got bitten with the LS bug.
And here's the freshly painted turd of an engine:
And the interior:
If someone tells you it has just been rebuilt and puts fresh paint on it, that doesn't mean that it's true. I did an H/C/I on the old 350, and found sludge in the heads, and eventually spun a rod bearing on a test and tune.
My first thought was to stroke it out to a 383 and be happy with it, but I got bitten with the LS bug.


 12-12-2013, 10:04 AM
#5
So, after a little test and tune with a friend of mine, the Camaro had one good burst of power and then it sounded like someone had dumped a box of marbles into the bottom end. I couldn't even limp back home. I got trailered and the fun began.
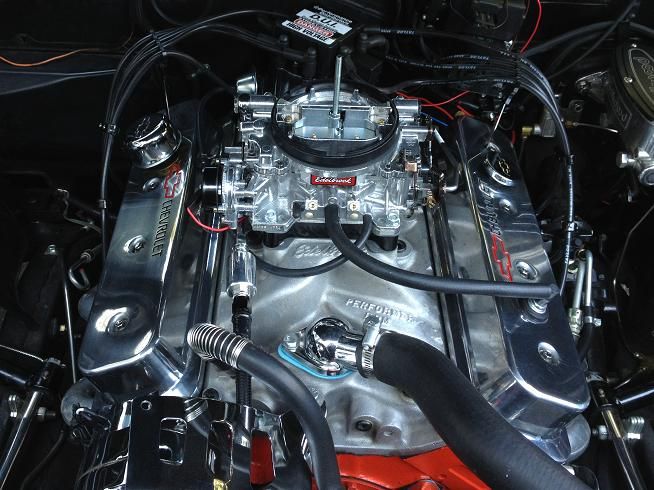
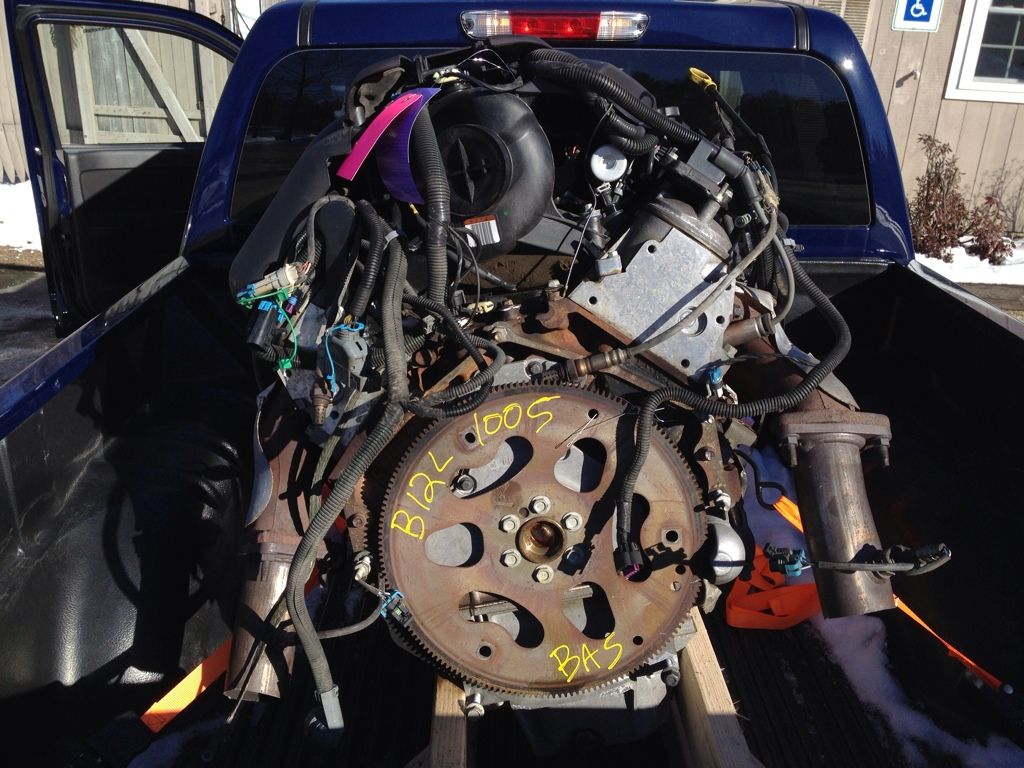
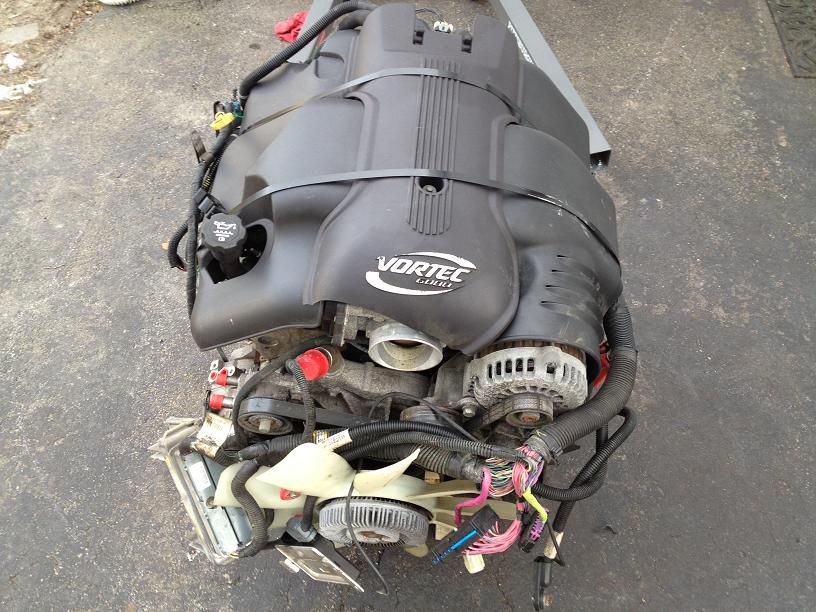
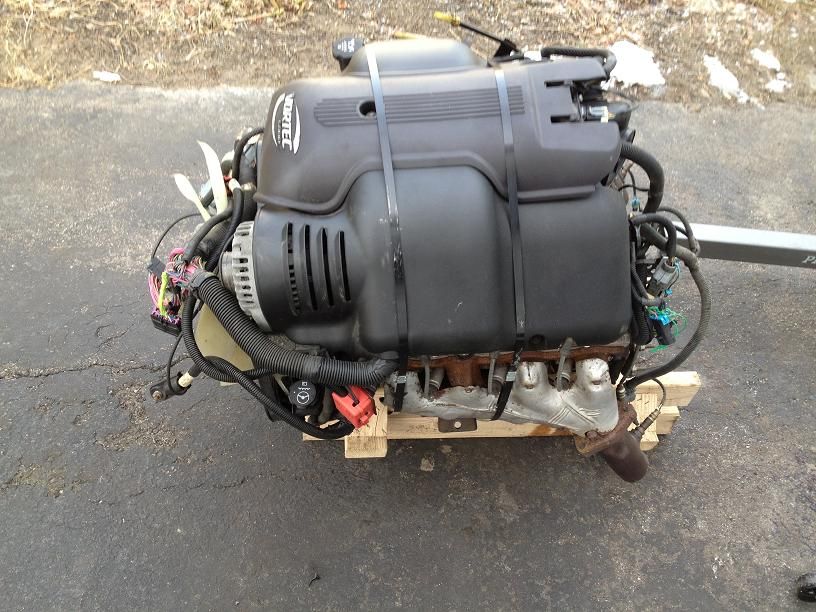
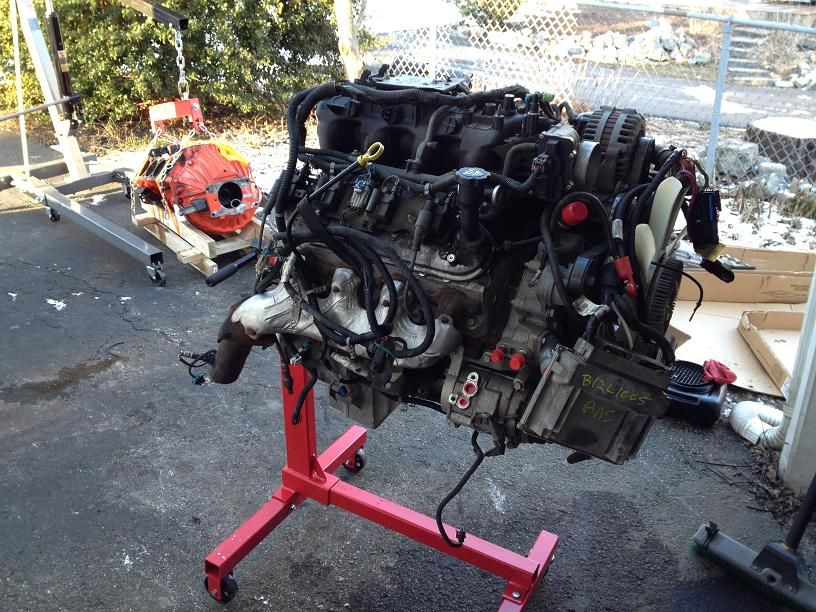
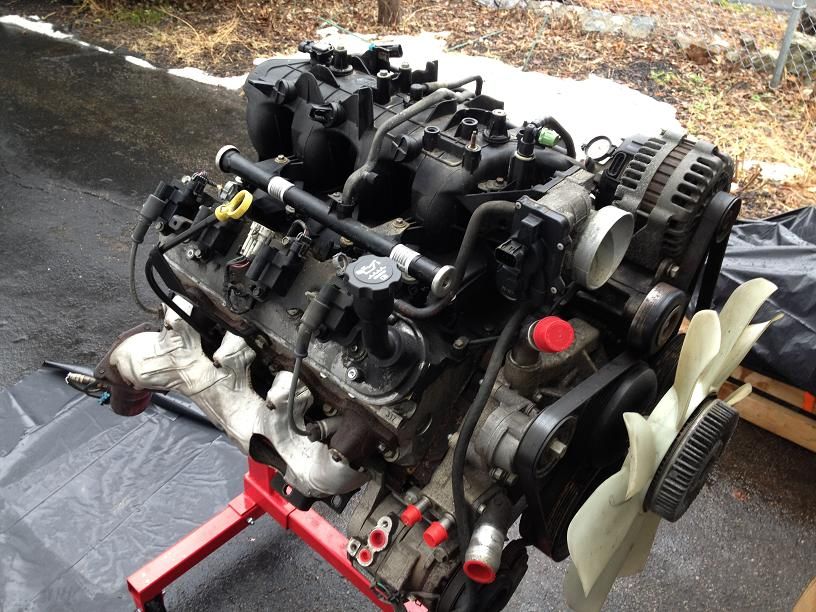
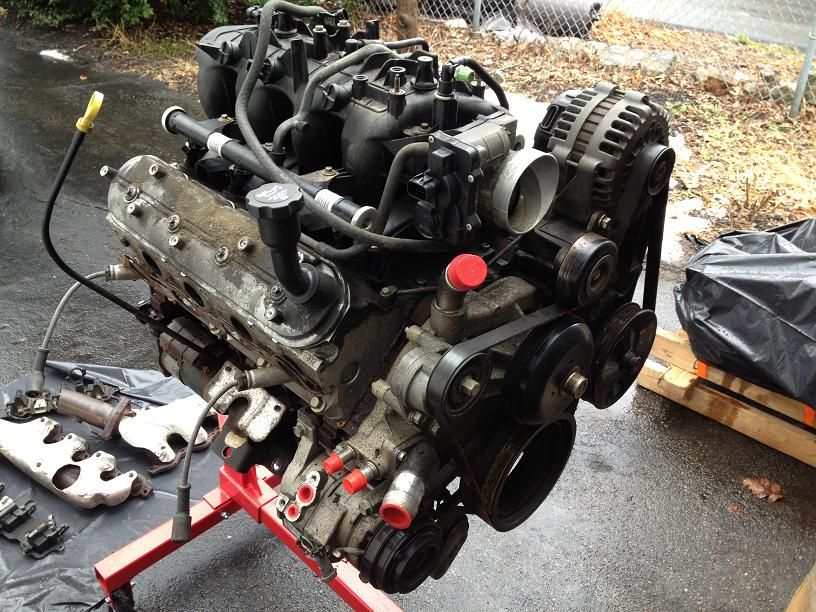
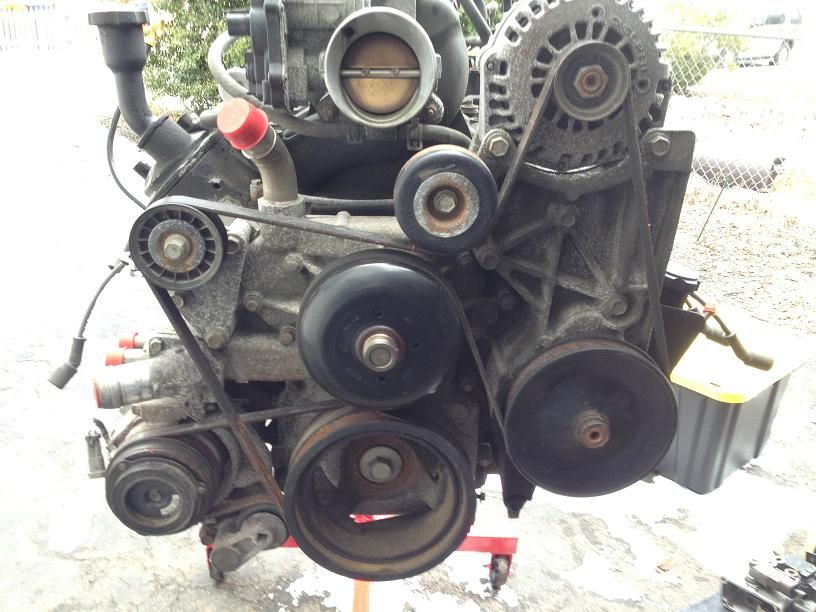
Here's how the motor looked just before the swap. I had upgraded the engine quite a bit, so I knew I could sell a lot of the parts off to help with the swap:
FROM THIS POINT ON, ANYTHING QUOTED IS TAKEN FROM ANOTHER BUILD THREAD
Here's how the motor looked just before the swap. I had upgraded the engine quite a bit, so I knew I could sell a lot of the parts off to help with the swap:

FROM THIS POINT ON, ANYTHING QUOTED IS TAKEN FROM ANOTHER BUILD THREAD
 12-12-2013, 10:08 AM
#6
Finding my new engine and trans...
Alright, lot's of good news....
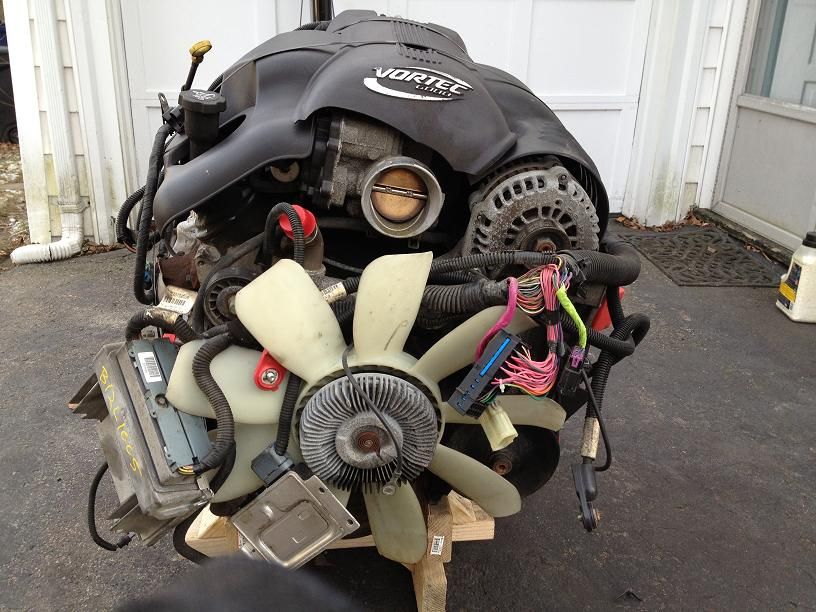
I have sold off a bunch of the old engine parts...heads, intake, carb, alternator, distributor, cam/lifters/timing chain, along with some other random stuff lying around and it will basically pay for the LQ9 that I am going to pick up tomorrow!!!! I have spent a ridiculous amount of hours searching for the right engine and I finally found it!
I am heading out tomorrow afternoon to pick up a nice clean LQ9 dropout from an '04 Cadillac Escalade. It will include the Alt, AC, PS pump, ECU, Wiring harness, gas pedal, TAK (throttle control) module, MAF sensor, O2 sensors, airbox, etc. The LQ9 is essentially an iron block LS2, and in stock form it has 10:1 compression and produces 345 hp and 380 lb-ft tq.:hurray:
Of course, I'm not going to leave it in stock form......
I also have a T56 from an '04 GTO arriving shortly. The '04 GTO T56 is a step up from the '98-02 F-body T56's. This one has the same triple cone synchro's that the LS1/LS6 Corvette's have. It also has a 1st gear ratio of 2.97:1 which combined with my 3.31's will give me a final drive ratio of 9.83:1. That should be just about perfect.
FWIW here are the LS1 T56 F-body vs GTO gear ratios:
F-body: 2.66, 1.78, 1.30, 1.00, .74, .50
G T O : 2.97, 2.07, 1.43, 1.00, .84, .57
This should also make a shorter drop from 4th to 5th which will be nice, but still a very low 6th ratio.
 12-12-2013, 10:10 AM
#7
Got her home...
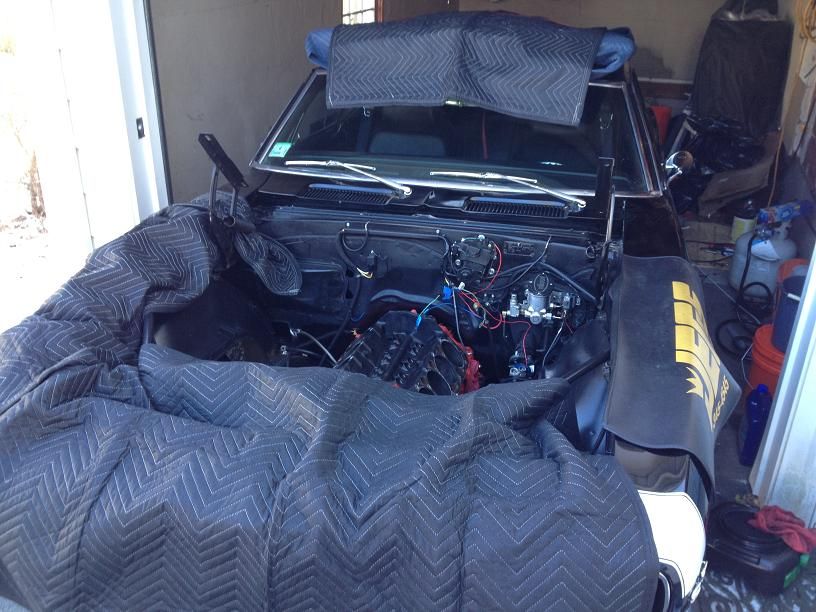
I did a little work today, but I turned into a popsicle after a couple of hours and called it quits. I managed to get the hood off, PS pump off, headers out, and all electrical connections disconnected.
Tomorrow I'm going to push the Camaro out of the garage and pull the old engine block so I can start cleaning up the engine bay. My plan is to sand the subframe and anything else that needs cleanup down to bare metal, prime and paint while the engine is out. I'd also like to get the new LQ9 off the wooden stand and onto my engine stand and start dismantling it.
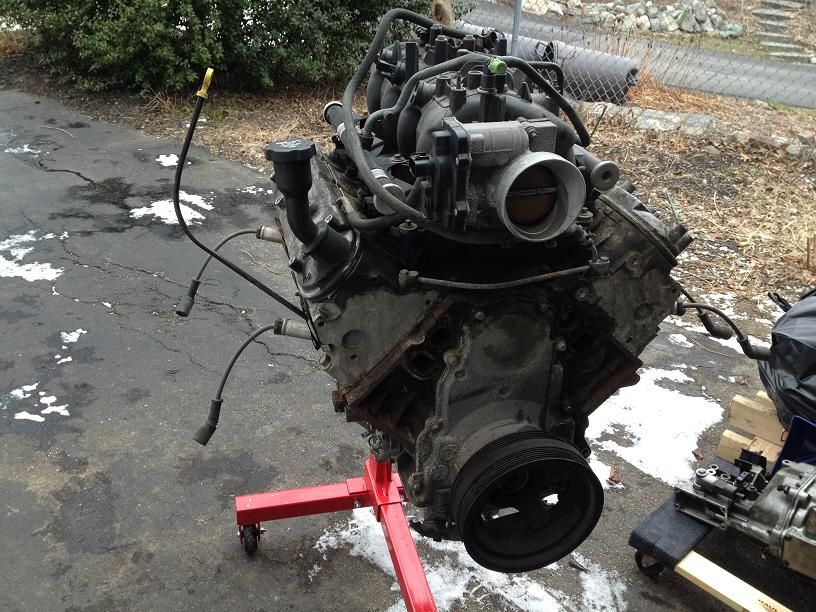
Here's a couple of the before shots. Trust me, it won't look anything like this once it goes into the engine bay:
Tomorrow I'm going to push the Camaro out of the garage and pull the old engine block so I can start cleaning up the engine bay. My plan is to sand the subframe and anything else that needs cleanup down to bare metal, prime and paint while the engine is out. I'd also like to get the new LQ9 off the wooden stand and onto my engine stand and start dismantling it.
Here's a couple of the before shots. Trust me, it won't look anything like this once it goes into the engine bay:
Trending Topics
12-12-2013, 10:12 AM
#8
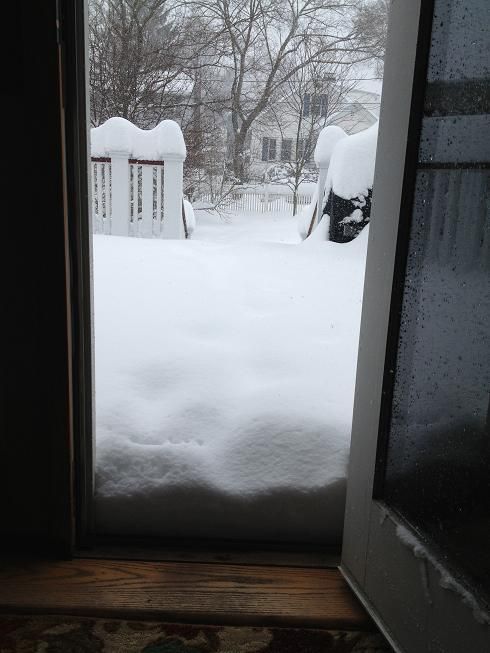
The swap begins. This whole process was a lot of fun because my garage is so small I couldn't do the work inside. It was freezing cold, and many days I had to shovel the driveway first before I could do any work...
Alright, I'm officially frozen. Supposedly it got up to 28 degrees today, but I was in the shade all day so I don't buy it.
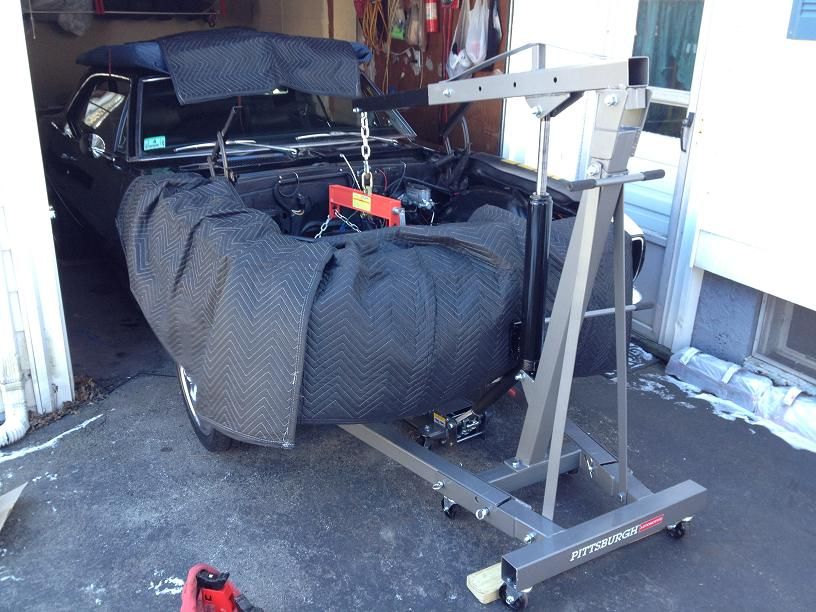
It took a litte longer than planned. I was going to remove the engine and tranny as one unit, but I couldn't get access to my shifter to get it off. The handle is welded to the shifter, the shifter hole is tiny so I couldn't access it from above, and couldn't get to one of the bolts from below. Anyways, I managed to pull the engine and bellhousing as a unit, then remove the shifter, then drop the driveshaft, and finally drop the tranny and remove the crossmember. It'll be quite a while before the new engine and tranny go it, but at least now I can start detailing the engine bay. Time for a beer.:beers:
Prepping for surgery:
Ready for removal:
Up, up and away:

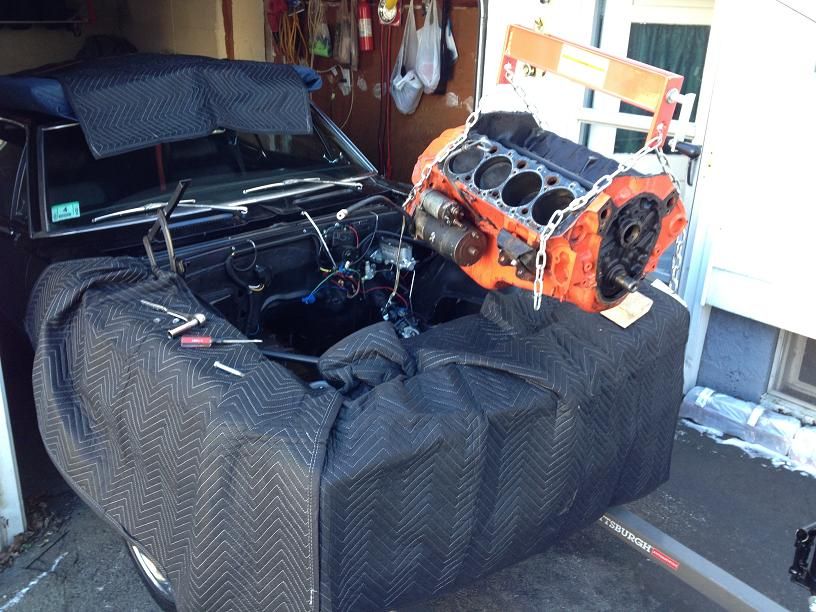
It's officially out:
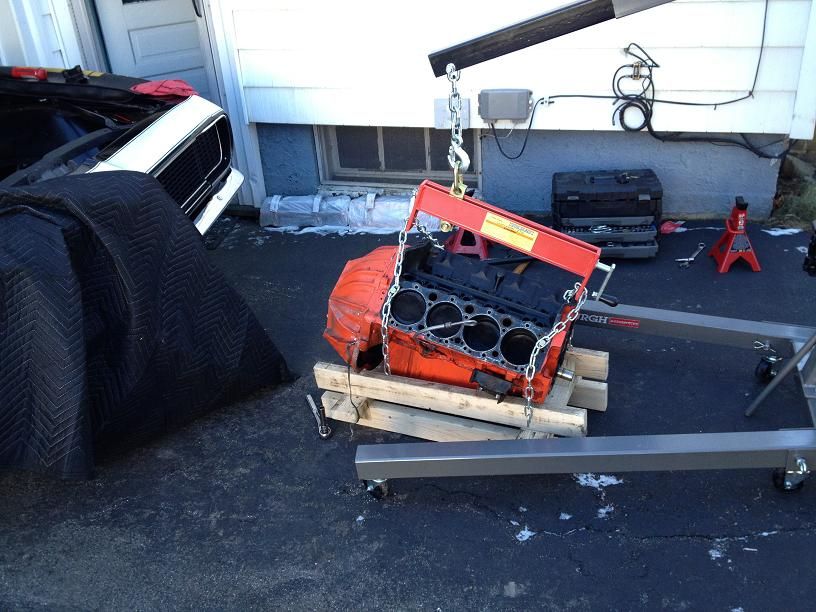
The old and the new:
It took a litte longer than planned. I was going to remove the engine and tranny as one unit, but I couldn't get access to my shifter to get it off. The handle is welded to the shifter, the shifter hole is tiny so I couldn't access it from above, and couldn't get to one of the bolts from below. Anyways, I managed to pull the engine and bellhousing as a unit, then remove the shifter, then drop the driveshaft, and finally drop the tranny and remove the crossmember. It'll be quite a while before the new engine and tranny go it, but at least now I can start detailing the engine bay. Time for a beer.:beers:
Prepping for surgery:
Ready for removal:
Up, up and away:
It's officially out:
The old and the new:
12-12-2013, 10:23 AM
#9
*
The transmission arrives (sort of):
I took advantage of the 55 degree heat wave today, and stripped the wiring harness along with some other stuff. The exterior is going to need a good cleaning, there's plenty of dirt and grime built up, but everything was in good shape.
Before:
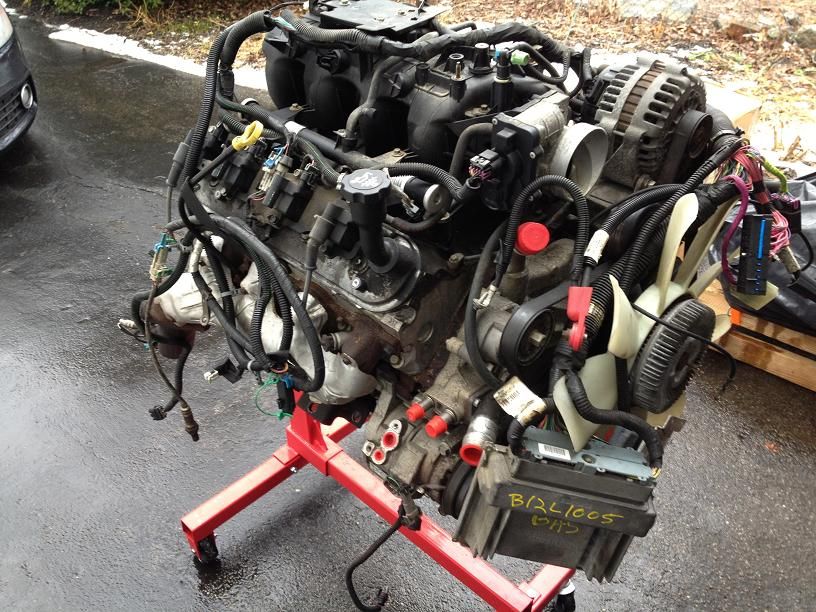
Harness removed:
Coil packs, exhaust manifolds and fan removed:
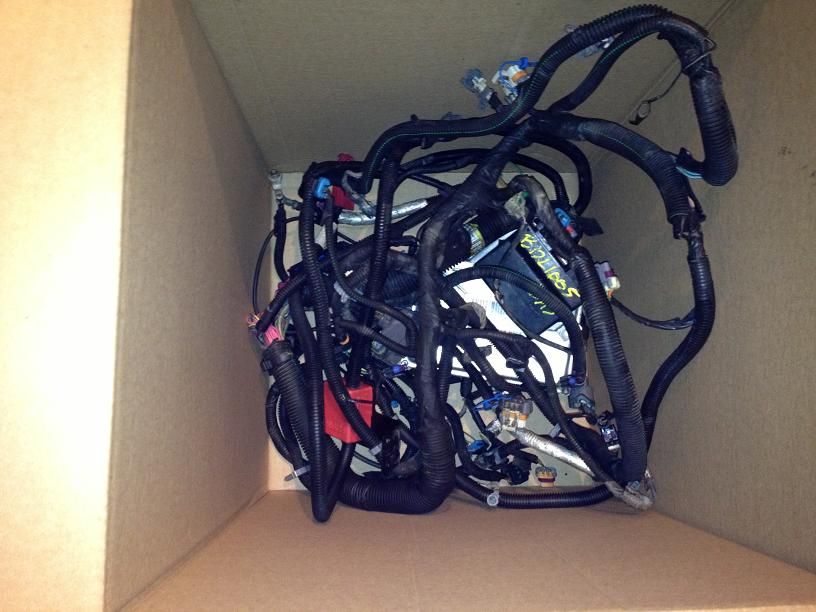
Here's the jumble of wires that will be someone else's problem:
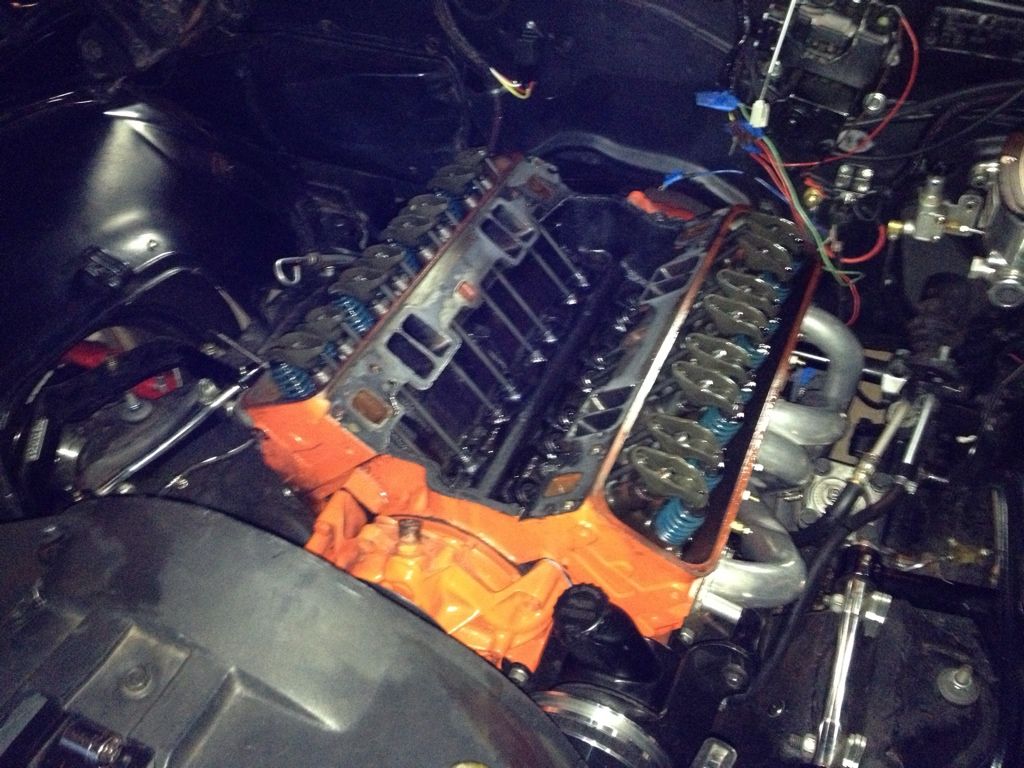
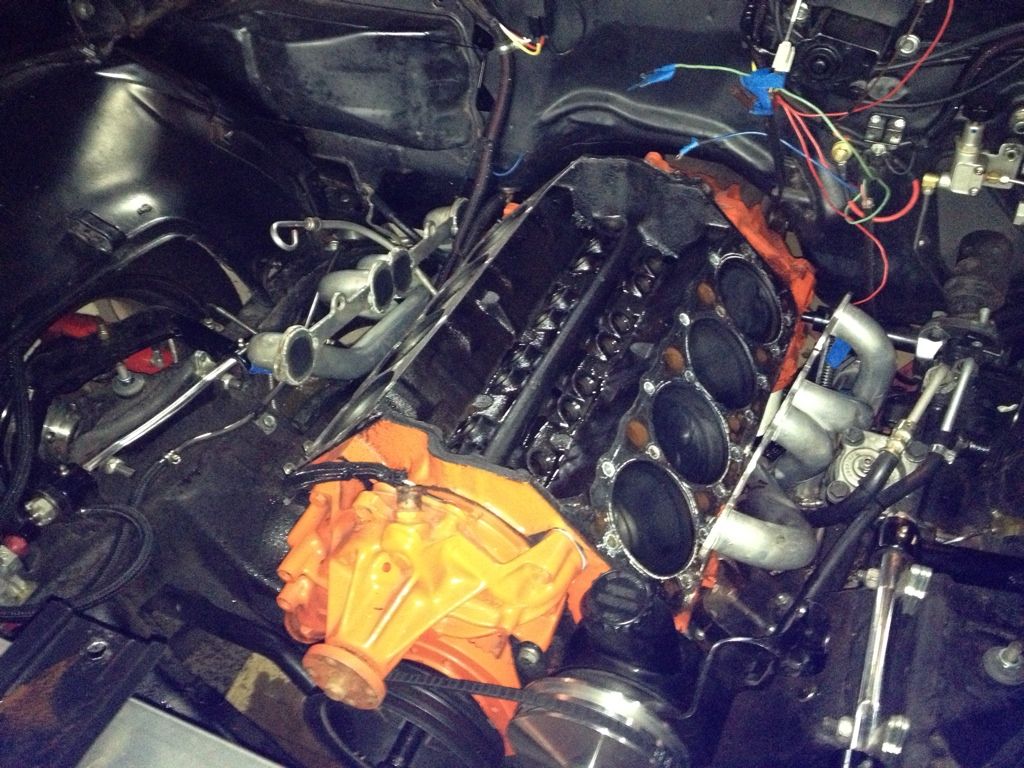
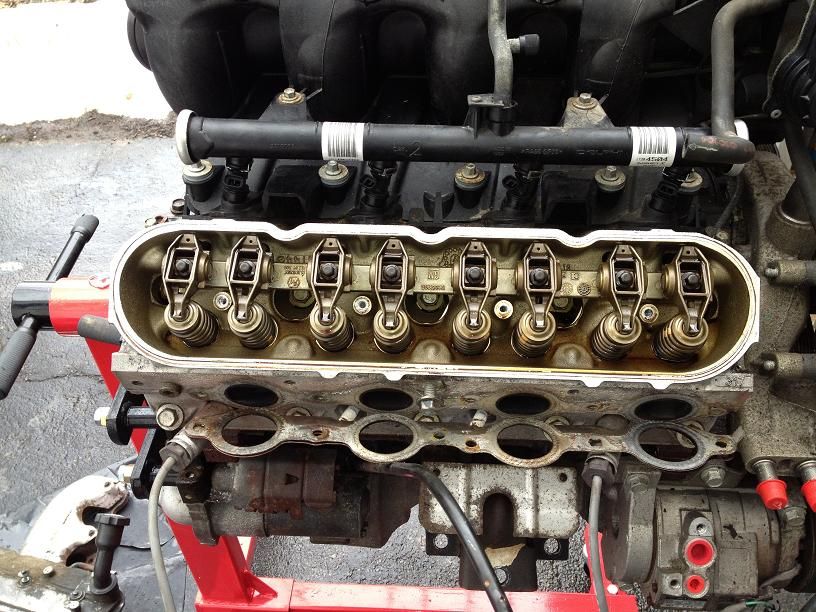
While I was at it, I pulled the valve covers. I just didn't want to see any nasty sludge build up, and was pleased to see this:
Before:
Harness removed:
Coil packs, exhaust manifolds and fan removed:
Here's the jumble of wires that will be someone else's problem:
While I was at it, I pulled the valve covers. I just didn't want to see any nasty sludge build up, and was pleased to see this:
The transmission arrives (sort of):
My T56 arrived yesterday, along with the bellhousing. The box the bellhousing was in was also supposed to contain a clutch, flywheel, transmission crossmember, etc. It tore open in transit, and everything was lost. The seller is shipping out replacment parts this weekend.
T56:

T56:
I spoke with the eBay seller for the tranny this weekend and decided to take a partial refund on the clutch, rather than having him send me a low mile used one. I think I would definitely be pushing the limits of what a stock GTO clutch could handle, so I am looking at either an LS7 clutch setup or possibly a stage 2 from Monster/Spec/??? Either should be good for 450+rwhp.
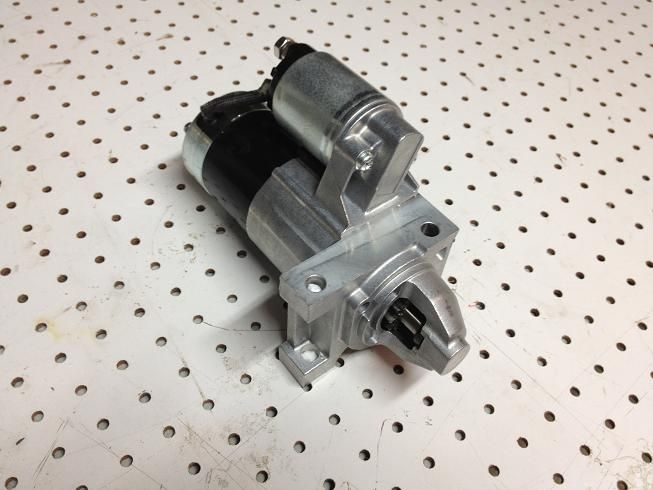
I ordered a new GTO starter for the LQ9 from someone on LS1tech. I have a GTO bellhousing and it turns out that the GTO starter is smaller in diameter than any other LS starter. So my choice was to get an F-body bellhousing or a GTO starter. I opted for the new starter.
My new throttle body arrived a few days ago, and I just ordered my new intake and fuel rails. I'll post pics when I'm ready to unveil...
Last thing is I just won an eBay auction for a nice set of 243 (LS2) heads. The heads flow a little better than the 317's that come on the LQ9, but they also have smaller combustion chambers.
The LQ4 has a 9.5:1 compression ratio, the LQ9 has flat top pistons which bump it to 10.1:1 and with the 243's I'll be right at 11 or 11.1:1.
Now I have to decide whether I'll just install bigger springs and add a cam, or if I'll send the heads out to do a valve job/port work as well. Porting is expensive, but if I'm going to do it, now would be the time. I am looking at Advanced Inductions or Total Engine Airflow to do the port work, which would put me over 300cfm at around .500 lift and up.
I was on the phone with Jon from PSI Conversions today and I'm going to have them do my harness. Looks like I'll probably just sell off the original harness and have PSI build me a new one.
I also PM'd with Don from Slowhawk down in Bridgewater and he's going to set me up with an initial program just to get me running, and then I'll head down there for a custom tune.
I'm just getting all my ducks in a row, it'll still be a couple months before I have all my parts and can begin the actual swap. Hoping for some warm weather so I can finish tearing down the engine and really cleaning up/painting the block.
Last edited by 67rally; 01-02-2014 at 05:39 PM.
12-12-2013, 10:27 AM
#10
More work and more parts...
I pulled all the accessories off today. I think I'm going to clean these up and re-use them except for the water pump. I'm looking for a good deal on a 2010 Camaro L99 water pump as it will line up with the rest of my truck accessories, but move the upper inlet from the passenger side to the driver's side for a cleaner install. I'll swap out the starter for the GTO starter that's in the mail, and obviously I'll need new motor mounts, once I decide on my headers.
Before:
After:
Before:
After:
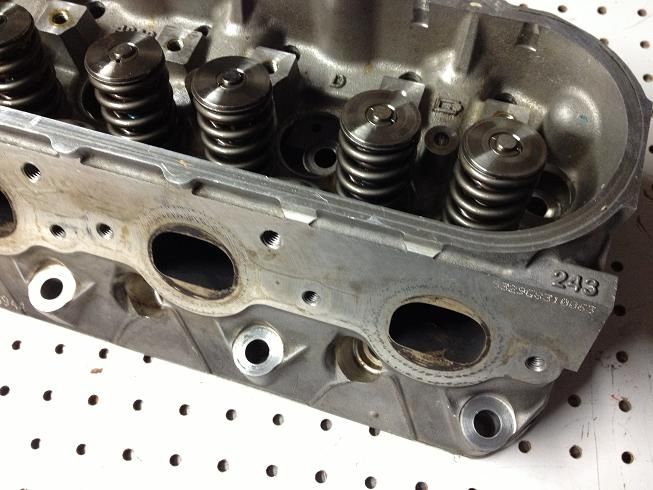
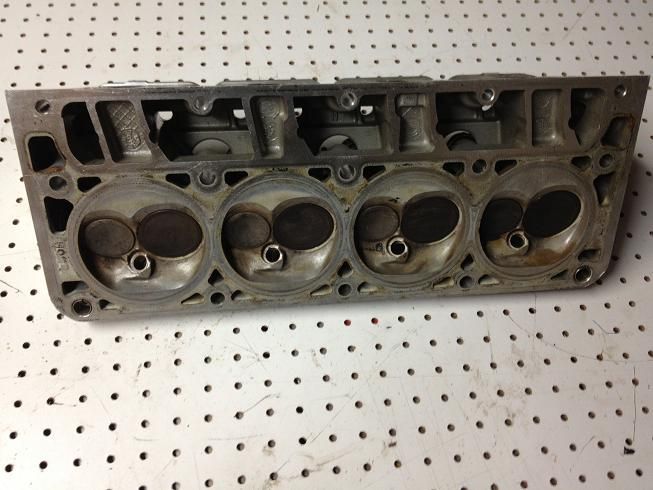
I got one of my cylinder heads today, the other must have taken the scenic route and it will be here tomorrow. These are the 243 LS2 heads. They have a 64.5cc combustion chamber. The nice thing is these already had a brand new set of .650 lift PRC dual springs installed on them.
If the other one comes tomorrow, I am shipping them off to Advanced Induction out of Concord, NC for their 232cc Full CNC Porting Package.
Check out these
Flow Figures (I/E):
.100: 69/53
.200: 146/115
.300: 214/157
.400: 258/204
.500: 293/256
.550: 301/265
.600: 305/271
.650: 309/275
.700: 315/277
Here's one of the heads before they clean it up and port it:
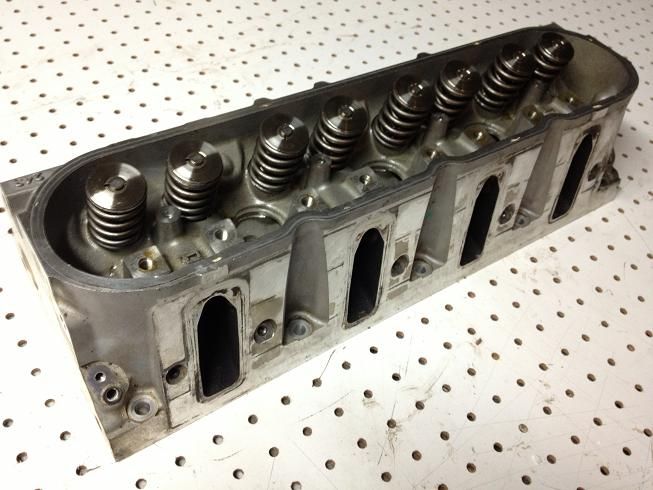
12-12-2013, 10:28 AM
#11
Change of plans...
I bailed on shipping my new heads off to Advanced Inductions. I just couldn't get a timely/straight answer out those guys, it felt uncomfortably similar to dealing with Prodigy Customs and DriverzInc when they were on their way out and didn't want to go down that road. They're supposed to be one of the best in the industry, but it wasn't working for me.
So, I got in touch with Mike from Total Engine Airflow and he's going to do their Stage 2 Full CNC Porting Package. I shipped the heads out this morning, and he should have them by Thursday. TEA is the other big name in porting LSx heads, and after exchanging a few emails and a phone call I feel so much better than I did with AI.
They'll hot tank and bead blast the heads, do a full cnc stage 2 port, competition multi angle valve job. Then they'll flow the heads, do a blend valve job and reassemble with my .650 spring, mill the heads to 63cc, install Ferrea 2.04/1.575 (slightly larger) valves. They're also supplying a custom ground camshaft, pushrods, head gaskets, ARP head bolts, LS7 lifters, lifter guides, and a ported high volume GMPP oil pump.
Here are TEA's flow numbers:
Lift: Intake/Exhaust
.100: 67/54
.200: 139/120
.300: 219/179
.400: 271/224
.500: 308/248
.550: 315/255
.600: 320/260
12-12-2013, 10:29 AM
#12
Trans stuff...
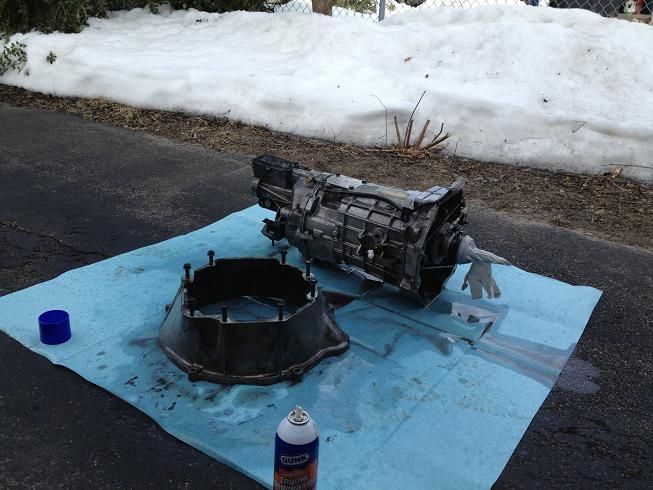
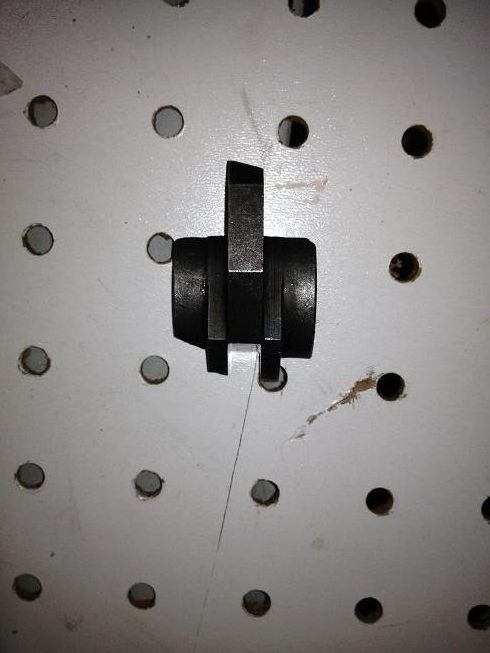
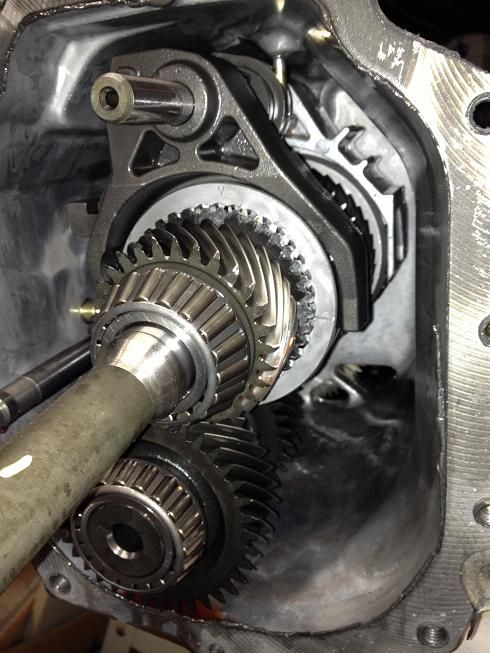
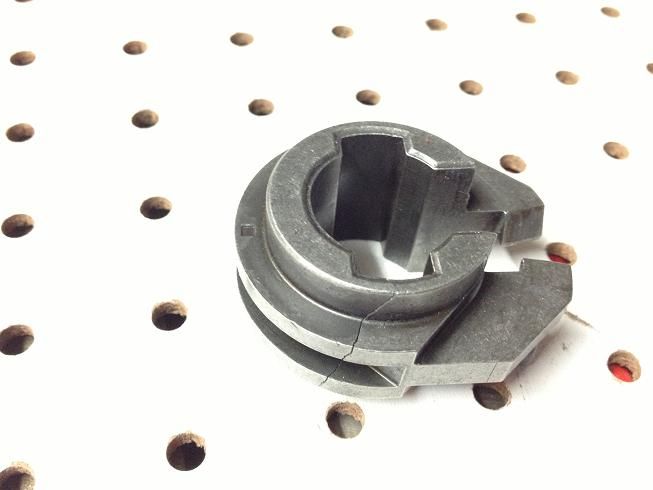
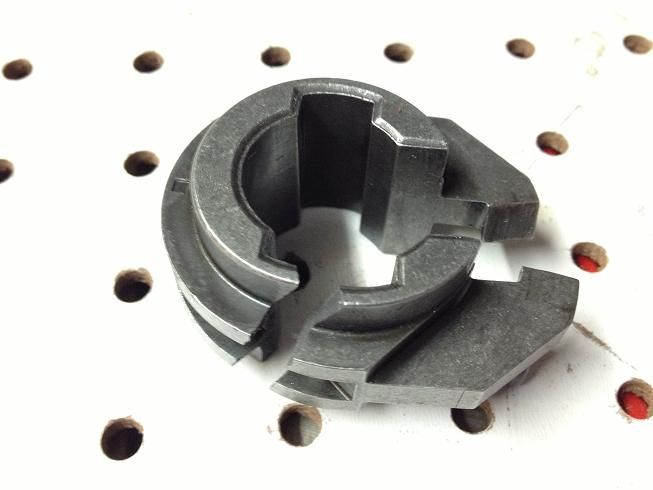
I power washed my T56 and the GTO bell housing so I could paint them. I heard a little rattle inside the T56 that didn't sound right, so I pulled the end of the housing off and found this piece floating around and brought it to a local transmission shop, they're going to look at it next week. One of the guys on LS1tech thinks it's part of the shift rail interlock plate and I'm sure it got damaged by UPS when the lost my clutch and everything else. They're only around $40, but the labor is going to cost more $$$.
At least the inside of the tranny looks good:
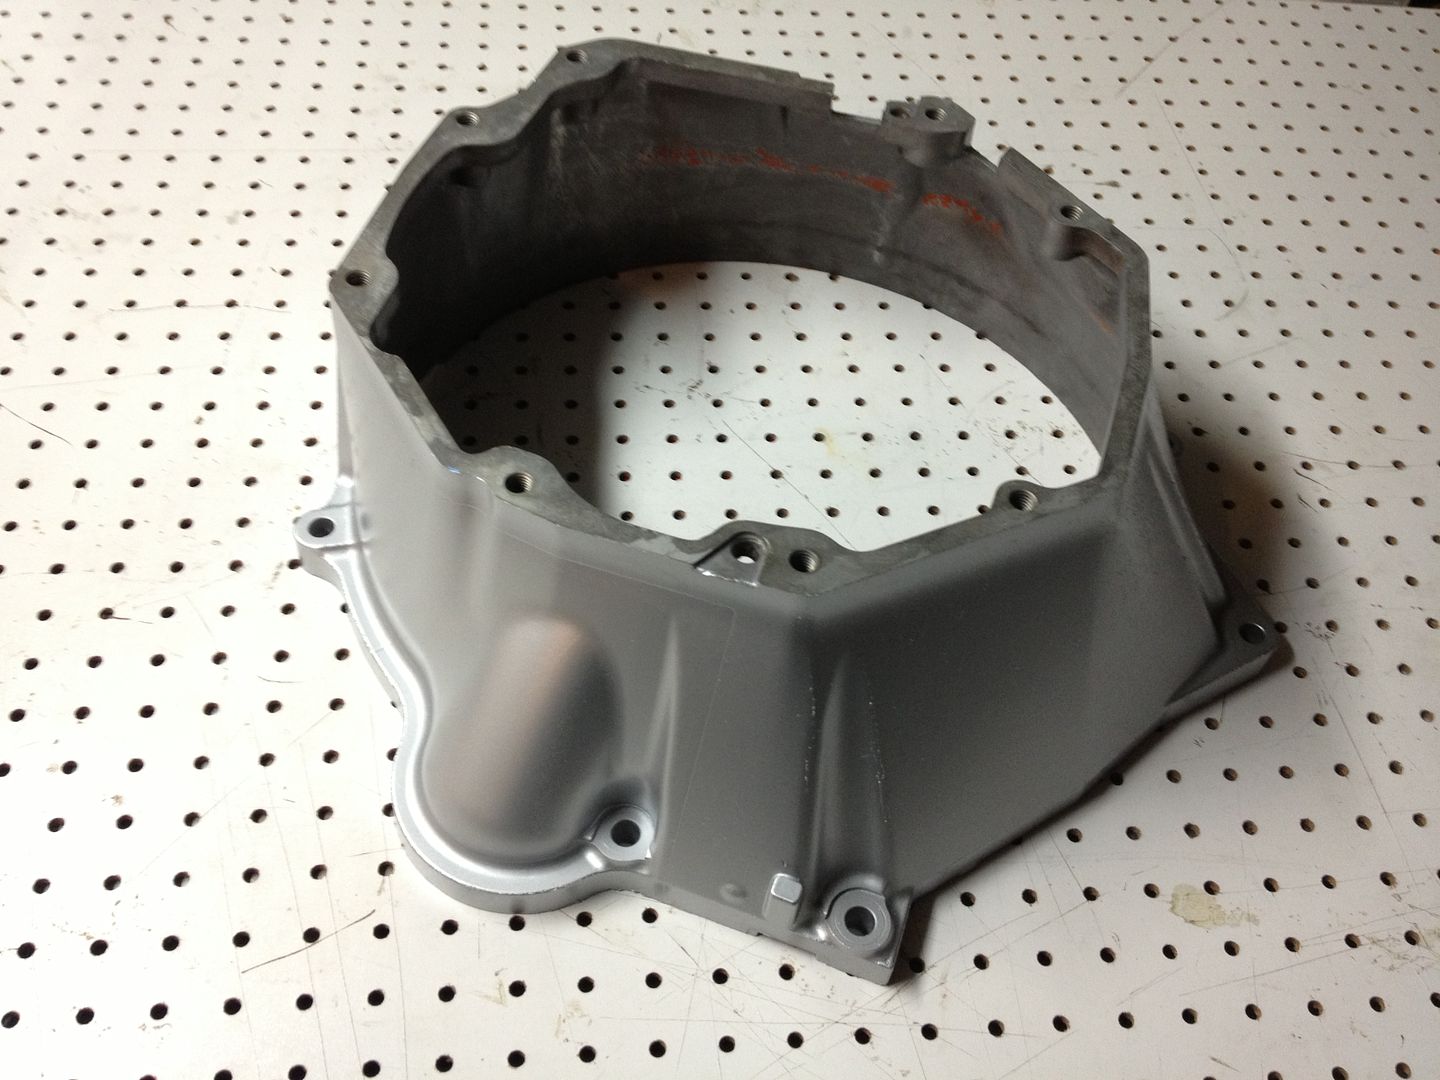
And I got the bellhousing cleaned up and painted with an 'Aluminum' ceramic engine paint:
I power washed my T56 and the GTO bell housing so I could paint them. I heard a little rattle inside the T56 that didn't sound right, so I pulled the end of the housing off and found this piece floating around and brought it to a local transmission shop, they're going to look at it next week. One of the guys on LS1tech thinks it's part of the shift rail interlock plate and I'm sure it got damaged by UPS when the lost my clutch and everything else. They're only around $40, but the labor is going to cost more $$$.
At least the inside of the tranny looks good:
And I got the bellhousing cleaned up and painted with an 'Aluminum' ceramic engine paint:
 12-12-2013, 10:32 AM
#13
Fuel tank conversion...
And my new fuel tank arrived today. I ordered the EFI tank, sender and pump from Tanks Inc.
The tank comes powdercoated in a silver/aluminum finish, I may paint it black like my last one, undecided right now:
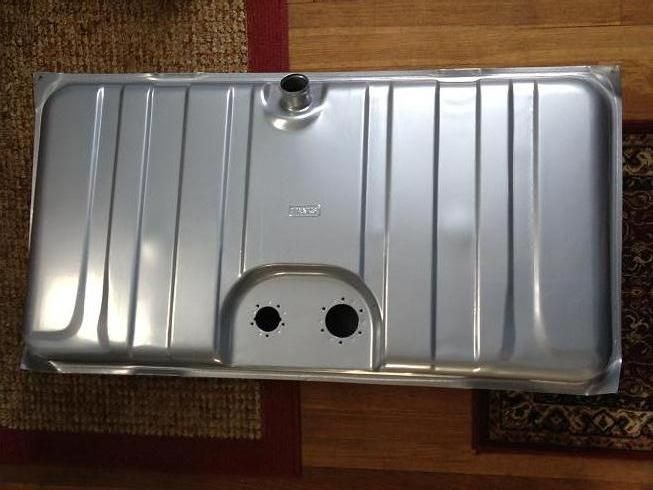
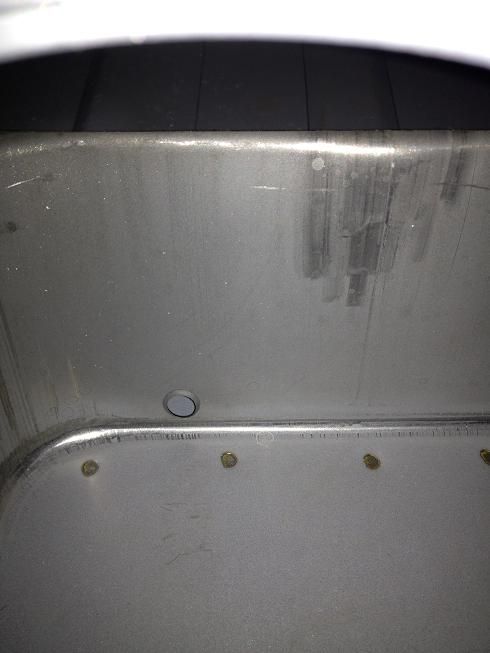
Here's the baffle inside the tank (to prevent fuel starvation) looking into the fuel pump hole:
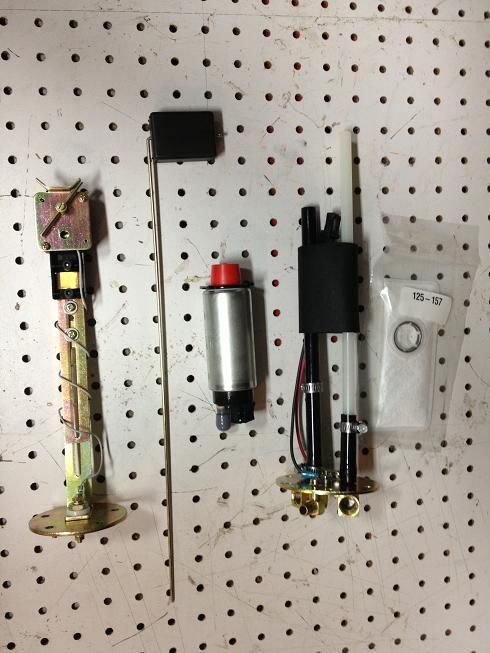
Sender, Walbro 255, etc.:
The tank comes powdercoated in a silver/aluminum finish, I may paint it black like my last one, undecided right now:
Here's the baffle inside the tank (to prevent fuel starvation) looking into the fuel pump hole:
Sender, Walbro 255, etc.:
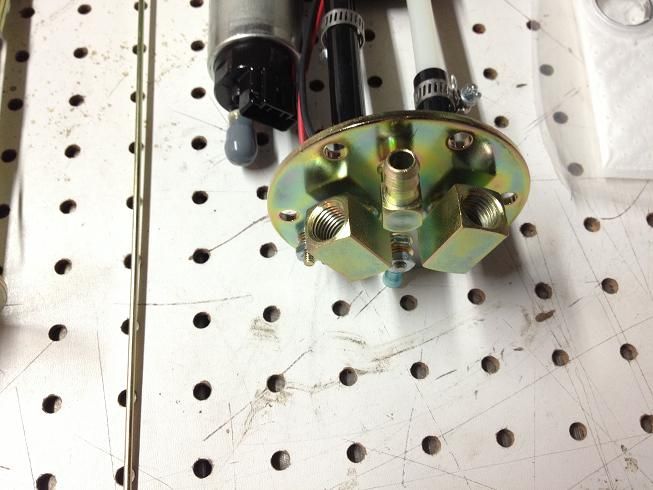
I worked on the new Tanks Inc. EFI tank today. I got the sender wire and pump lines trimmed to proper length and installed on the tank. I didn't take too many pics during the process as it wasn't very exciting. Lot's of measuring before cutting.
I'm hoping to mock up the tank this weekend and measure for fuel hoses. I'm going to be using PTFE lines that are custom cut to length with the fittings already installed just for peace of mind. The rest of the fittings and the Corvette filter/regulator are on their way from Summit, and should be here tomorrow afternoon.
Walbro 255 pump:
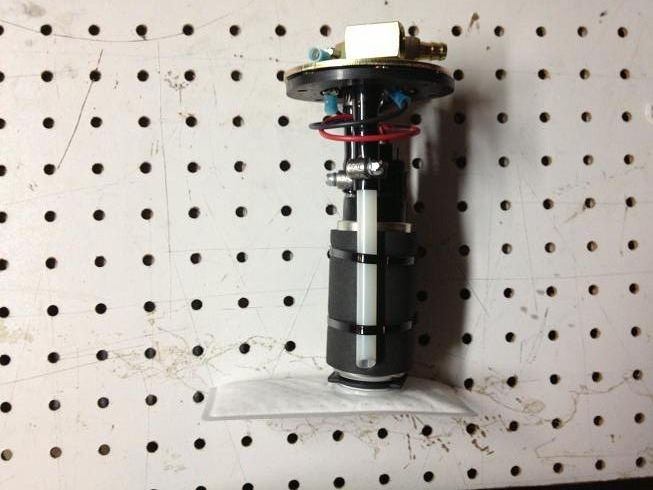
Sender and float:
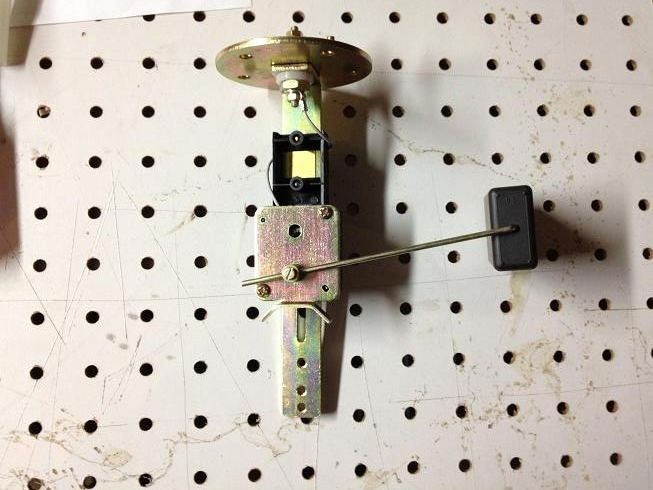
Installed:

I'm hoping to mock up the tank this weekend and measure for fuel hoses. I'm going to be using PTFE lines that are custom cut to length with the fittings already installed just for peace of mind. The rest of the fittings and the Corvette filter/regulator are on their way from Summit, and should be here tomorrow afternoon.
Walbro 255 pump:
Sender and float:
Installed:
12-12-2013, 10:34 AM
#14
I had to save some money somewhere...
This caused a slight delay in my outdoor workshop...
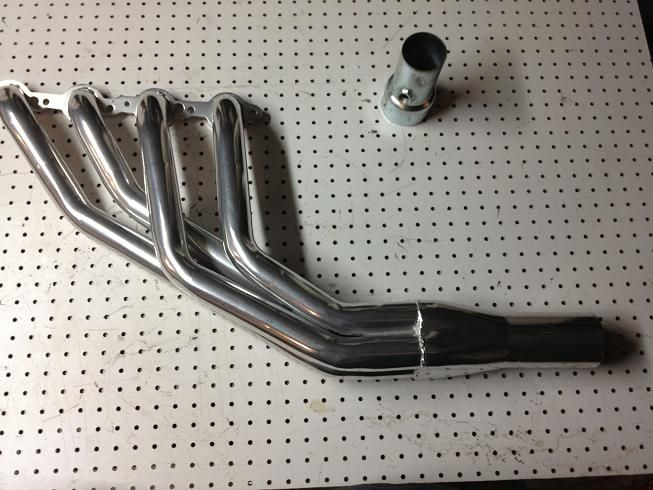
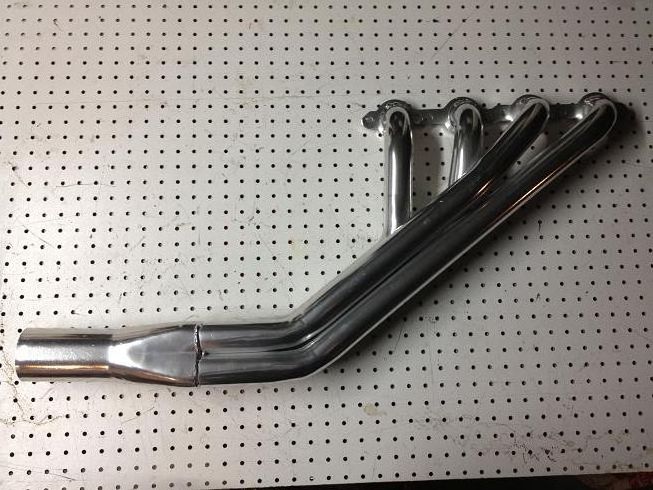
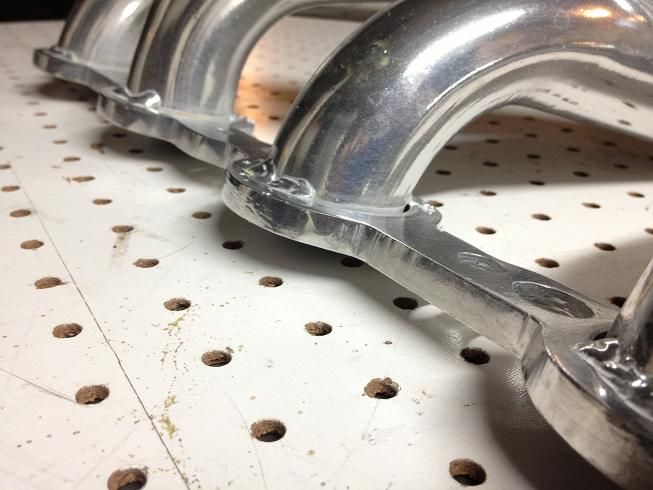
My new ceramic coated headers arrived today. I took a gamble and went with a set of the eBay headers. I have heard good an bad about them as far as fitment, but at about 1/3 of the price of others, I had to take the chance. These were nicer than expected, the flanges were advertised as 5/16" but actually measured 3/8" with my micrometer. 1 3/4" primary tubes and 3" collectors. I'm going to be using adjustable motor mounts, so I should be able to tweak the engine location if fitment is a problem, or bang them with a sledge...
Driver's side:
Passenger's side:
Comparison between the new LS1 headers and my old SBC headers:
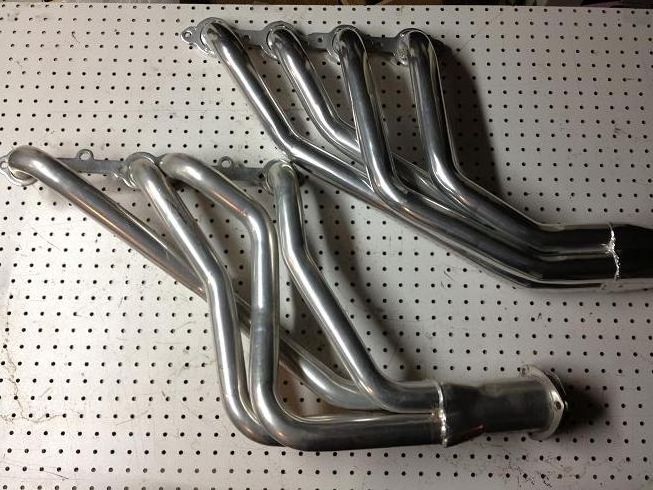
Flanges on the new headers:
Driver's side:
Passenger's side:
Comparison between the new LS1 headers and my old SBC headers:
Flanges on the new headers:
 12-12-2013, 10:36 AM
#15
Back at it...
Finally, no snow! So I pushed the Camaro out into the driveway and ran the propane heater for a couple of hours to get ready to paint the engine. I was just in a T-shirt and I was hot!
I cleaned it up with a variety of wire brushes and dremel attachments. I left the heads, intake and oil pan on, but taped them up. I won't be using any of them for my build, but I know the heads and intake have some re-sale value. Hopefully the new heads/cam/oil pump, etc arrive later this month. I already have the new intake and throttle body ready to go as soon as I get my new heads. (yes, I know the timing chain cover will have to come off and ruin my new paint job, easy fix).
I sprayed it with Duplicolor engine primer and ceramic RED engine paint. I broke the rules, it's not orange, but hopefully the Chevy guys will still talk to me!
Here it is all taped up:
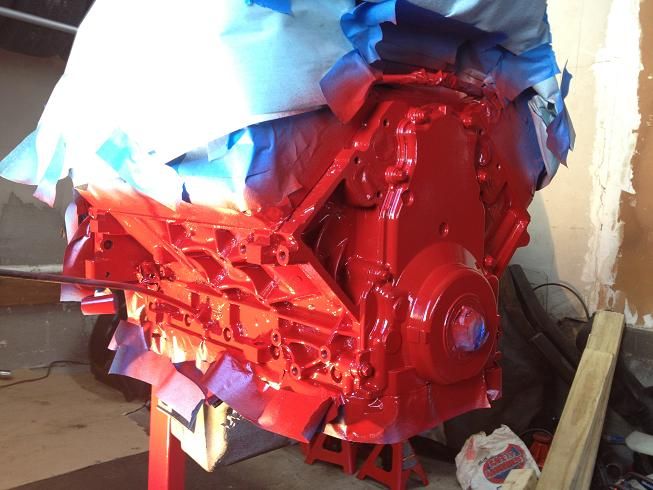
And with the tape removed:
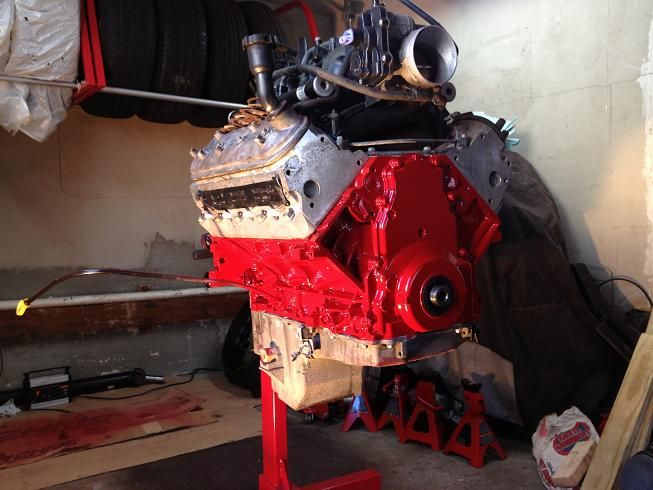
I cleaned it up with a variety of wire brushes and dremel attachments. I left the heads, intake and oil pan on, but taped them up. I won't be using any of them for my build, but I know the heads and intake have some re-sale value. Hopefully the new heads/cam/oil pump, etc arrive later this month. I already have the new intake and throttle body ready to go as soon as I get my new heads. (yes, I know the timing chain cover will have to come off and ruin my new paint job, easy fix).
I sprayed it with Duplicolor engine primer and ceramic RED engine paint. I broke the rules, it's not orange, but hopefully the Chevy guys will still talk to me!
Here it is all taped up:
And with the tape removed:
12-12-2013, 10:59 AM
#18
Well, luckily I had this build thread on two other sites. I think I broke one of the two sites?
I ended up with the afternoon off today, so I managed to get some work done. I didn't get many good pics because it was a low light situation, and most everything came out blurry.
I drained (11 gallons) and dropped the old fuel tank, and removed the Holley Black fuel pump. Mocked up the new corvette bypass regulator, which will sit right where the Holly pump was mounted. Then I mocked up the new Tanks Inc. tank, and figured out exactly how and where I was going to run my fuel plumbing. I'll order the new PTFE hoses this week.
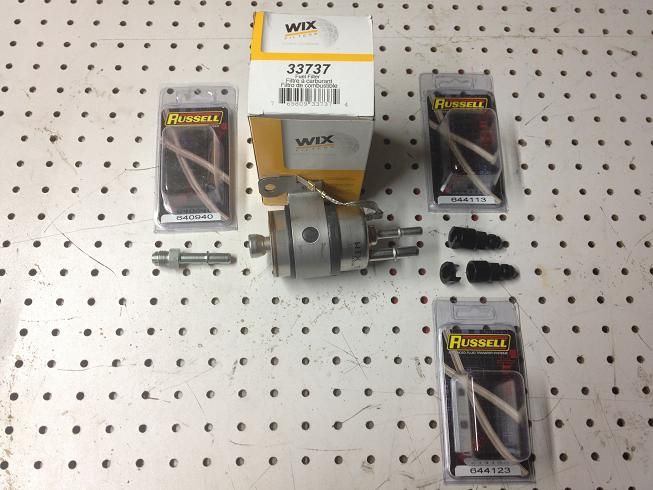
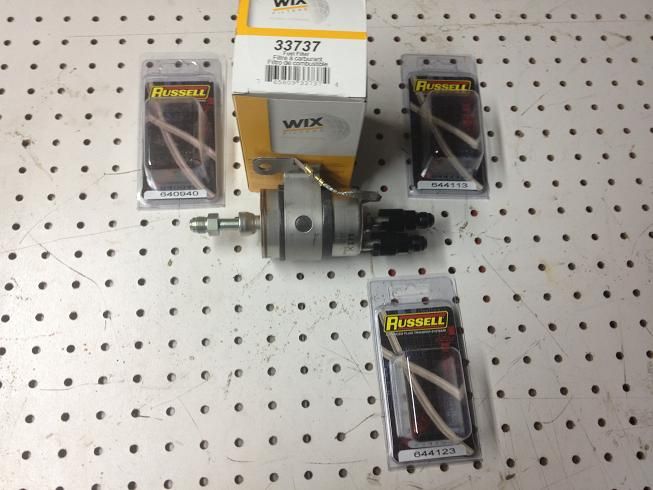
Here's a pic of the Wix 33737 fuel filter/regulator along with a few Russell fittings. The 640940 is a -6AN to 3/8" quick disconnect male fitting, the 644113 is a -6AN male to 5/16" quick disconnect female fitting, and the 644123 is a -6AN male to 3/8" quick disconnect female fitting.
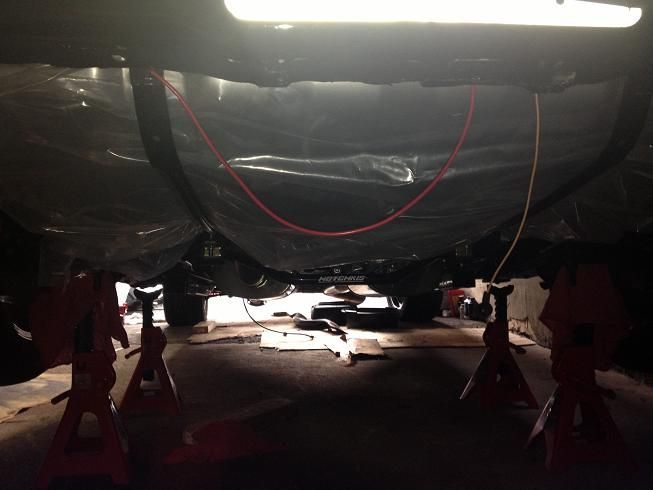
And here's a pic of the tank mocked up. I left it in it's baggie because I didn't want to bang it up too badly since it will be in an out a couple of times. I think I'm going to leave it silver and paint or order some new tank straps.
I drained (11 gallons) and dropped the old fuel tank, and removed the Holley Black fuel pump. Mocked up the new corvette bypass regulator, which will sit right where the Holly pump was mounted. Then I mocked up the new Tanks Inc. tank, and figured out exactly how and where I was going to run my fuel plumbing. I'll order the new PTFE hoses this week.
Here's a pic of the Wix 33737 fuel filter/regulator along with a few Russell fittings. The 640940 is a -6AN to 3/8" quick disconnect male fitting, the 644113 is a -6AN male to 5/16" quick disconnect female fitting, and the 644123 is a -6AN male to 3/8" quick disconnect female fitting.
And here's a pic of the tank mocked up. I left it in it's baggie because I didn't want to bang it up too badly since it will be in an out a couple of times. I think I'm going to leave it silver and paint or order some new tank straps.
Not much for pictures, but I ordered a bunch of stuff, so I have a half dozen tracking numbers.
-I won an auction for a set of freshly rebuilt Bosch 36lb injectors (which will be 42lb at my psi)
-I ordered my PTFE lined braided fuel hoses from Lyons Performance for the supply and return lines from the regulator to the tank, the output line from the regulator to the hard line, as well as one to connect the fuel rails. I'll order the one from the front hardline to the fuel rail once the motor is in.
-I ordered my Energy Suspension poly motor mounts from Summit Racing.
-I ordered a set of Dirty Dingo slider mounts, so I will have 2 1/2" of front to back adjustability.
-I won an auction a new serpentine belt for the new layout of the accessories.
-I ordered a new water pump from an L99 Camaro from Rock Auto, which uses the truck accessory offset, but places the outlet on the driver's side instead of the passenger's side.
-And my freshly ported heads, cam, push rods, head gaskets, ported oil pump, etc. should ship out from Total Engine Airflow tomorrow.
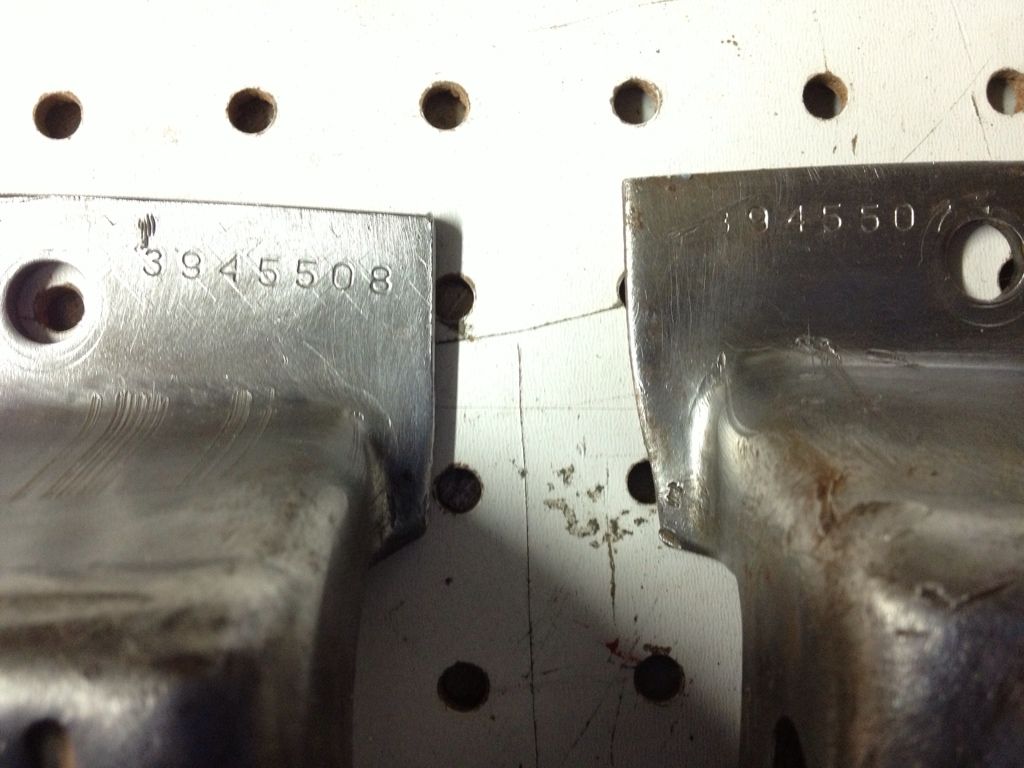
Here's my only pic. I removed my frame (motor) mounts to get ready to clean up the subframe (still waiting for a day above 40 degrees to powerwash), and assumed I had the standard low performance frame mounts. Frame mounts come in short & wide or tall & narrow. The low perf. are the short and wide, and the hi perf. are the tall and narrow. It doesn't really matter which one's you have as long as you get the right motor mounts to match. It turns out I have the tall and narrow, which are for a '69 Camaro with the 350 or 302 engine. Just one more piece to my Frankenstein build.
Part #'s 3945507 and 3945508:
Part #'s 3945507 and 3945508:
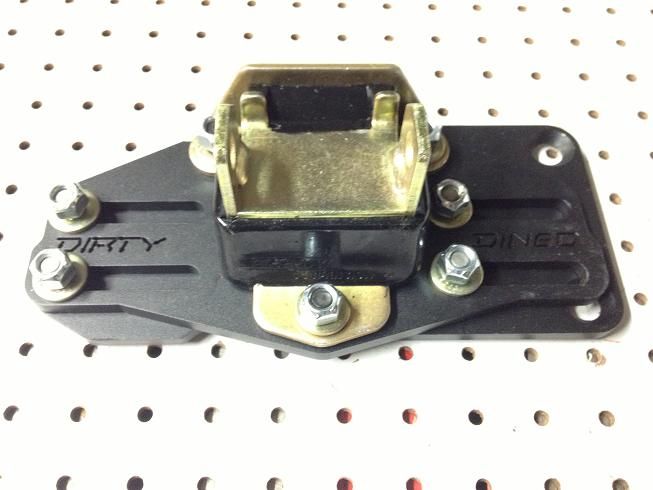
My Dirty Dingo Sliders and Energy Suspension (3-1117G) poly motor mounts arrived today.
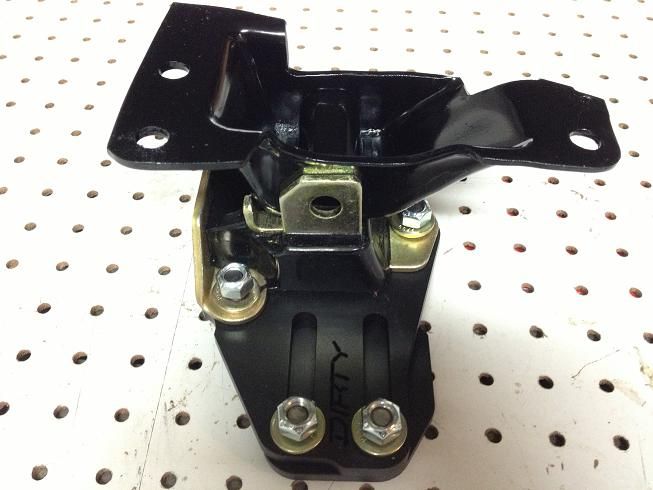
The sliders are very nice and allow 2" (not 2 1/2" as I previously stated) of forward to backward engine placement. The slider attaches to the engine, then the motor mount attaches to the slider and the frame mount.
Here's one of the Dirty Dingo Slider's in powdercoated black:

Here it is with the ES motor mount:
And here it is mocked up with the frame mounts as well (driver's side):
The sliders are very nice and allow 2" (not 2 1/2" as I previously stated) of forward to backward engine placement. The slider attaches to the engine, then the motor mount attaches to the slider and the frame mount.
Here's one of the Dirty Dingo Slider's in powdercoated black:
Here it is with the ES motor mount:
And here it is mocked up with the frame mounts as well (driver's side):
Last edited by 67rally; 12-12-2013 at 02:13 PM.
12-12-2013, 11:02 AM
#19
More progress...
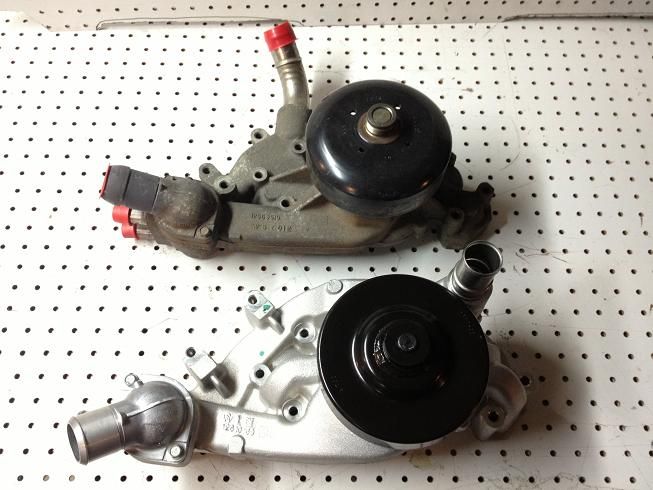
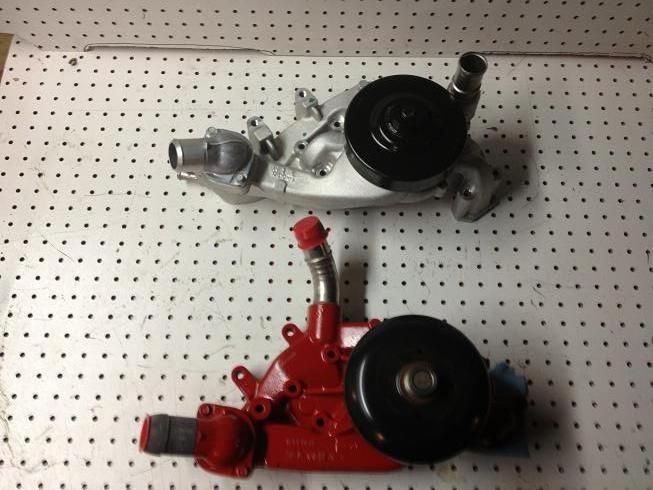
The new water pump arrived today. There wasn't anything wrong with the old one, but the outlet was on the passenger side, and my radiator's is on the driver's side. Since I had the choice of replacing a 9 year old water pump for $140, or a brand new aluminum radiator for $500, I chose the lesser of two evils.
This is the water pump for the 2010+ L99 Camaro (#19207665). It uses the same accessory spacing as the truck motors:
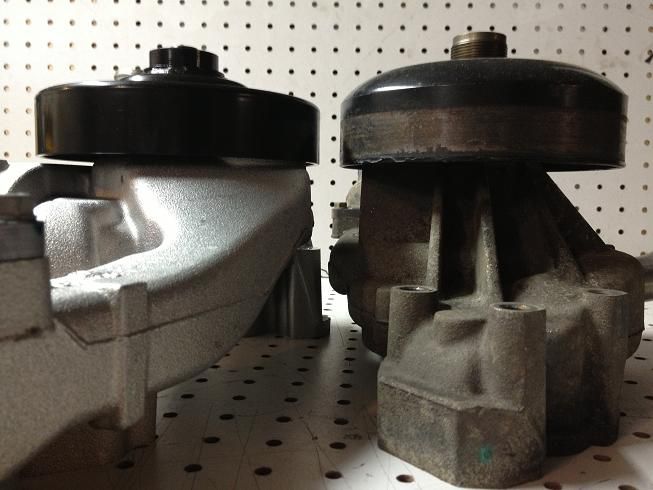
This is the water pump for the 2010+ L99 Camaro (#19207665). It uses the same accessory spacing as the truck motors:
I finally made some progress today, rather than just taking pics of new parts.
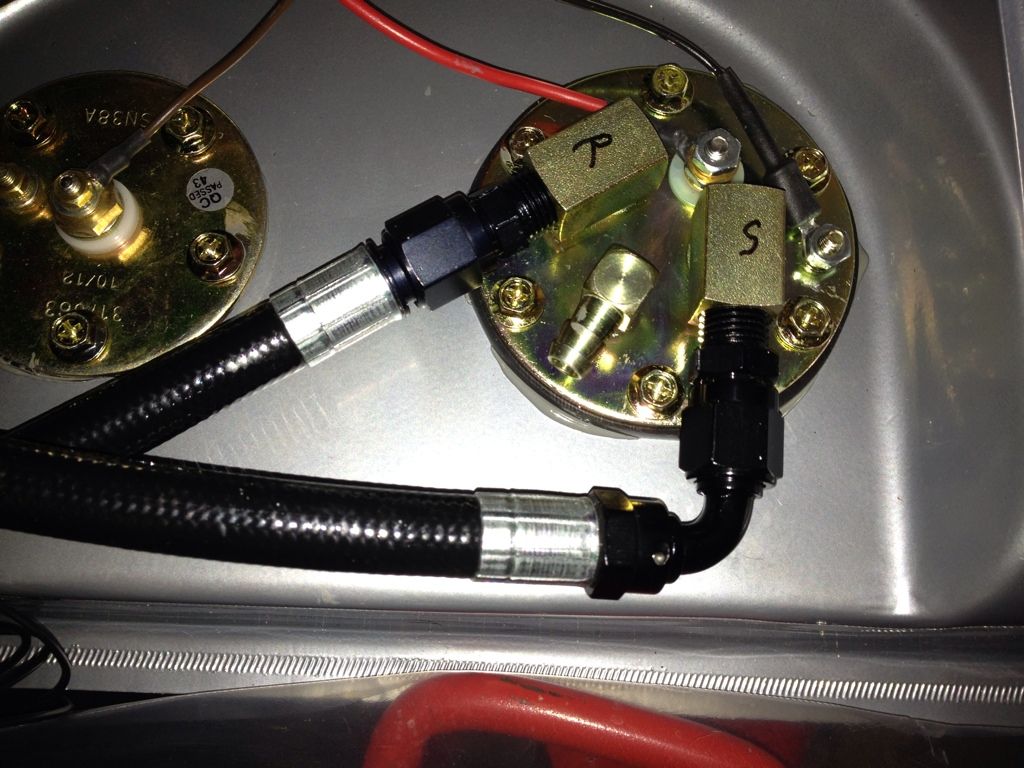
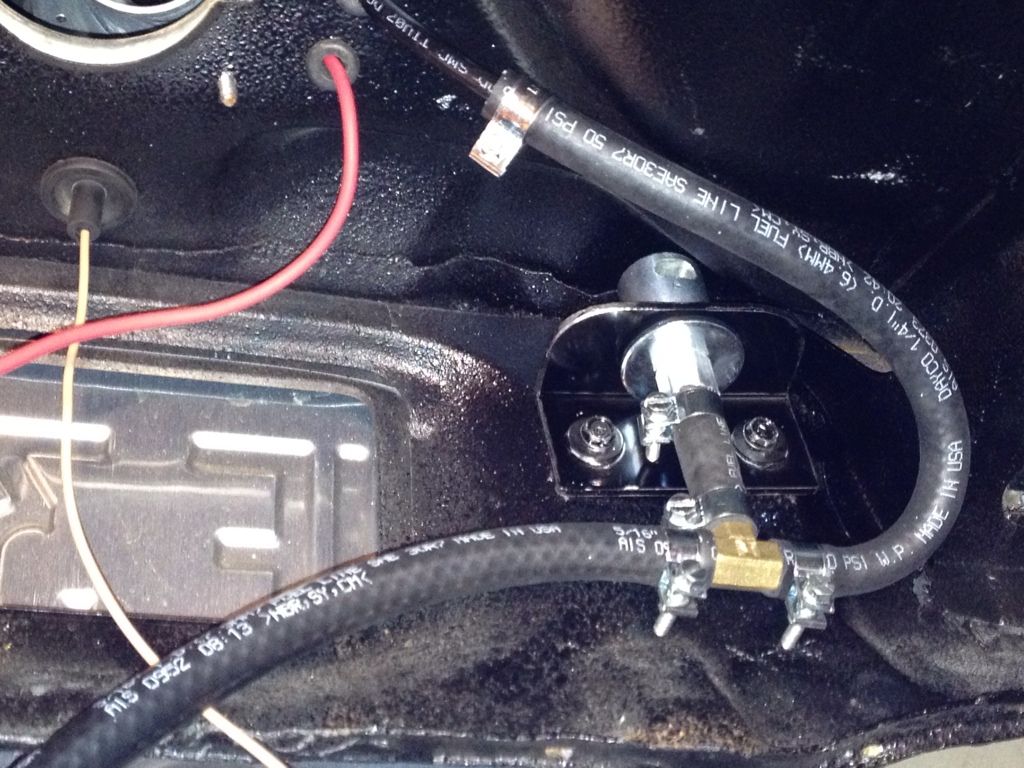
I dropped the new tank, got it wired up, ran the new hoses, and reinstalled everything. I took my time and did it right. All connections are soldered and heat shrinked. The PTFE (Teflon) lined fuel hoses are nice and tidy.
New hoses and wiring:
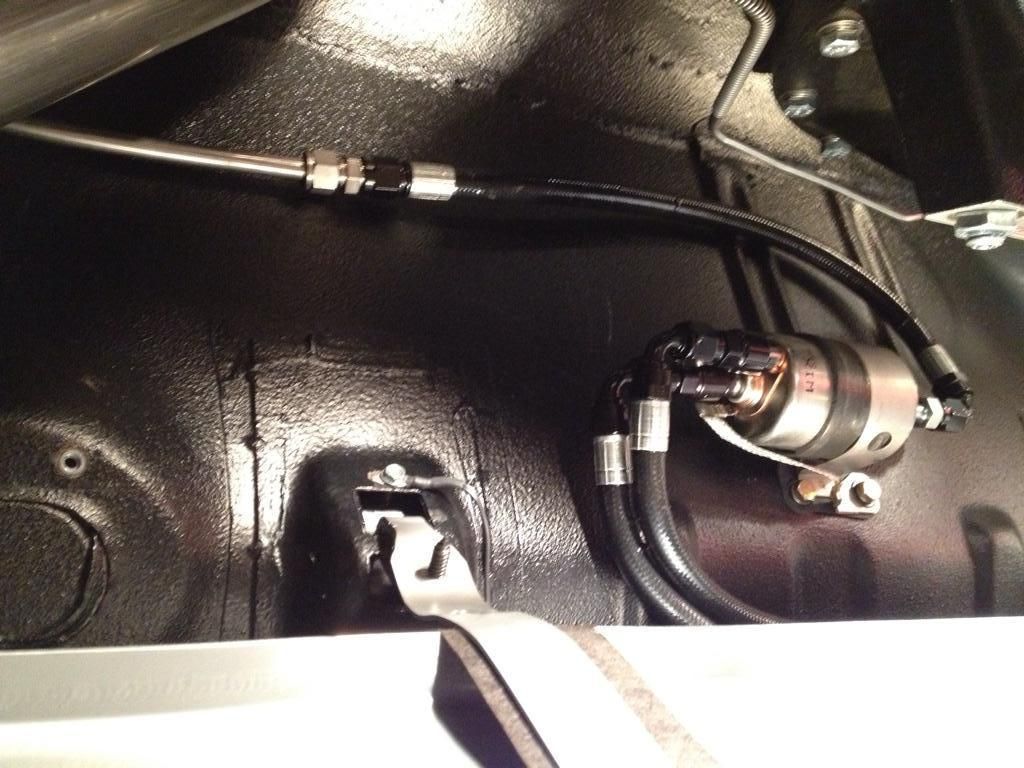
Corvette Fuel Filter/Regulator plumbed:
I fabricated a bracket for the Tanks Inc. check valve. This closes the fuel vent incase you flip the car over, so the fuel won't pour out. I don't want to test this feature out:
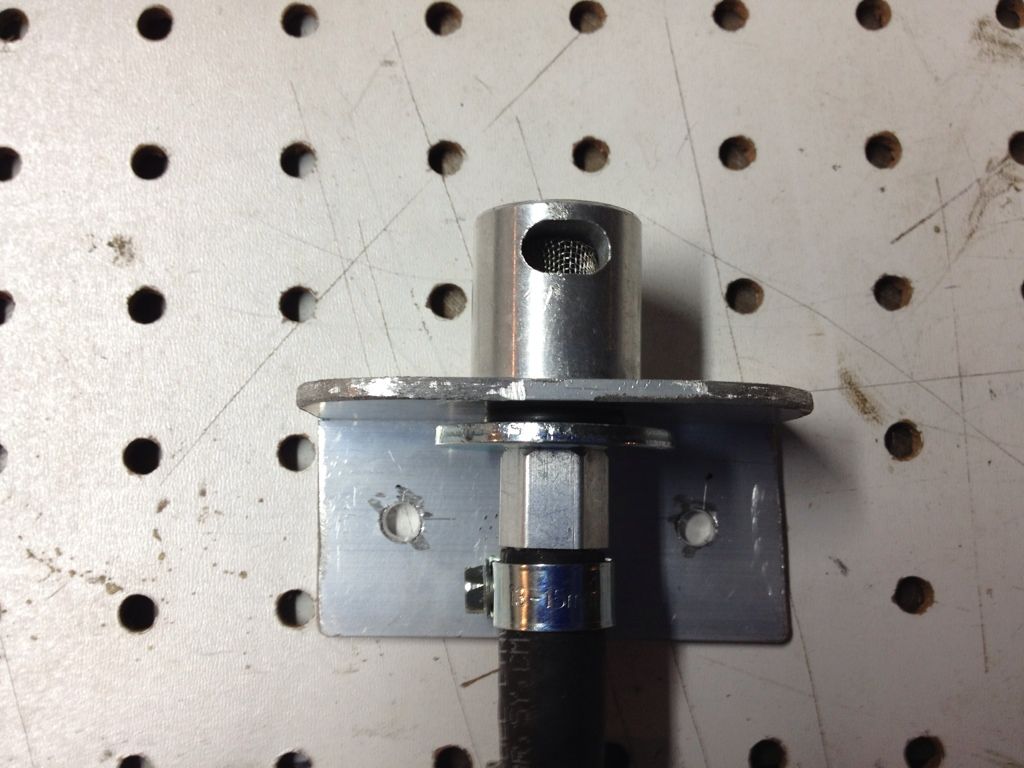
I mounted behind the license plate up high and out of the way. I T'd into the existing fuel vent that is on the RideTech filler neck:
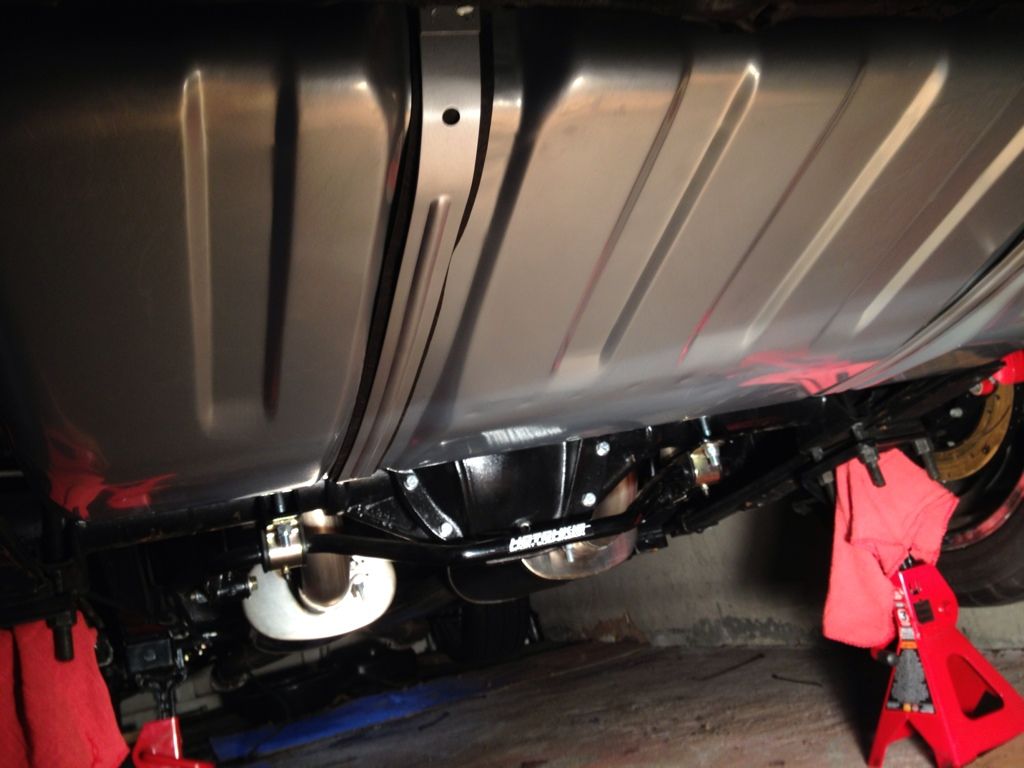
And here's a shot of the new tank. It looks just like a stock tank, but has the EFI baffle inside, along with the provision for the sender and intank pump in the first photo. It's a little hard to tell, but I left it powdercoated silver, and painted some new tank straps to match:
I dropped the new tank, got it wired up, ran the new hoses, and reinstalled everything. I took my time and did it right. All connections are soldered and heat shrinked. The PTFE (Teflon) lined fuel hoses are nice and tidy.
New hoses and wiring:
Corvette Fuel Filter/Regulator plumbed:
I fabricated a bracket for the Tanks Inc. check valve. This closes the fuel vent incase you flip the car over, so the fuel won't pour out. I don't want to test this feature out:
I mounted behind the license plate up high and out of the way. I T'd into the existing fuel vent that is on the RideTech filler neck:
And here's a shot of the new tank. It looks just like a stock tank, but has the EFI baffle inside, along with the provision for the sender and intank pump in the first photo. It's a little hard to tell, but I left it powdercoated silver, and painted some new tank straps to match:


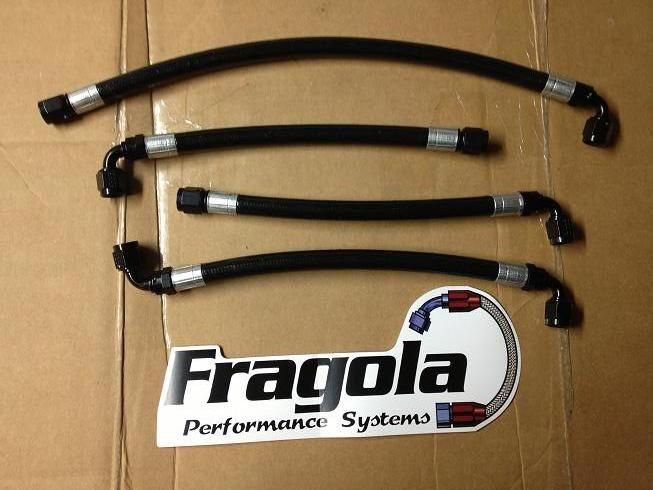
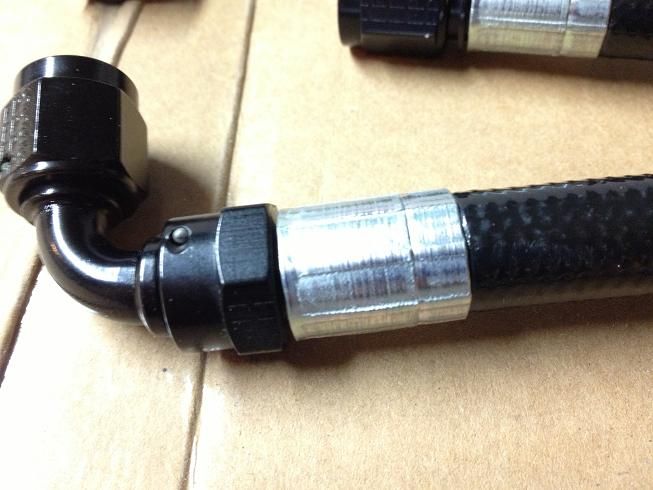
Here's a pic of the custom length hoses I had made. These are from Fragola, and I ordered them from Matt at Lyons Performance. They are braided black and then covered in a protective plastic sheathing which almost looks like carbon fiber. The 90 degree ends swivel which made installation a lot easier. And the fact that they are factory crimped will give me a little peace of mind that I won't spring a leak.
Close up of the fittings:
And I painted my old water pump the new engine color. I'm going to mock up the old pump painted red and the new pump in natural finish to see which way I want to go.
Close up of the fittings:
And I painted my old water pump the new engine color. I'm going to mock up the old pump painted red and the new pump in natural finish to see which way I want to go.
I had to order a new tensioner to go along with the new water pump. It was wishful thinking that I could re-use the old one. But I found a brand new take-off from a 2012 Camaro for half the cost of a new one.
Just a couple pics showing how different they are (new one on left):
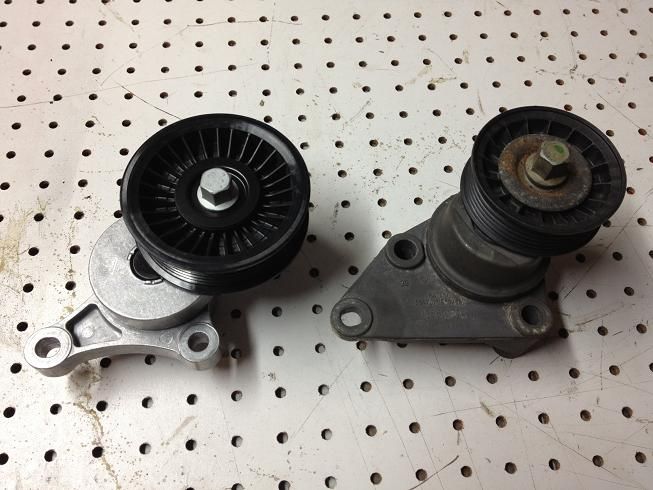
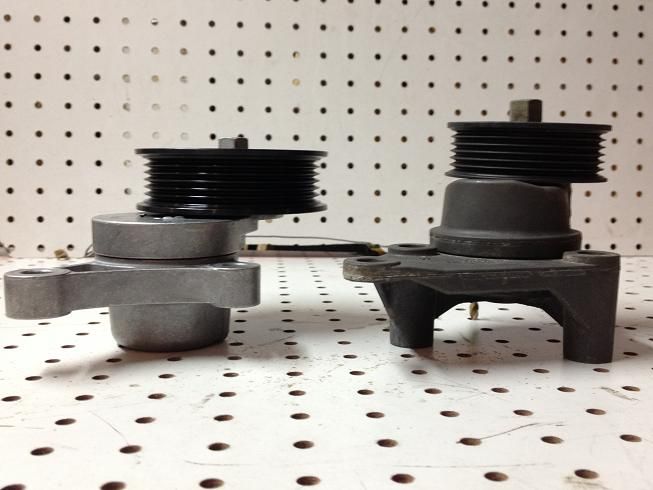
Just a couple pics showing how different they are (new one on left):
Last edited by 67rally; 12-12-2013 at 11:17 AM.
12-12-2013, 11:04 AM
#20
A little clean up...
I cleaned up the subframe with some degreaser and a power washer. Then I took it down to bare metal everywhere I could. There's a couple areas I may go back and re-do, but they'll be hidden from sight, so it's not a top priority since it's not a show car.
Before:
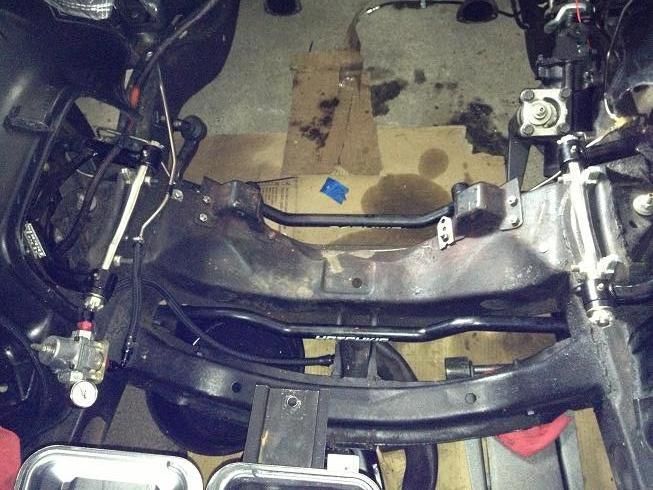
After (still need to pull the tape and tinfoil off)
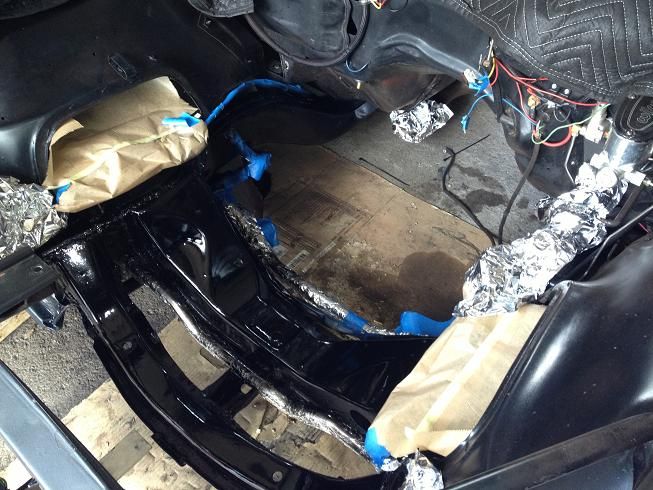
Before:
After (still need to pull the tape and tinfoil off)