Another engine bay cover (in work)
 10-11-2011, 02:45 PM
#1
TECH Apprentice
Thread Starter
iTrader: (10)
Join Date: Jan 2008
Location: Florida
Posts: 310
Likes: 0
Received 0 Likes
on
0 Posts
***Updated pic on post 37***
Well, I'm in the final phase of this cover. Going to take it back to work tomorrow and finish my layout and cuts for the latch mechanism and everything else. What do yall think? Again, sorry for pic quality....cell pic.
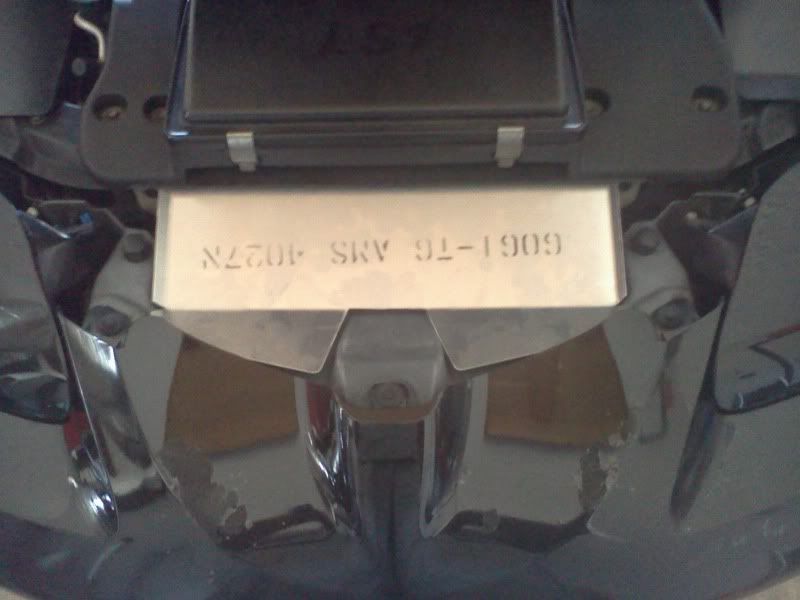
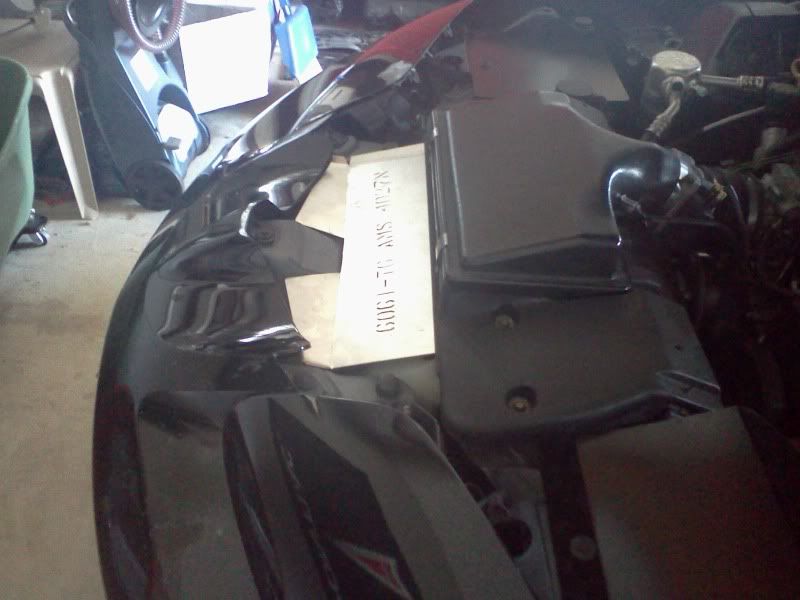
This will be a 2 bolt mounting set up using factory hardware. I'll post up more pics when I get it finished and painted. This latch cover is fabricated out of 6061 T-6.
Well, I'm in the final phase of this cover. Going to take it back to work tomorrow and finish my layout and cuts for the latch mechanism and everything else. What do yall think? Again, sorry for pic quality....cell pic.
This will be a 2 bolt mounting set up using factory hardware. I'll post up more pics when I get it finished and painted. This latch cover is fabricated out of 6061 T-6.
Last edited by throttlejunkie1; 10-16-2011 at 09:46 AM.
 10-11-2011, 02:54 PM
#2

Hey bro, I would like to purchase this piece as well if you make a few sets haha.
I think it would look better if if can be widened out to cover a little more of the area. Is it possible? There can be holes for where those 2 rubber nipples can go through.
I think it would look better if if can be widened out to cover a little more of the area. Is it possible? There can be holes for where those 2 rubber nipples can go through.
 10-11-2011, 03:43 PM
#5
TECH Apprentice
Thread Starter
iTrader: (10)
Join Date: Jan 2008
Location: Florida
Posts: 310
Likes: 0
Received 0 Likes
on
0 Posts
I used the lacquer. So far its been great for the under-the-hood heat. I'm going to have to repaint them when I get the chance because I've used them so often for ensuring the fitment of other covers and now they are scratched.
10-11-2011, 05:14 PM
#7
i got a scrap aluminum sheet at work so im taking my stab at this also but the problem i have run into is on the inclined piece, the hood itself is hitting it the holes and everything are lined up good but once the hood is hooked and you push down to close it fully, i run into an issue
Trending Topics
 10-12-2011, 10:54 AM
#11
TECH Apprentice
Thread Starter
iTrader: (10)
Join Date: Jan 2008
Location: Florida
Posts: 310
Likes: 0
Received 0 Likes
on
0 Posts
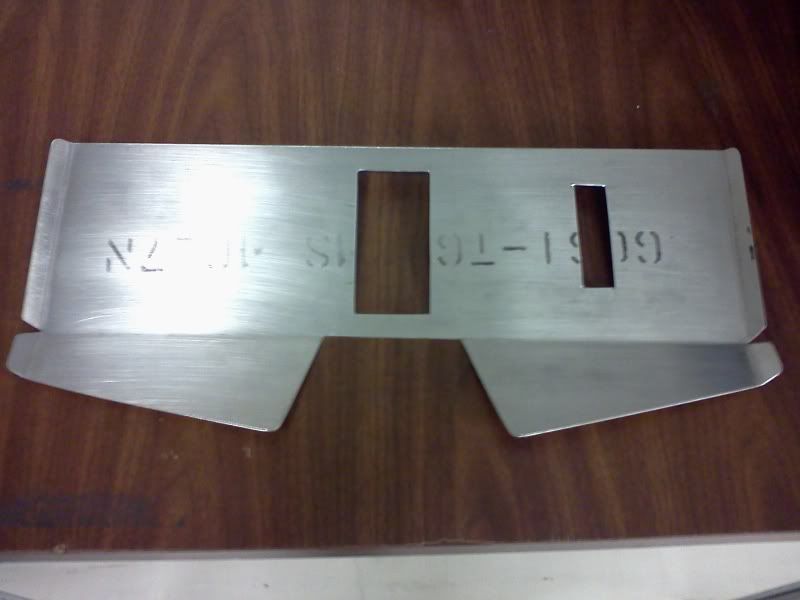
Here is a quick snap shot. Almost done. Going to check fitment later today, align my mounting holes that still need drilled, and check all my set back for any unwanted rubbing.
 10-12-2011, 10:57 AM
#13
Bandit, I wonder if your hooking in due to the washer fluid cap. I plan to remove the whole thing. My car doesn't see rain and I can't even remember in the last 5yrs when I used it.
Your right though, no way to bend a small flap on those ends? It'll look like small wings. Still though with all these covers in place, it will look awesome.
Your right though, no way to bend a small flap on those ends? It'll look like small wings. Still though with all these covers in place, it will look awesome.
 10-12-2011, 11:20 AM
#15
TECH Apprentice
Thread Starter
iTrader: (10)
Join Date: Jan 2008
Location: Florida
Posts: 310
Likes: 0
Received 0 Likes
on
0 Posts
10-12-2011, 11:33 AM
#17
Launching!
iTrader: (2)

Join Date: Jan 2008
Location: Milford , Ohio
Posts: 217
Likes: 0
Received 0 Likes
on
0 Posts
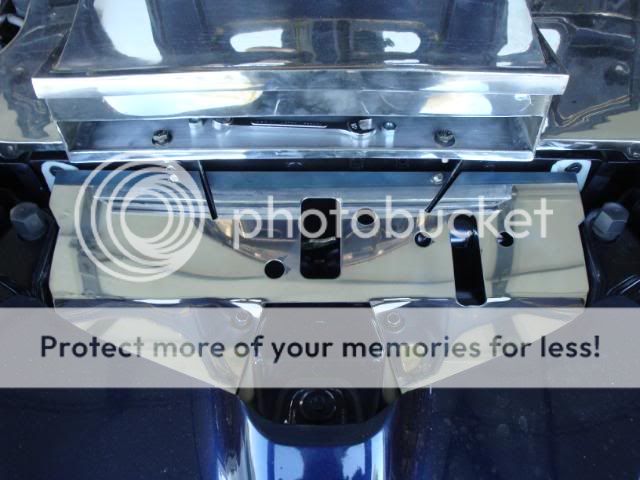
did you try closing your hood with the part in place......i made one and it was to thick and the hood wouldn't close?? I remade it from a thinner material and worked out fine....just an FYI Yours is looking really good
Here is the one i made also from 6061 alum and polished it.....it will shine up if you wanted too
Here is the one i made also from 6061 alum and polished it.....it will shine up if you wanted too
10-12-2011, 11:43 AM
#18
TECH Apprentice
Thread Starter
iTrader: (10)
Join Date: Jan 2008
Location: Florida
Posts: 310
Likes: 0
Received 0 Likes
on
0 Posts
did you try closing your hood with the part in place......i made one and it was to thick and the hood wouldn't close?? I remade it from a thinner material and worked out fine....just an FYI Yours is looking really good
Here is the one i made also from 6061 alum and polished it.....it will shine up if you wanted too
Here is the one i made also from 6061 alum and polished it.....it will shine up if you wanted too
Haven't gotten the chance yet. I had to measure and cut the square latch holes first. I will keep that in mind. I have a few sheets of 2024 T-3 thats thinner.
Yours looks great!!! Nice job!
10-12-2011, 12:21 PM
#20
12 Second Club
iTrader: (6)
Join Date: Jun 2004
Location: Ft. Irwin, California (But Virginia is home)
Posts: 1,501
Likes: 0
Received 7 Likes
on
1 Post

did you try closing your hood with the part in place......i made one and it was to thick and the hood wouldn't close?? I remade it from a thinner material and worked out fine....just an FYI Yours is looking really good
Here is the one i made also from 6061 alum and polished it.....it will shine up if you wanted too
Here is the one i made also from 6061 alum and polished it.....it will shine up if you wanted too
